The new Manker MK41 is the subject of my review today. It seems I've amassed…
Manker Quinlan T01 900 Lumen Flashlight Review


Manker Quinlan T01
At this writing, Manker is pretty new within the flashlight marketplace. Therefore it pleases me to bring you my review of the Manker Quinlan T01.

Simple Packaging
So, from the accompanying photo, you can see that the T01 arrives in a plain cardboard box with the flashlight nestled in a Styrofoam cut-out. A pocket clip and lanyard are already attached (I removed the lanyard). The clip can also be removed if you desire. The other accessories consist of an English/Chinese user manual, and one spare o-ring. You may also refer to the photo of just the manual… which folds out fan-style. One side for English, the opposite in Chinese.
The extensive, easy to read manual
Impressive Statistics
First, let’s talk particulars;
- Total length; 3.3 inches. Head diameter; 1 inch. Tube diameter; 0.7 inches. As you can see from the photo above, it’s not much taller than the battery itself!
- Weight; (including a 14550 battery) 82.4 grams.
Specifications;
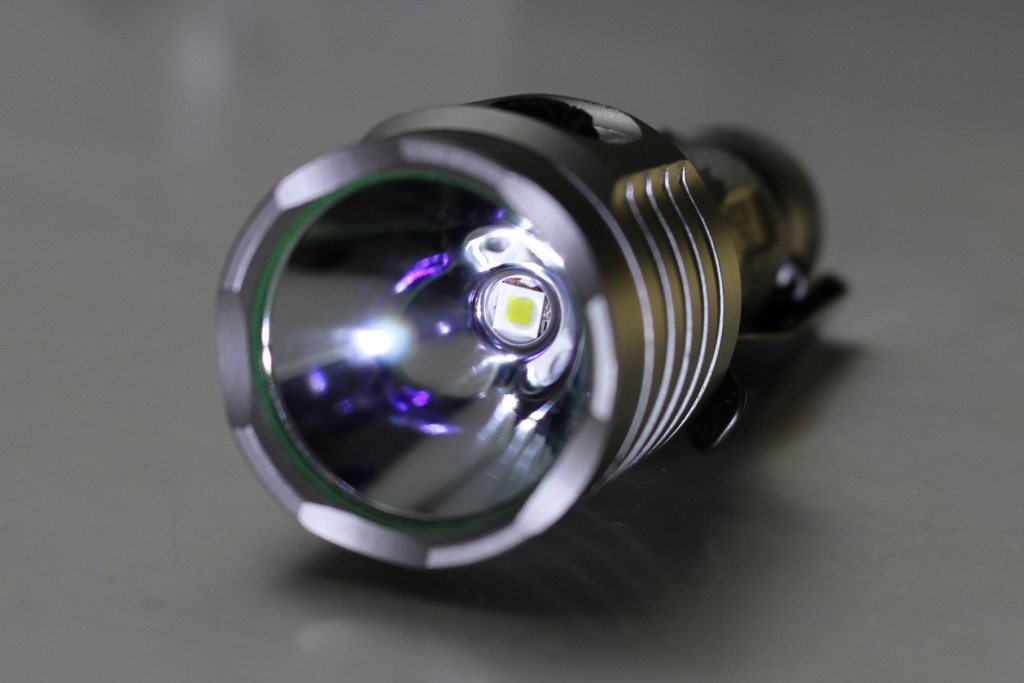
- Uses a CREE XPL-HI LED
- Uses only 1 battery; 1.5v alkaline or 1.2v rechargeable NiMH or 14500 3.7v rechargeable Lithium-ion
- Beam distance; 282 meters/925 feet
- Made from aerospace grade aluminum
- Tail-stand capability
- HA III MIL-standard hard anodization (original color)
- Waterproof to IPX-8 standard (2 meters or 6.6 ft depth)
- Impact resistant to 2 meters or 6 ft
- Titanium coated 2-way removable pocket clip
Modes and Output
Here is where the Manker Quinlan T01 is somewhat unique.
There are two operating modes. A general mode and a pro mode. Within each mode, you can choose between four constant outputs. Low, medium, high and turbo.
Hidden within each operating mode, are three blinking modes. Strobe, SOS and location beacon.
The outputs within the general mode are pre-defined. They are different depending on which battery type you choose to use.
Here are the output levels when using a AA/NiMH battery;
- Low – 2 lumens
- Medium – 60 lumens
- High – 200 lumens
- Turbo – 500 lumens
Here are the outputs when using a 3.7v 14500 battery;
- Low – 1 lumen
- Medium – 100 lumens
- High – 320 lumens
- Turbo – 900 lumens
The runtime also varies greatly depending on which battery you prefer. Standard alkaline cells are particularly bad in this regard, and aren’t recommended. For instance in turbo, you’ll only get about 20 minutes out of a standard AA, until the battery reaches 50% power. Meanwhile, although not THAT much better, is a 14500 lithium, where in turbo mode, it may take only 40 minutes for the battery to reach 50%. Obviously all other modes will offer a longer runtime and it’s highly unlikely that you WOULD operate the light at such a high brightness for an extended period.
Battery Issue
Of great importance to note. When you’re selecting a 14500 to use in the T01, be careful of the brand, and whether or not the battery has a protection circuit. The Efest 14500 pictured above (which is what I’ve been using) is an unprotected IMR cell. It measures 50.53mm long and 14.15mm wide. It fits in the light perfectly. The point is, some 14500’s do not fit in the flashlight or make proper contact. Another brand I own, Olight, will not work in the T01. The tail cap won’t even screw all the way down. The Olight is protected, and is just a smidgen longer.
I’ve also been told that “flat top” 14500’s will not work either. There should however, be no problem finding AA’s (or NiMH rechargeables) that fit.
Pro Mode
The purpose of the Pro Mode is to be able to set your own output levels. So within the mode, for every standard level of light – low, medium, high and turbo, there are THREE separate output levels that you can program individually.
Below, is an example of the output choices as estimated by Manker. The individual outputs for each mode are well documented in the manual. I should also note that they vary depending on battery type.
Here’s what you can expect when using a 14500 rechargeable battery;
- Medium; (level 1) 85 lumens .. (level 2) 100 lumens .. (level 3) 120 lumens
- Turbo; (level 1) 620 lumens .. (level 2) 750 lumens .. (level 3) 900 lumens
Of course low and high mode present their own levels as well.
What should also be noted is that there’s not much variance between the mode levels. Within the operation section of this review, I’ll detail how everything works… but basically when the programming mode is reached, each individual level cycles automatically. It’s up to you to select the one you want. Again, with each choice within the mode (low, medium, etc) the differences in the light levels are quite subtle.
Operation of the General Mode
To turn the T01 on, press and hold the switch. To turn it off, do the same thing.
Once it’s on, a short press will advance to the next mode. The sequence is low>medium>high>turbo.
The flashing/emergency modes are accessed from ANY mode by double-clicking the switch. The flashing sequence is strobe>SOS>location beacon. A holding press from any flashing mode will shut it off. A double-click from any flashing mode will return the light to the previous regular mode.
Within the general mode, the levels of output are fixed and cannot be changed. By default, Manker has chosen the lowest of the low levels (1 lumen) and the highest of the turbo levels (900 lumens) as the general output. If that suits your needs just fine, then you need not use the Pro mode at all. But, if customization is your thing, then Pro might be of use to you.
Operation of the Pro Mode
To enter into Pro mode the light must be turned OFF. Press and hold the switch (the light will come on). KEEP PRESSING (with the light on) for about 10 seconds. When you see two “blinks” (followed by the light turning off) that means Pro mode is engaged.
To reverse and return to General mode, turn the light off and repeat the process. General mode is engaged after the light blinks ONCE and shuts off.
Okay, so, you’re in Pro mode, what next?
Basically, operating the T01 in Pro mode is the same as in General mode. Press and hold to turn it on, and press once to cycle through the regular lighting modes.
Here’s where Pro mode differs.
Within the flashing modes, you have a couple of different options. It cycles much the same with strobe, SOS and location beacon, but after beacon, you also get a “direct drive” (constant current) turbo mode. This is where turbo will be as bright as it can be for as long as the battery can sustain it. The light will also begin to heat up after a few minutes in this mode. How much use this actually is, is up to you. I’m not certain as to its purpose since regular turbo is already available in the other modes.
Then following direct drive turbo (within the sequence) is a battery indicator mode. Here, for every 25% of battery voltage, you’ll get one flash of light. Therefore if the battery is 75% full, it’ll flash three times in a continuous loop.
Lastly, within the flashing sequence is the custom settings mode. This as briefly described above, is where you have the option (not the requirement) of setting a different output to each of the regular lighting modes.
It’s quite simple. As soon as the settings mode is reached, you’ll be in low mode. The light will be displaying low, in three slightly different outputs. If on a 14500 battery, they are; 1, 10, & 16 lumens. They will do a continuous “loop” until you choose the one you want by giving the switch a quick press when you see it. Once you click, that output will be memorized, and it will move to the next set, medium. After medium is set, it’ll display three “high” outputs. After that choice is made, turbo is the last stop. The turbo choices on an AA/NiMH battery are 330, 400 & 500 lumens respectively.
These choices remain as your programmed selections in the Pro mode ONLY. Changing batteries will NOT erase them! BUT, if you want to change only one of them, you’ll need to reset ALL of them again. Of course you can still switch back and forth between General and Pro mode as you see fit. The memory selections will remain as you set them.
Manker Quinlan T01 Beam Shot Images
(please click on each to view full size)
Unless specifically noted, all images are taken using a 14500 3.7v battery. Those noted as “NiMH” are taken using a 1.2v EneloopPro rechargeable AA battery.
General Observations
I like the Manker Quinlan T01 very much. It’s compact, bright, has astounding throw, is well built and once you become a little more accustomed to the interface, it’ll be second nature to operate.
I recently heard that a slightly different version of the T01 has been released. I believe it might be newer than what I’ve reviewed here. Changes to that model are subtle. From what I’ve heard, the clip is thicker, and the cooling fins may have been tweaked a bit. The biggest change is that from the off position, a quick press of the switch activates low mode. That’s a nice feature and I wish THIS version did that!
As it is with my reviewed version, the internal memory will always return the light to the last mode used…accept for any flashing mode. So, if for any reason you think you MIGHT want low mode the next time you use it, you might want to shut it off in low, just so you’re not too alarmed with a higher output when you least suspect it.
The programming ability in Pro mode is a nifty idea, but in more uses, I can’t see THAT many owners considering it a necessity. Within the General mode, you always get the lowest output when you’re on low, and the highest output when on turbo. It’s only if you wish to have access to output levels somewhere in between, that programming might be important to you.
If what you’ve read here has tweaked your interest, here’s an Amazon purchase link for the Manker Quinlan T01.
Recent Posts
Wurkkos TS26S “Super Bright” LED Flashlight Review
The Wurkkos TS26S is what I'm reviewing today. It's also the first time I've had…
Nitecore TINI3 Intelligent Keychain Flashlight
The motto of Nitecore is to "keep innovating". And with that - let me tell…
Jetbeam E26 Kunai UV Flashlight Review
I haven't owned a new Jetbeam flashlight is quite some time. Having said that, I'm…
Nitecore HC65 Headlamp Review
Since the motto of Nitecore is "keep innovating" please join me now in this review…
Nitecore EDC33 Lumin Shield Flashlight Review
As Nitecore continues to implement new concepts with LED flashlights, let's dive in with my…
Wuben X3 Wireless Charging LED Flashlight Review
This is different! The Wuben X3 "Owl" is a dual-LED flashlight that features wireless charging…
