


I recently reviewed Manker’s T01 AA flashlight. Now it’s time to see how its slightly larger (and more powerful) sibling compares. THIS is the Manker U11 LED Flashlight.
Everything You’d Expect!
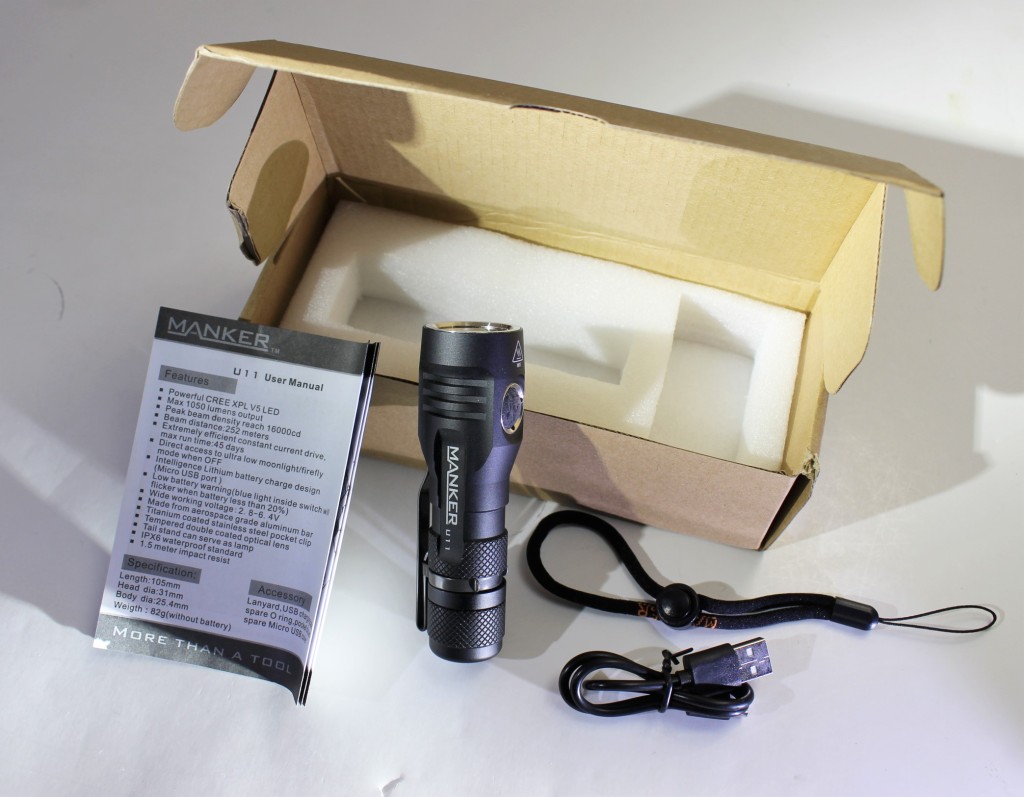
So within the non-descriptive cardboard box with foam cut-outs, is the Manker U11, user manual, pocket clip, spare o-ring, adjustable lanyard, micro USB charging cable and spare USB cover. Very nice!
Speaking of Features
Powering the U11 is a CREE XP-L V5 LED.
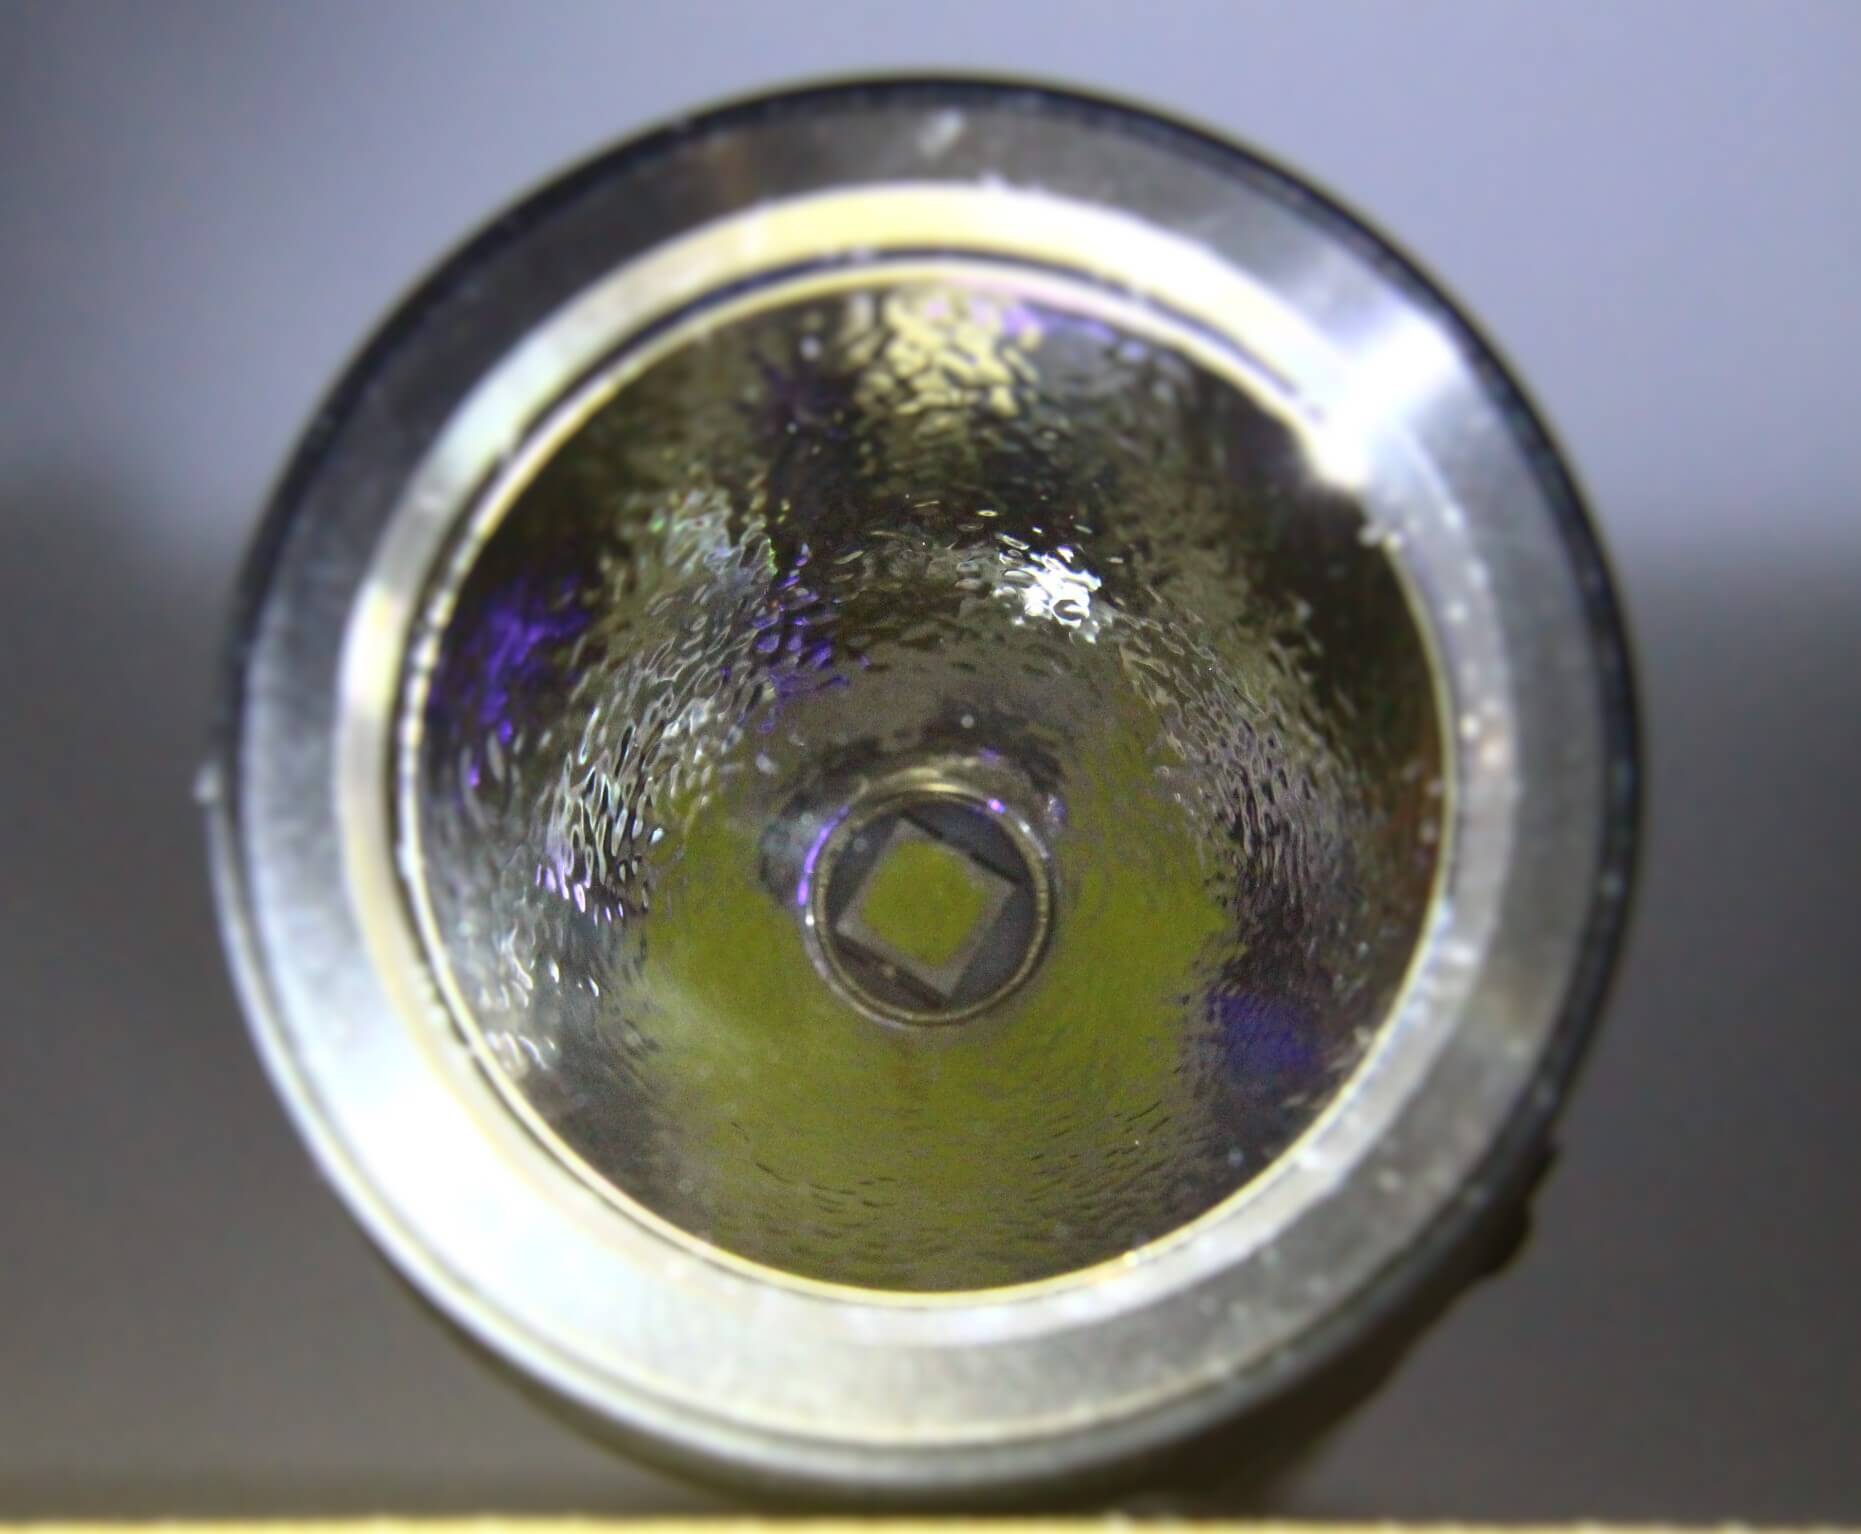
Orange peel reflector and CREE XP-L LED

Comparing size of the U11
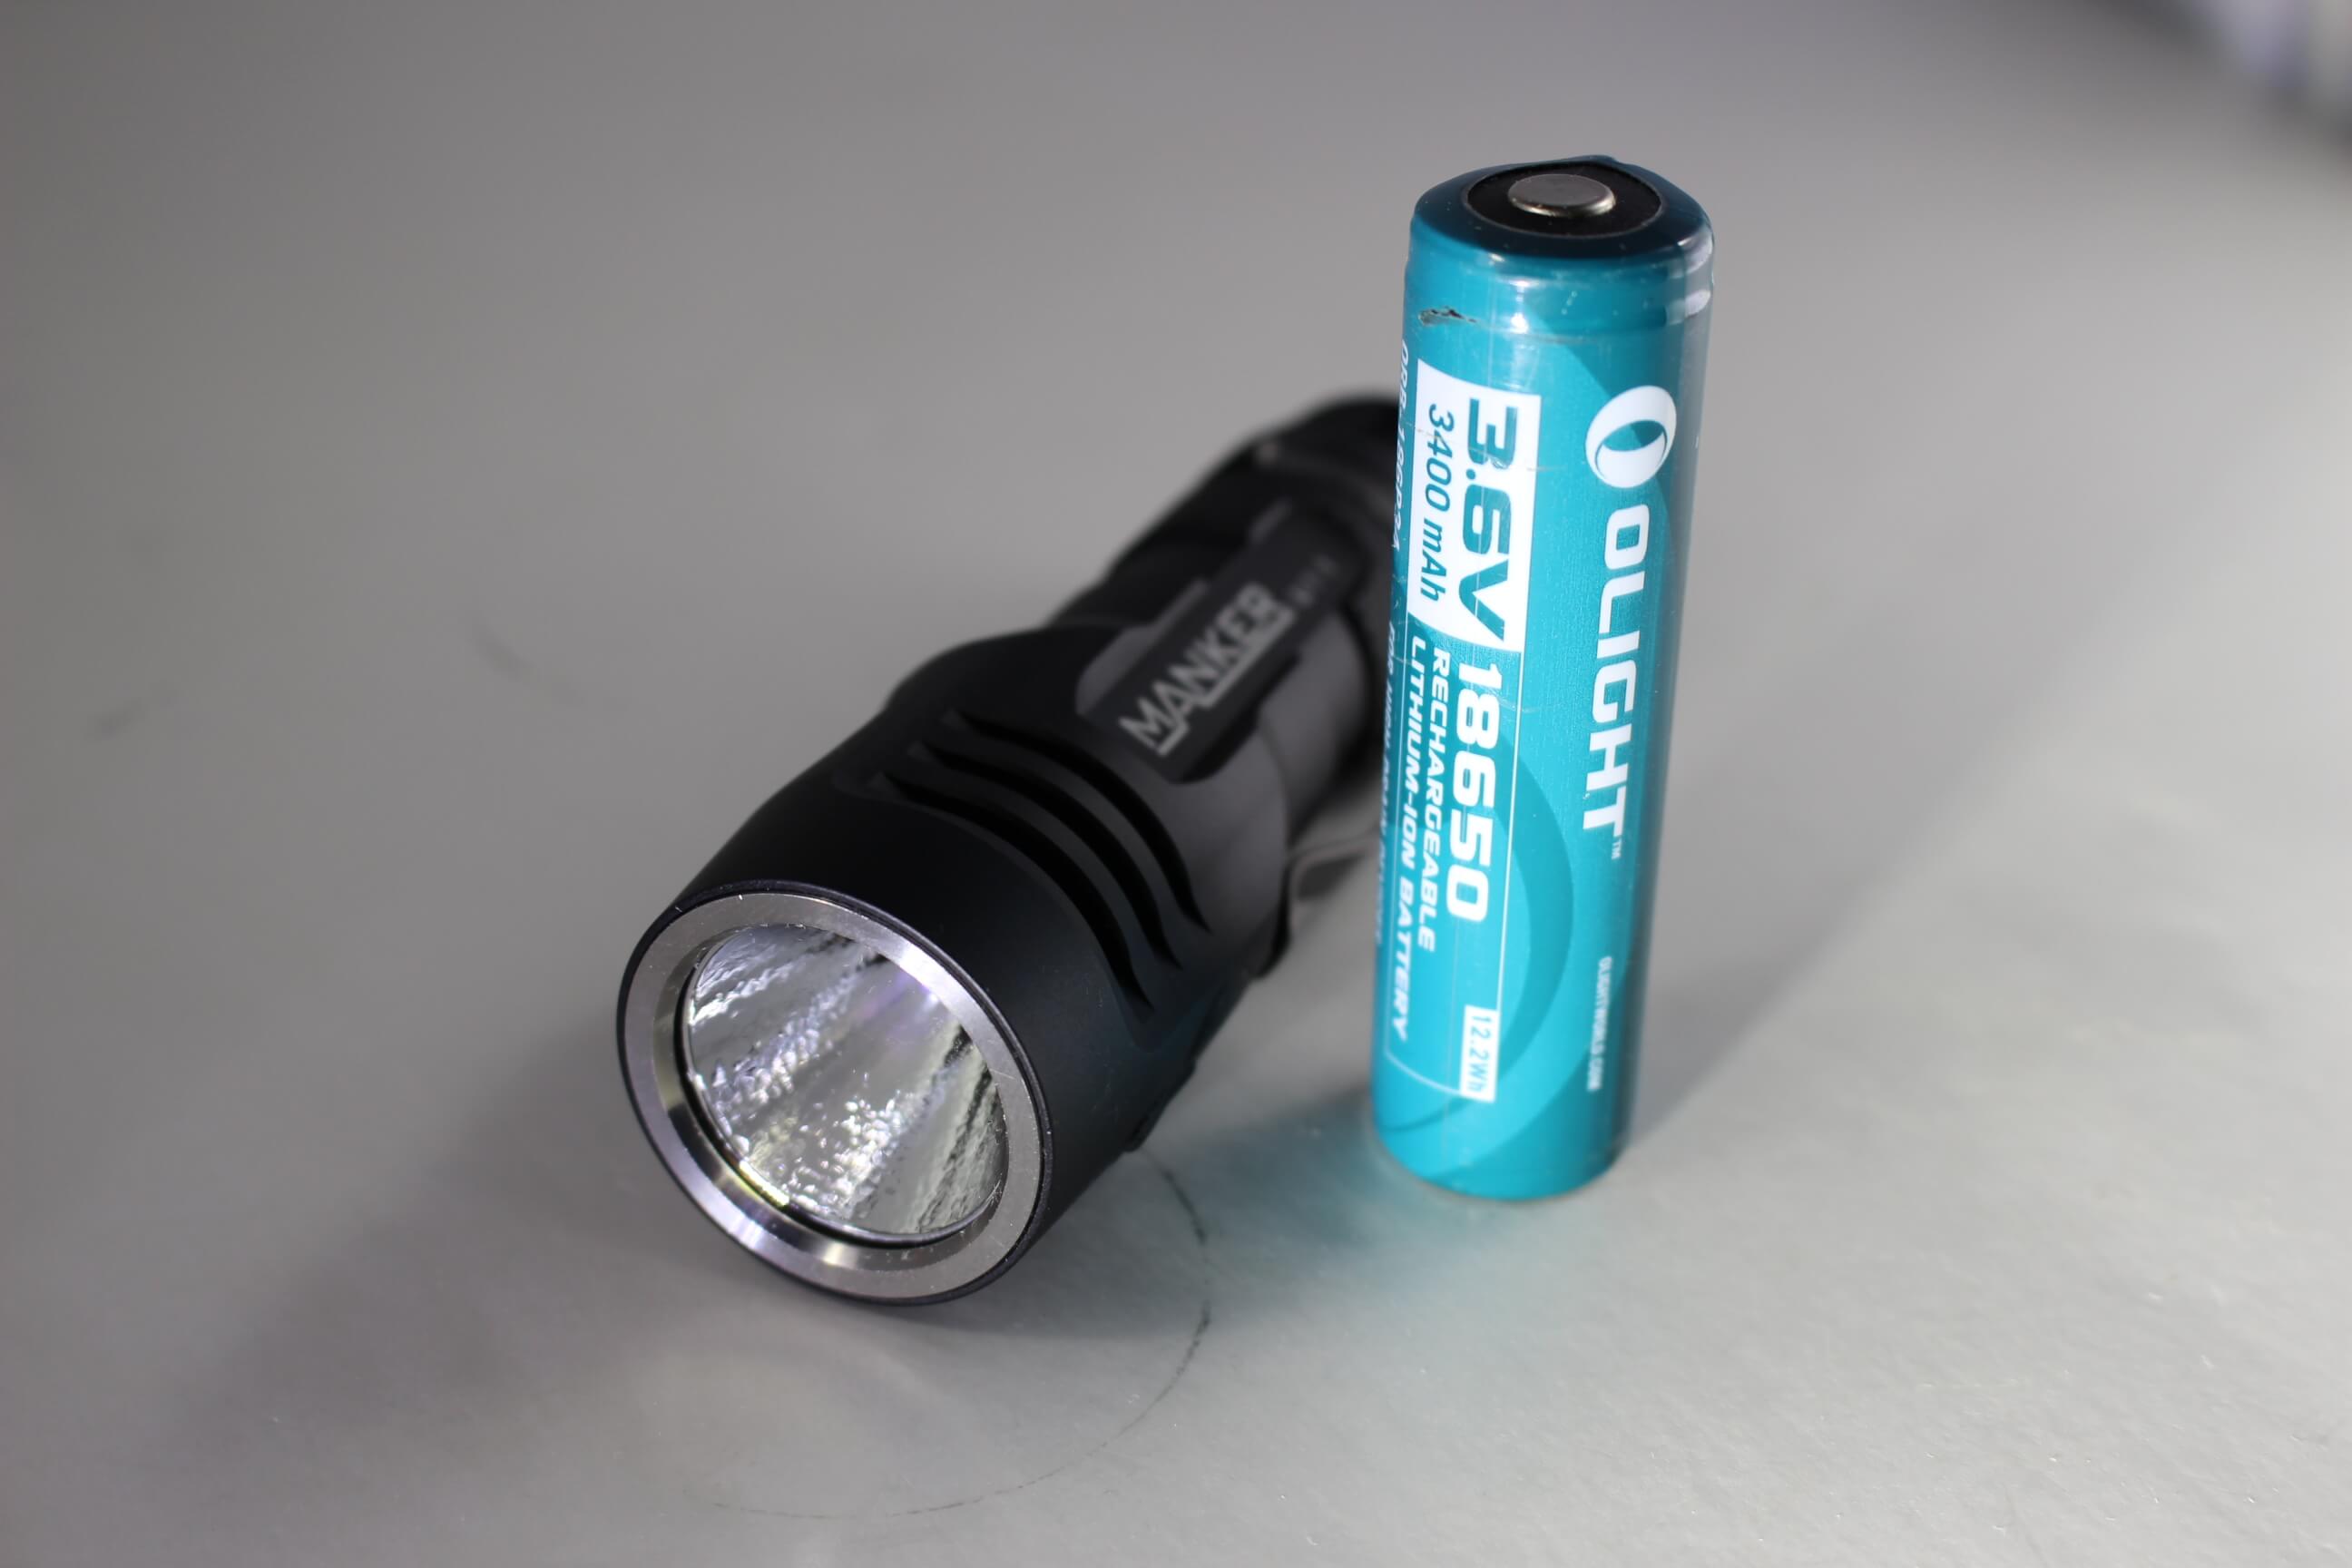
U11 and an 18650 battery
Other points of interest;
- Weight; (including a battery) 131 grams
- Measurements; 4.2″ long, 1.2″ wide (at the head)
- Beam distance is 252 meters (that’s 826 feet)
- Includes a very efficient constant current drive-circuit
- Working voltage is a tad scant; 2.8 – 6.4
- Made from Type-III hard anodized aerospace aluminum
- The pocket clip is titanium-coated stainless steel
- The lens is double-coated (tempered) scratch resistant glass
- Impact resistant to 1.5 meters
- Waterproof to IPX-6 standard. This level of protection doesn’t actually include submersion. But it’s built to withstand heavy splashing and rain.
Batteries, Output and Run-time
So, with the working voltage capping at 6.4, the recommended battery is an 18650. The only other acceptable cell would be two disposable CR123’s… since they’re 3 volts each. Two rechargeable 16340’s (at 3.7 volts each) would NOT be accepted! The reason Manker did this, is because of the internal charging capabilities of the U11. We’ll get to that in a moment.
There are five constant output modes on the U11. Moonlight, low, medium, high and turbo. Same as the T01, the U11 has TWO operating modes. General and Pro.
On General Mode;
- Low; 40 lumens
- Medium; 180 lumens
- High; 430 lumens
- Turbo; 1050 lumens
On Pro Mode; (where YOU select “one” of “three” varying outputs) **
- Low; 40, 60 or 80 lumens
- Medium; 180, 250 or 300 lumens
- High; 430, 530 or 600 lumens
- Turbo; 780, 890 or 1050 lumens
** The selection of these outputs is explained in detail below, under the heading; “selection mode“.
“Moonlight” is pre-set at 0.07 lumen and is the same in both operating modes. On Moonlight, the flashlight is capable of running continuously for 45 days!! (before needing to charge the battery)
On low at 40 lumens, run-time is 41 hours. On turbo (1050 lumens) run-time is 90 minutes.
As far as Turbo mode is concerned. If you have it set on the second or third level, its 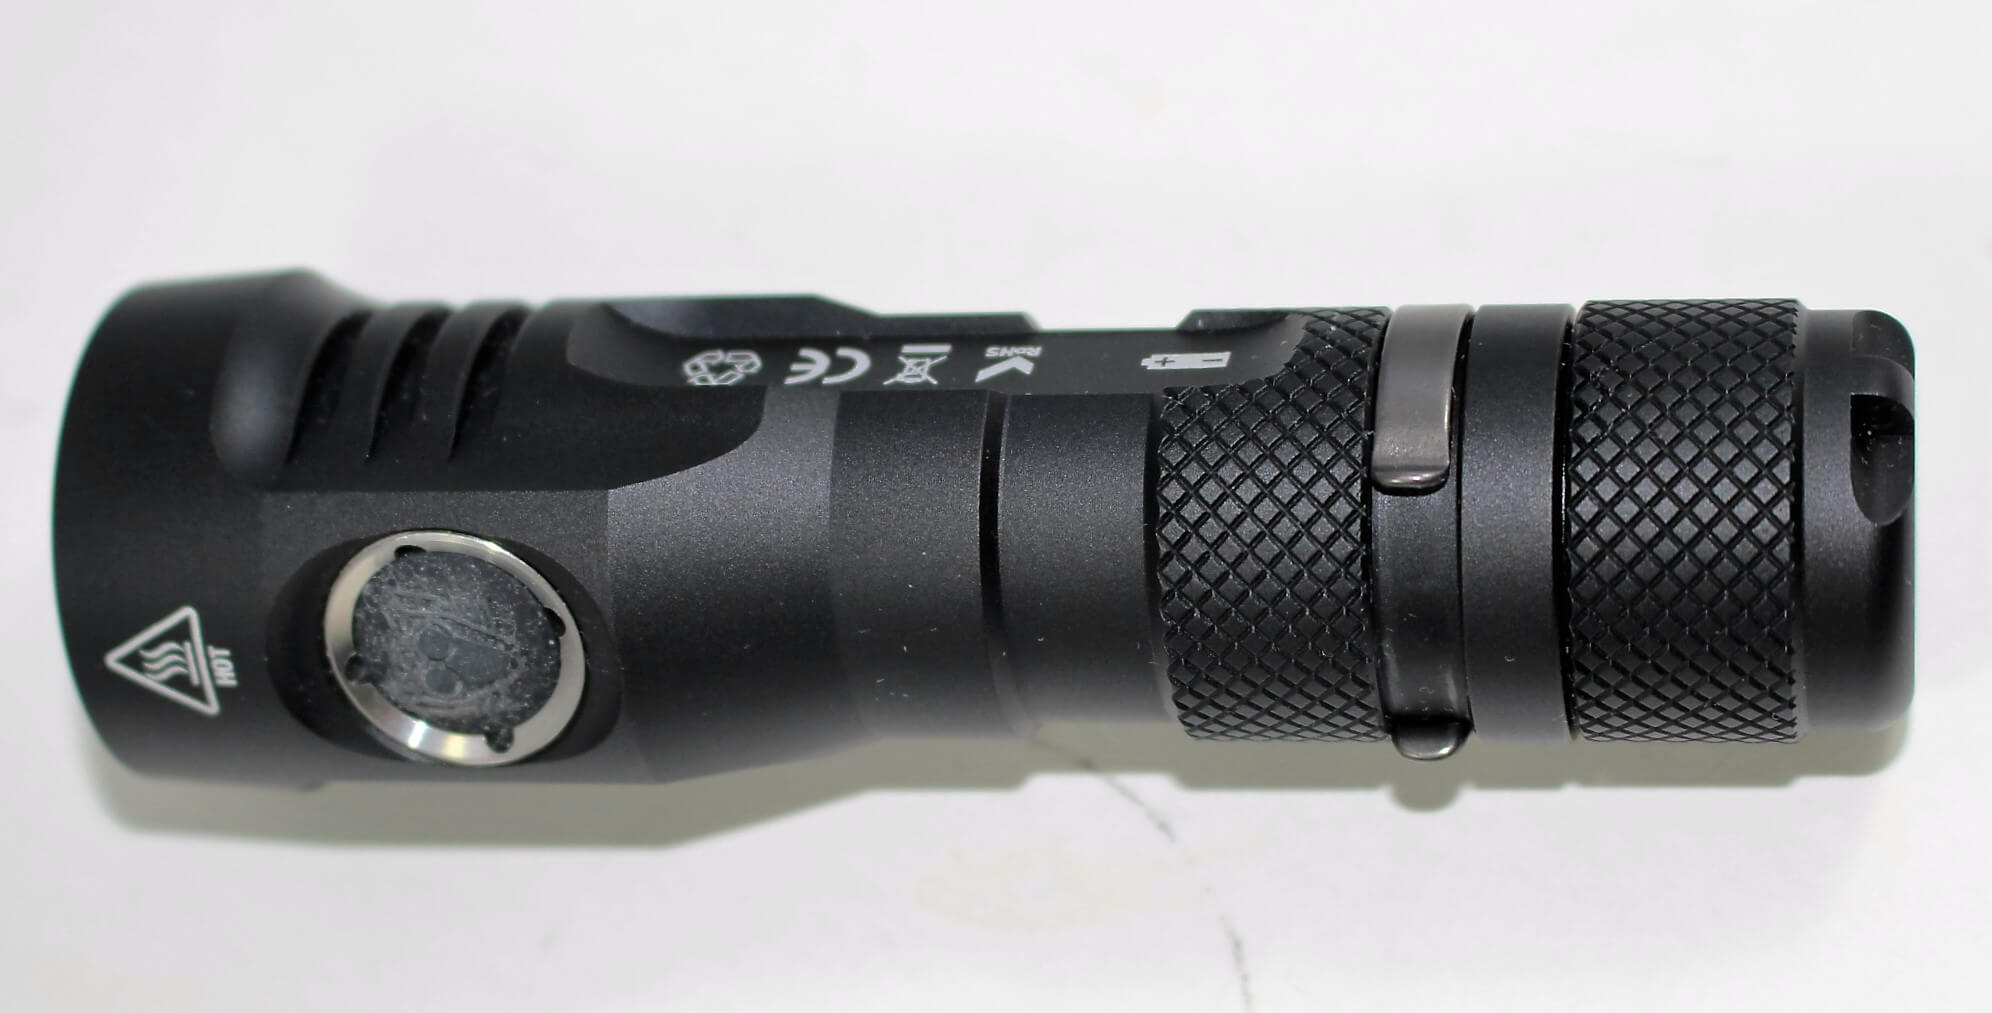 automatic step-down feature will kick in after about 3 minutes. On T3 for instance, it’s set to drop to T1 level. On T2, it’s roughly the same and will begin a slow decline once activated, ending up on T1 within 5 minutes.
To completely override the step-down, you may use the “constant Turbo” feature within Pro Mode. This setting maintains output extremely well, but as Manker warns, it also creates extreme heat within the light. Under those conditions, caution is advised if holding the light is necessary.
Special Modes
Like its sibling, the U11 has various flashing or “blinky” modes.
In General Mode they consist of Strobe, “breath-flash” and SOS.
In Pro Mode they consist of Strobe, “breathe-flash”, SOS, Location Beacon, Turbo, a battery voltage indicator, and the “selection” mode where you chose the level of brightness you want for each mode.
Breath Flash; This is an odd little feature. The power switch has a blue LED indicator underneath it. In breath-flash, the indicator lights up, but does so as if the light is “breathing”. It ramps up for a couple of seconds, then ramps down. Then repeats. When doing this, it resembles the action of turning a “dimmer switch” up and down continuously. It will do this repeatedly unless you click the switch. I’m not sure what its purpose is… but I suspect (since [to me] it looks like a frog’s eye) some people might find it rather creepy! You make the call… and let me know what you think!
Let it Shine, Let it Shine!
On medium – @60 ft
On high — @60 ft

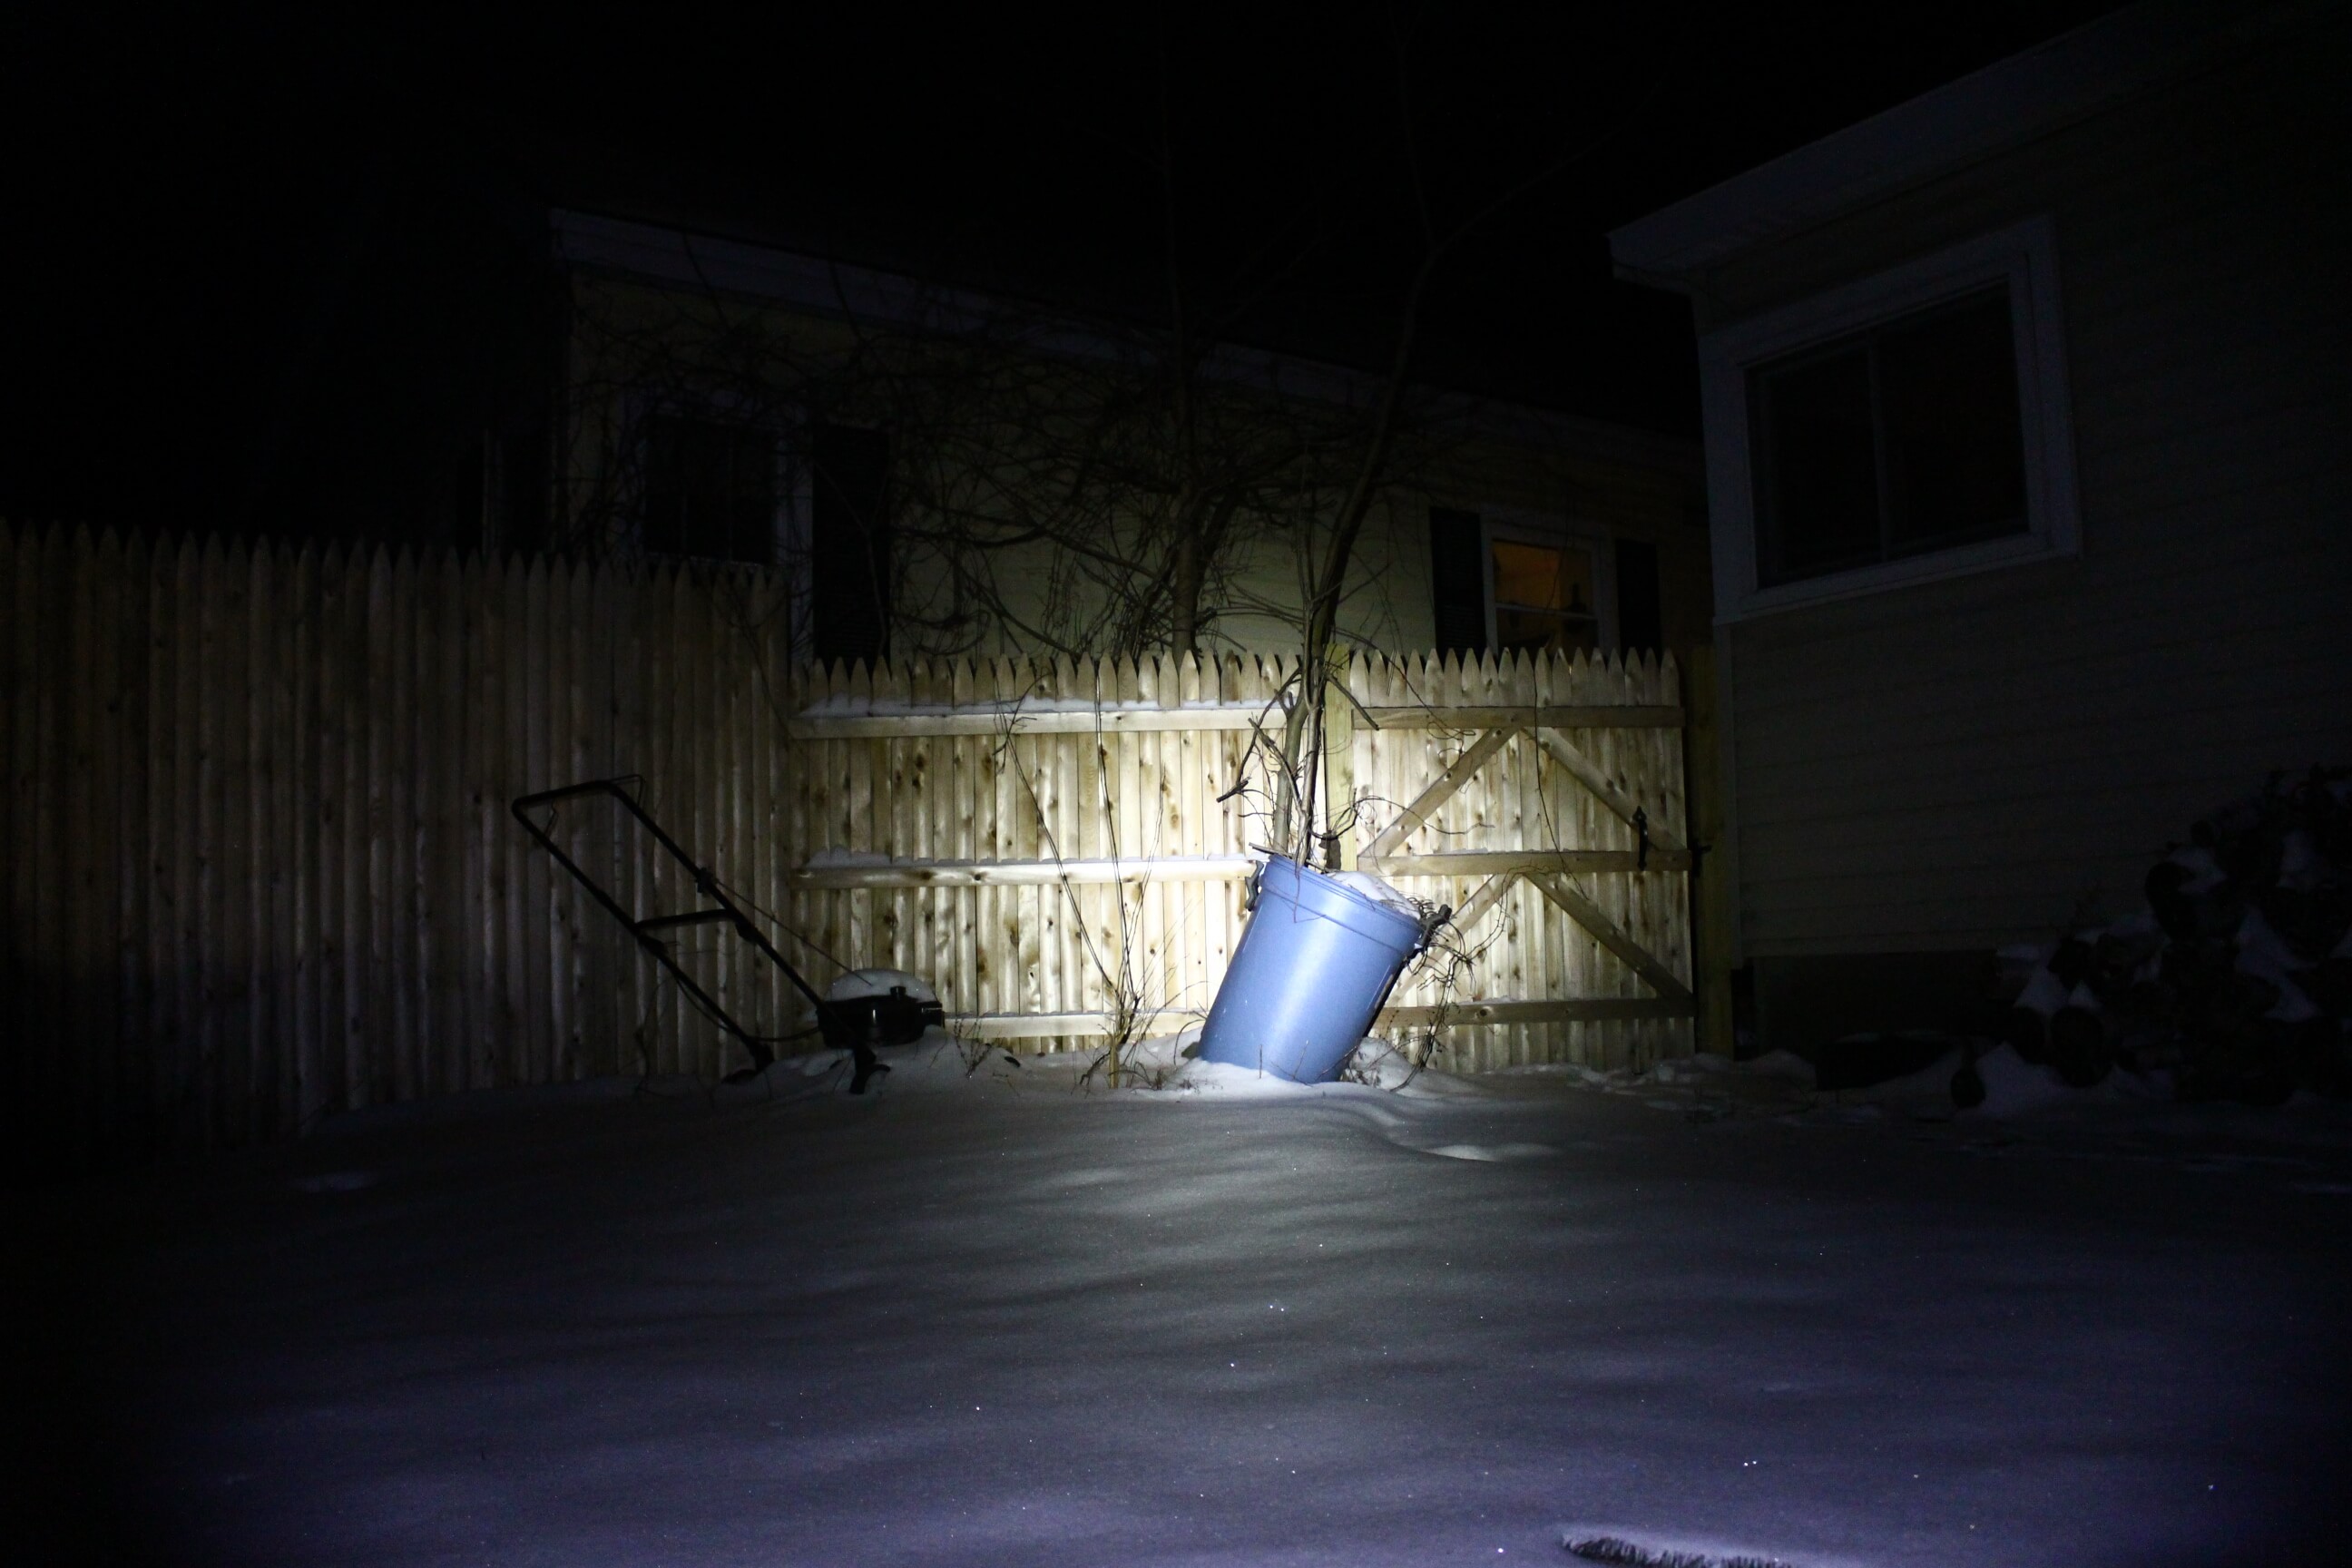
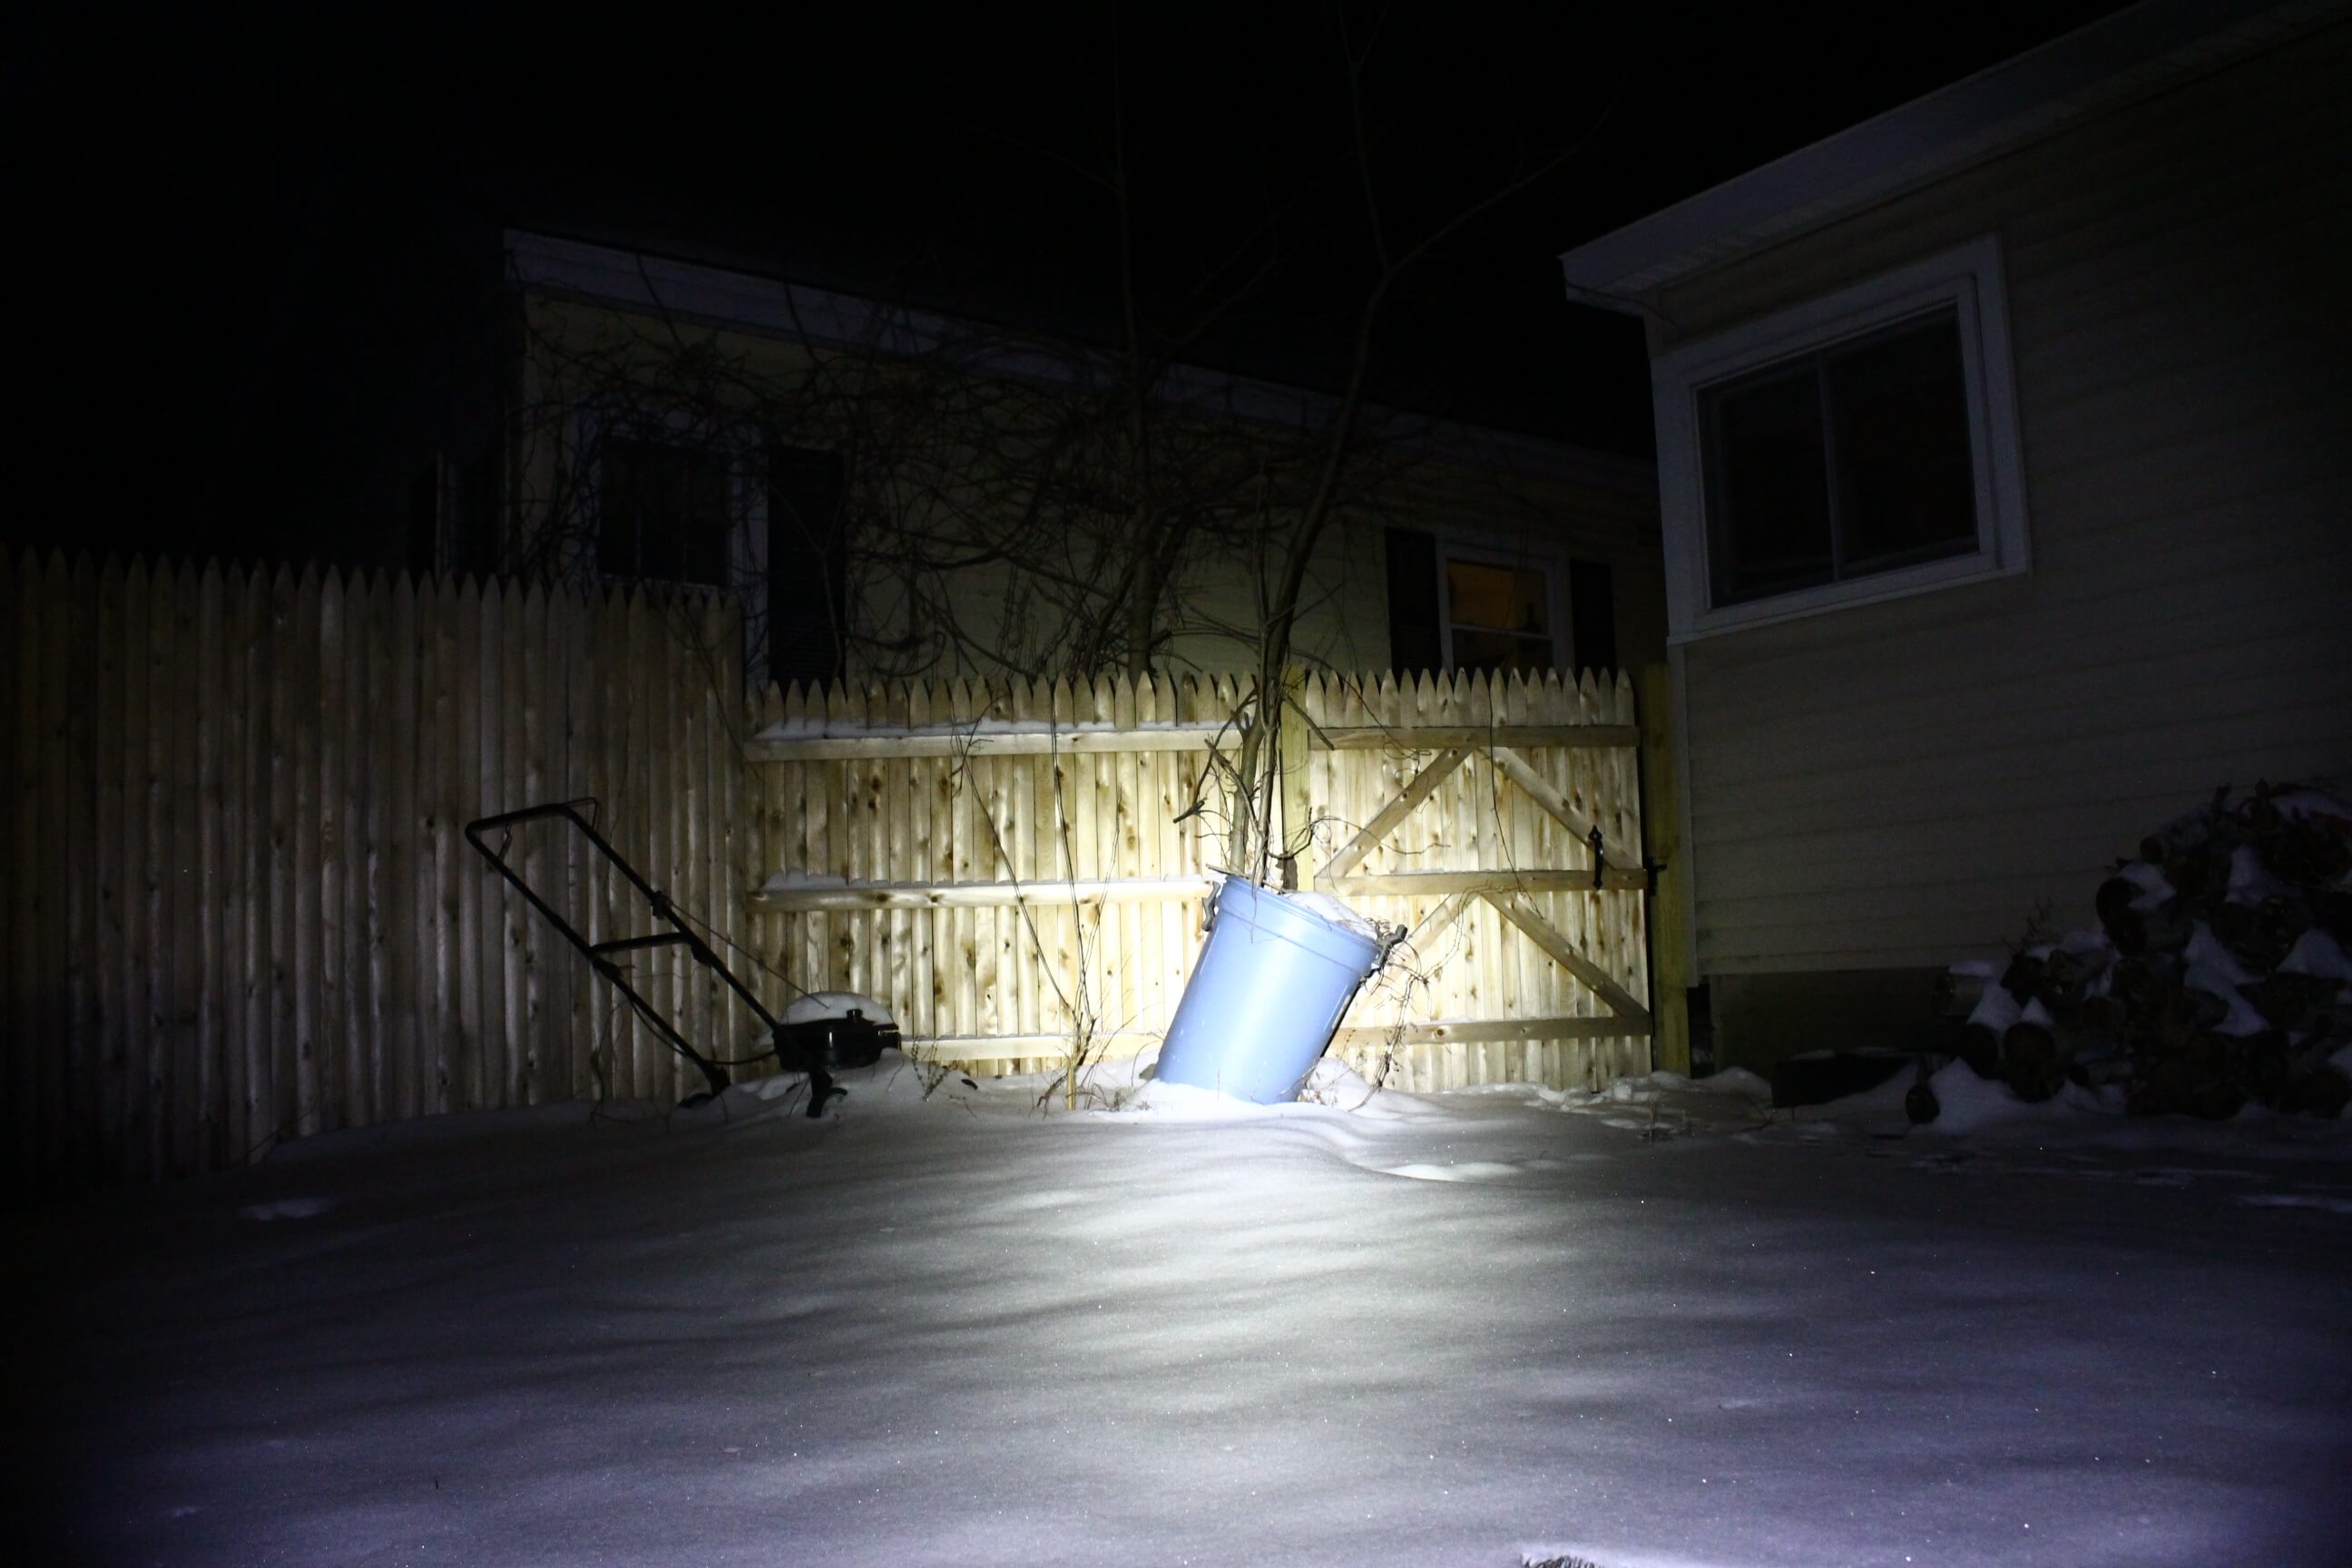
On turbo — @60 ft

On low — @20 ft
On medium — @20 ft
On high @ 20 ft
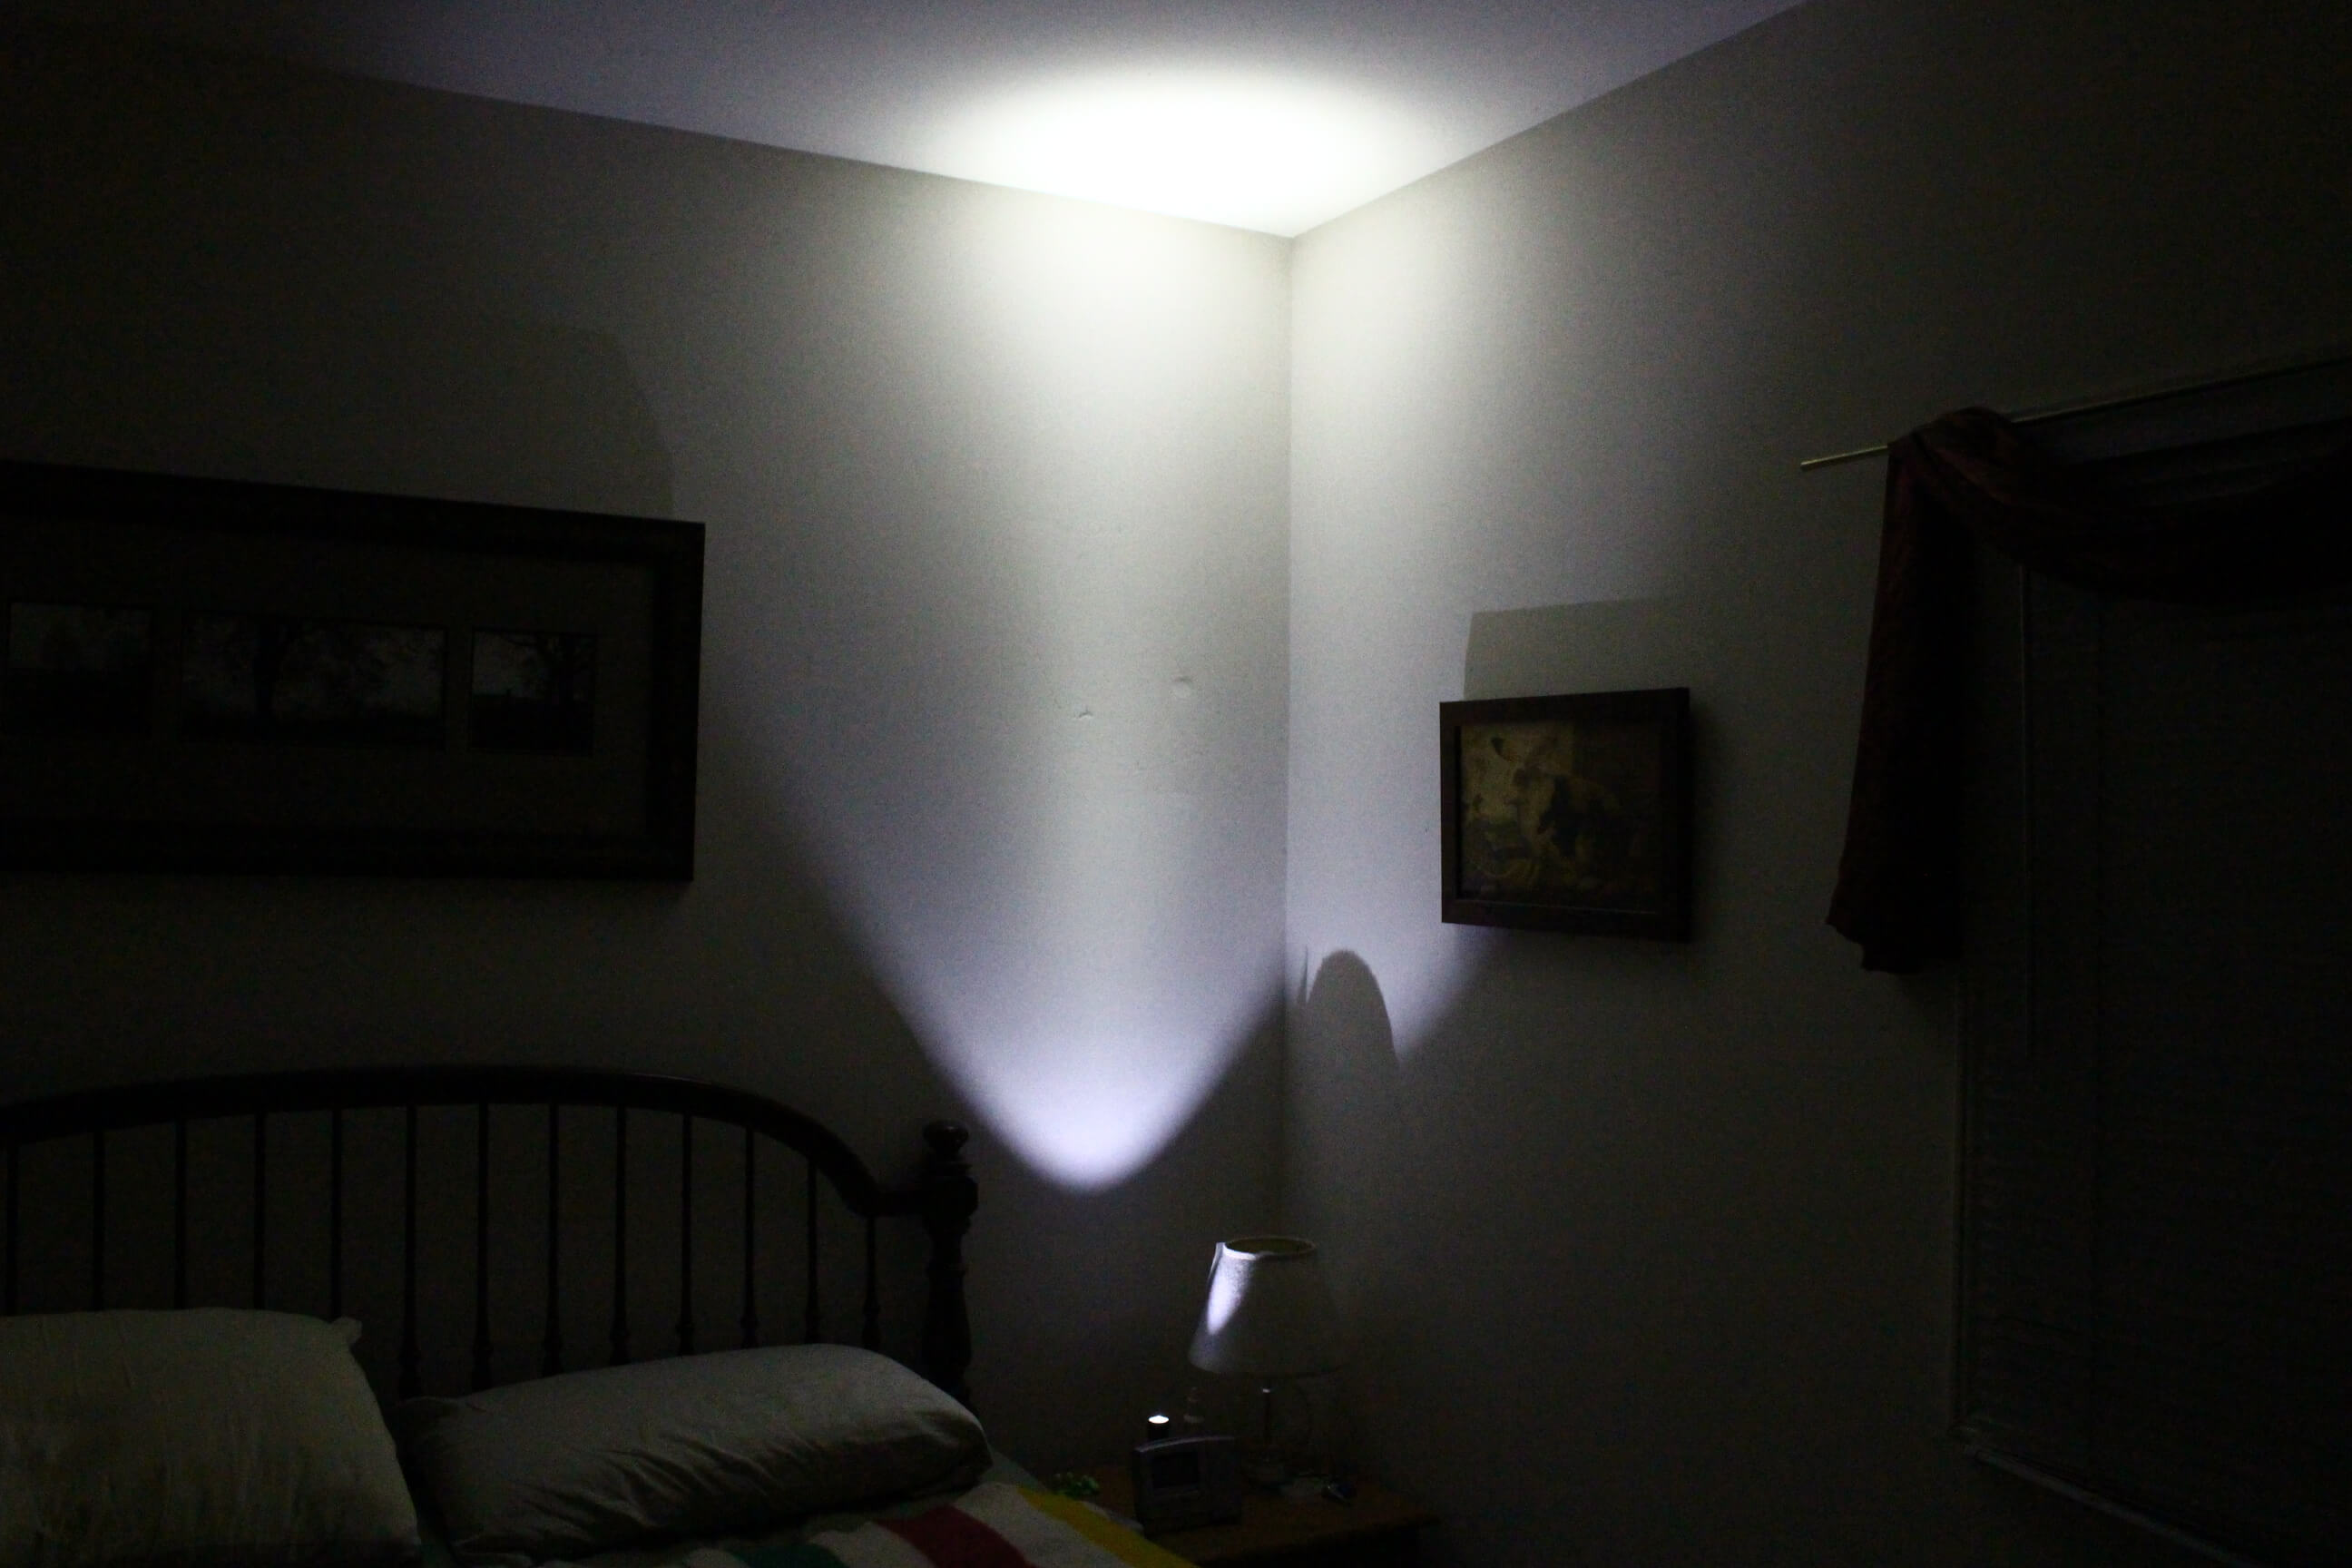
On low

On turbo

Moonlight mode
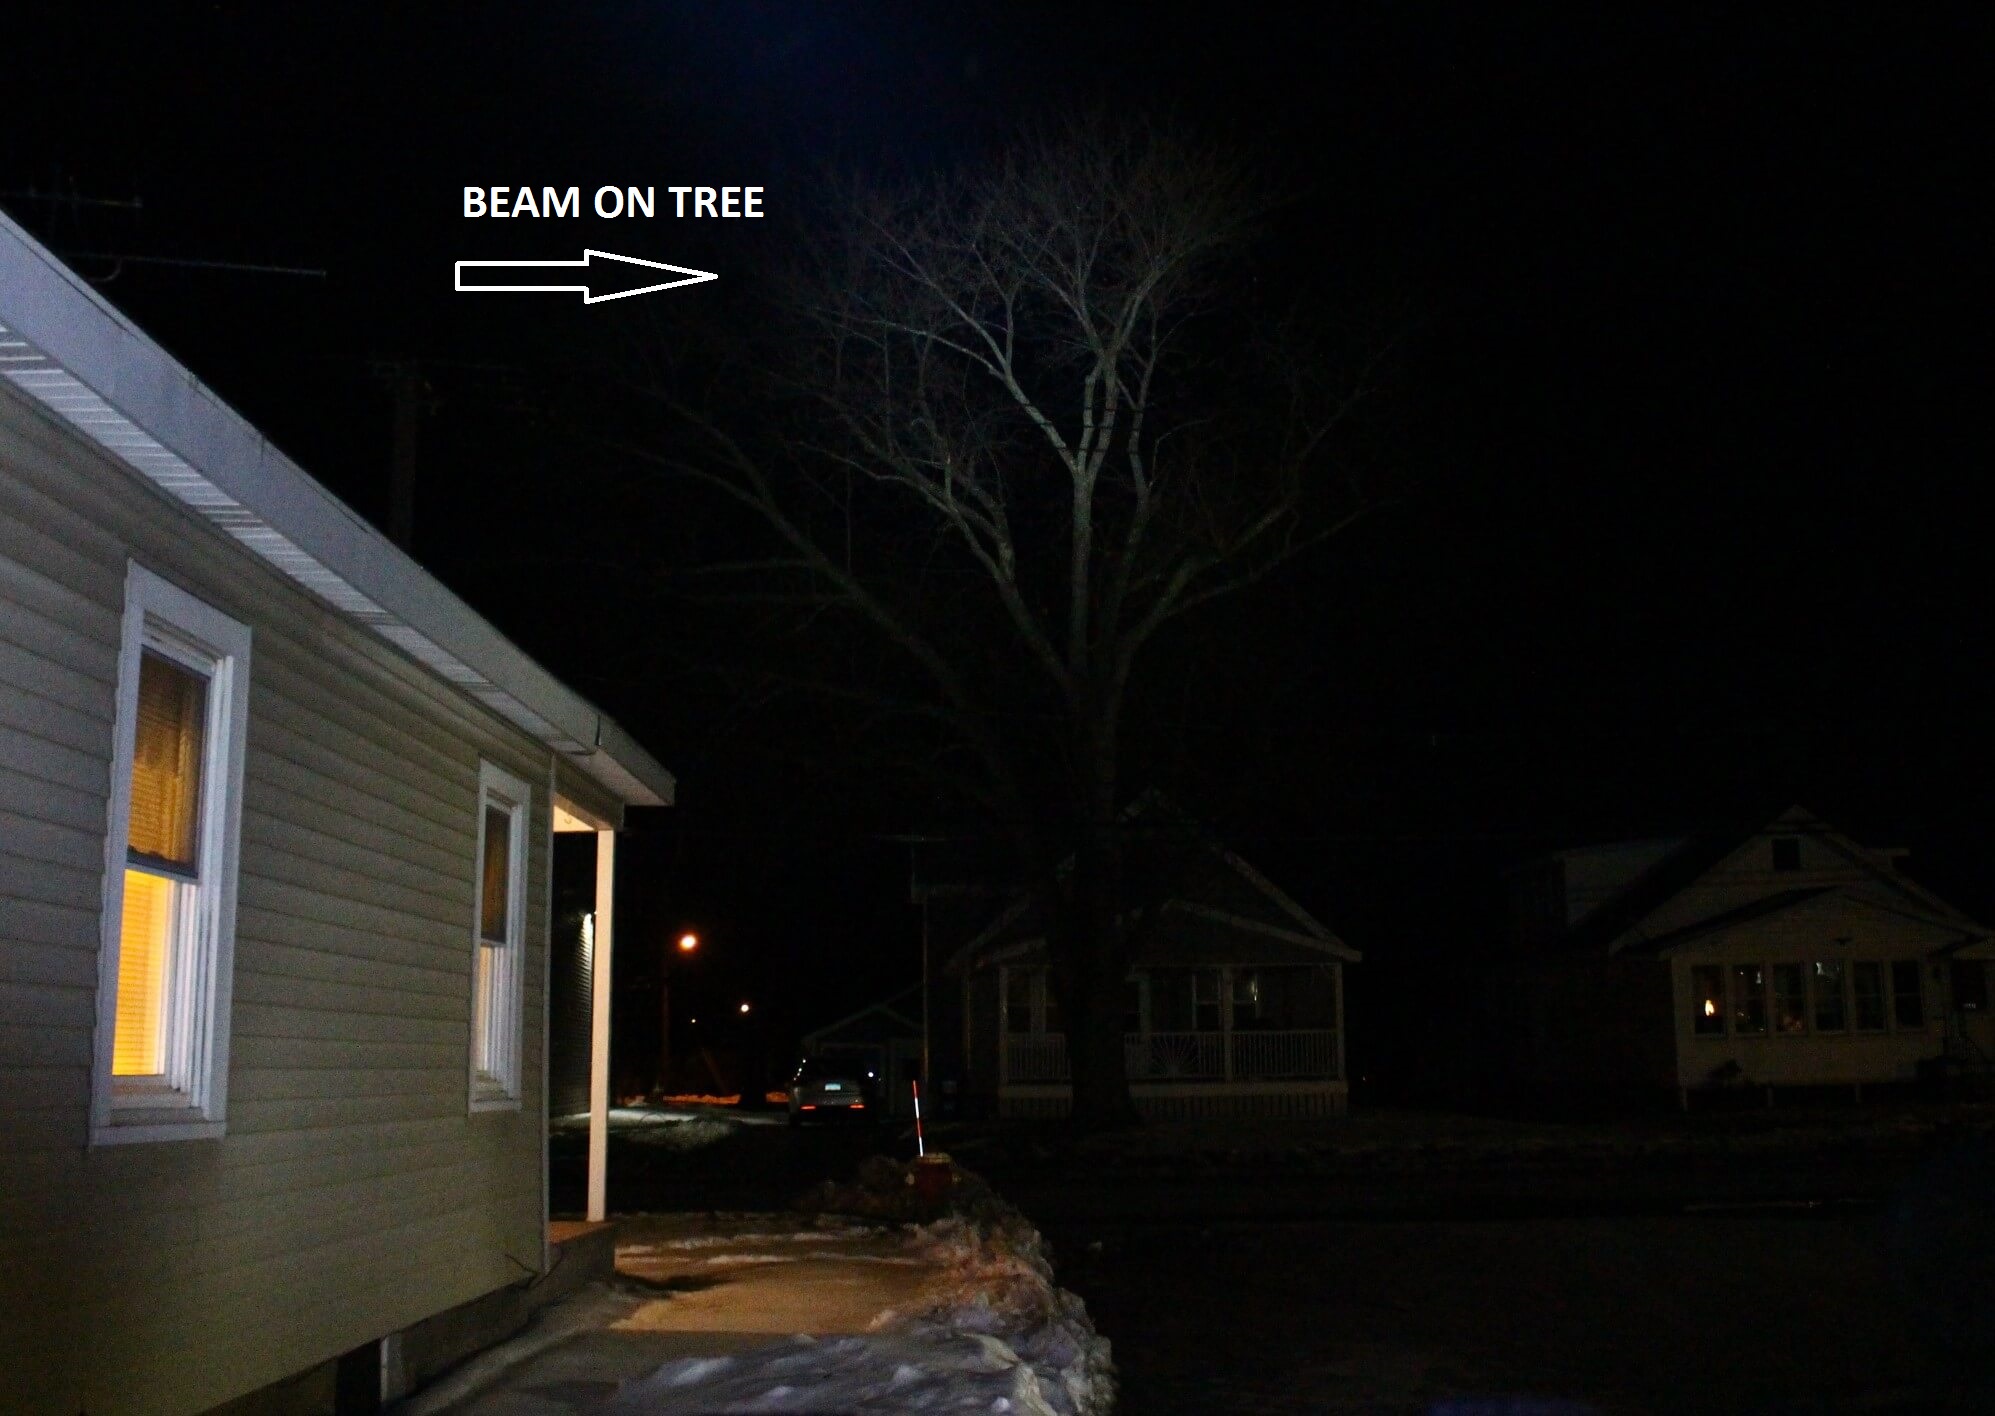
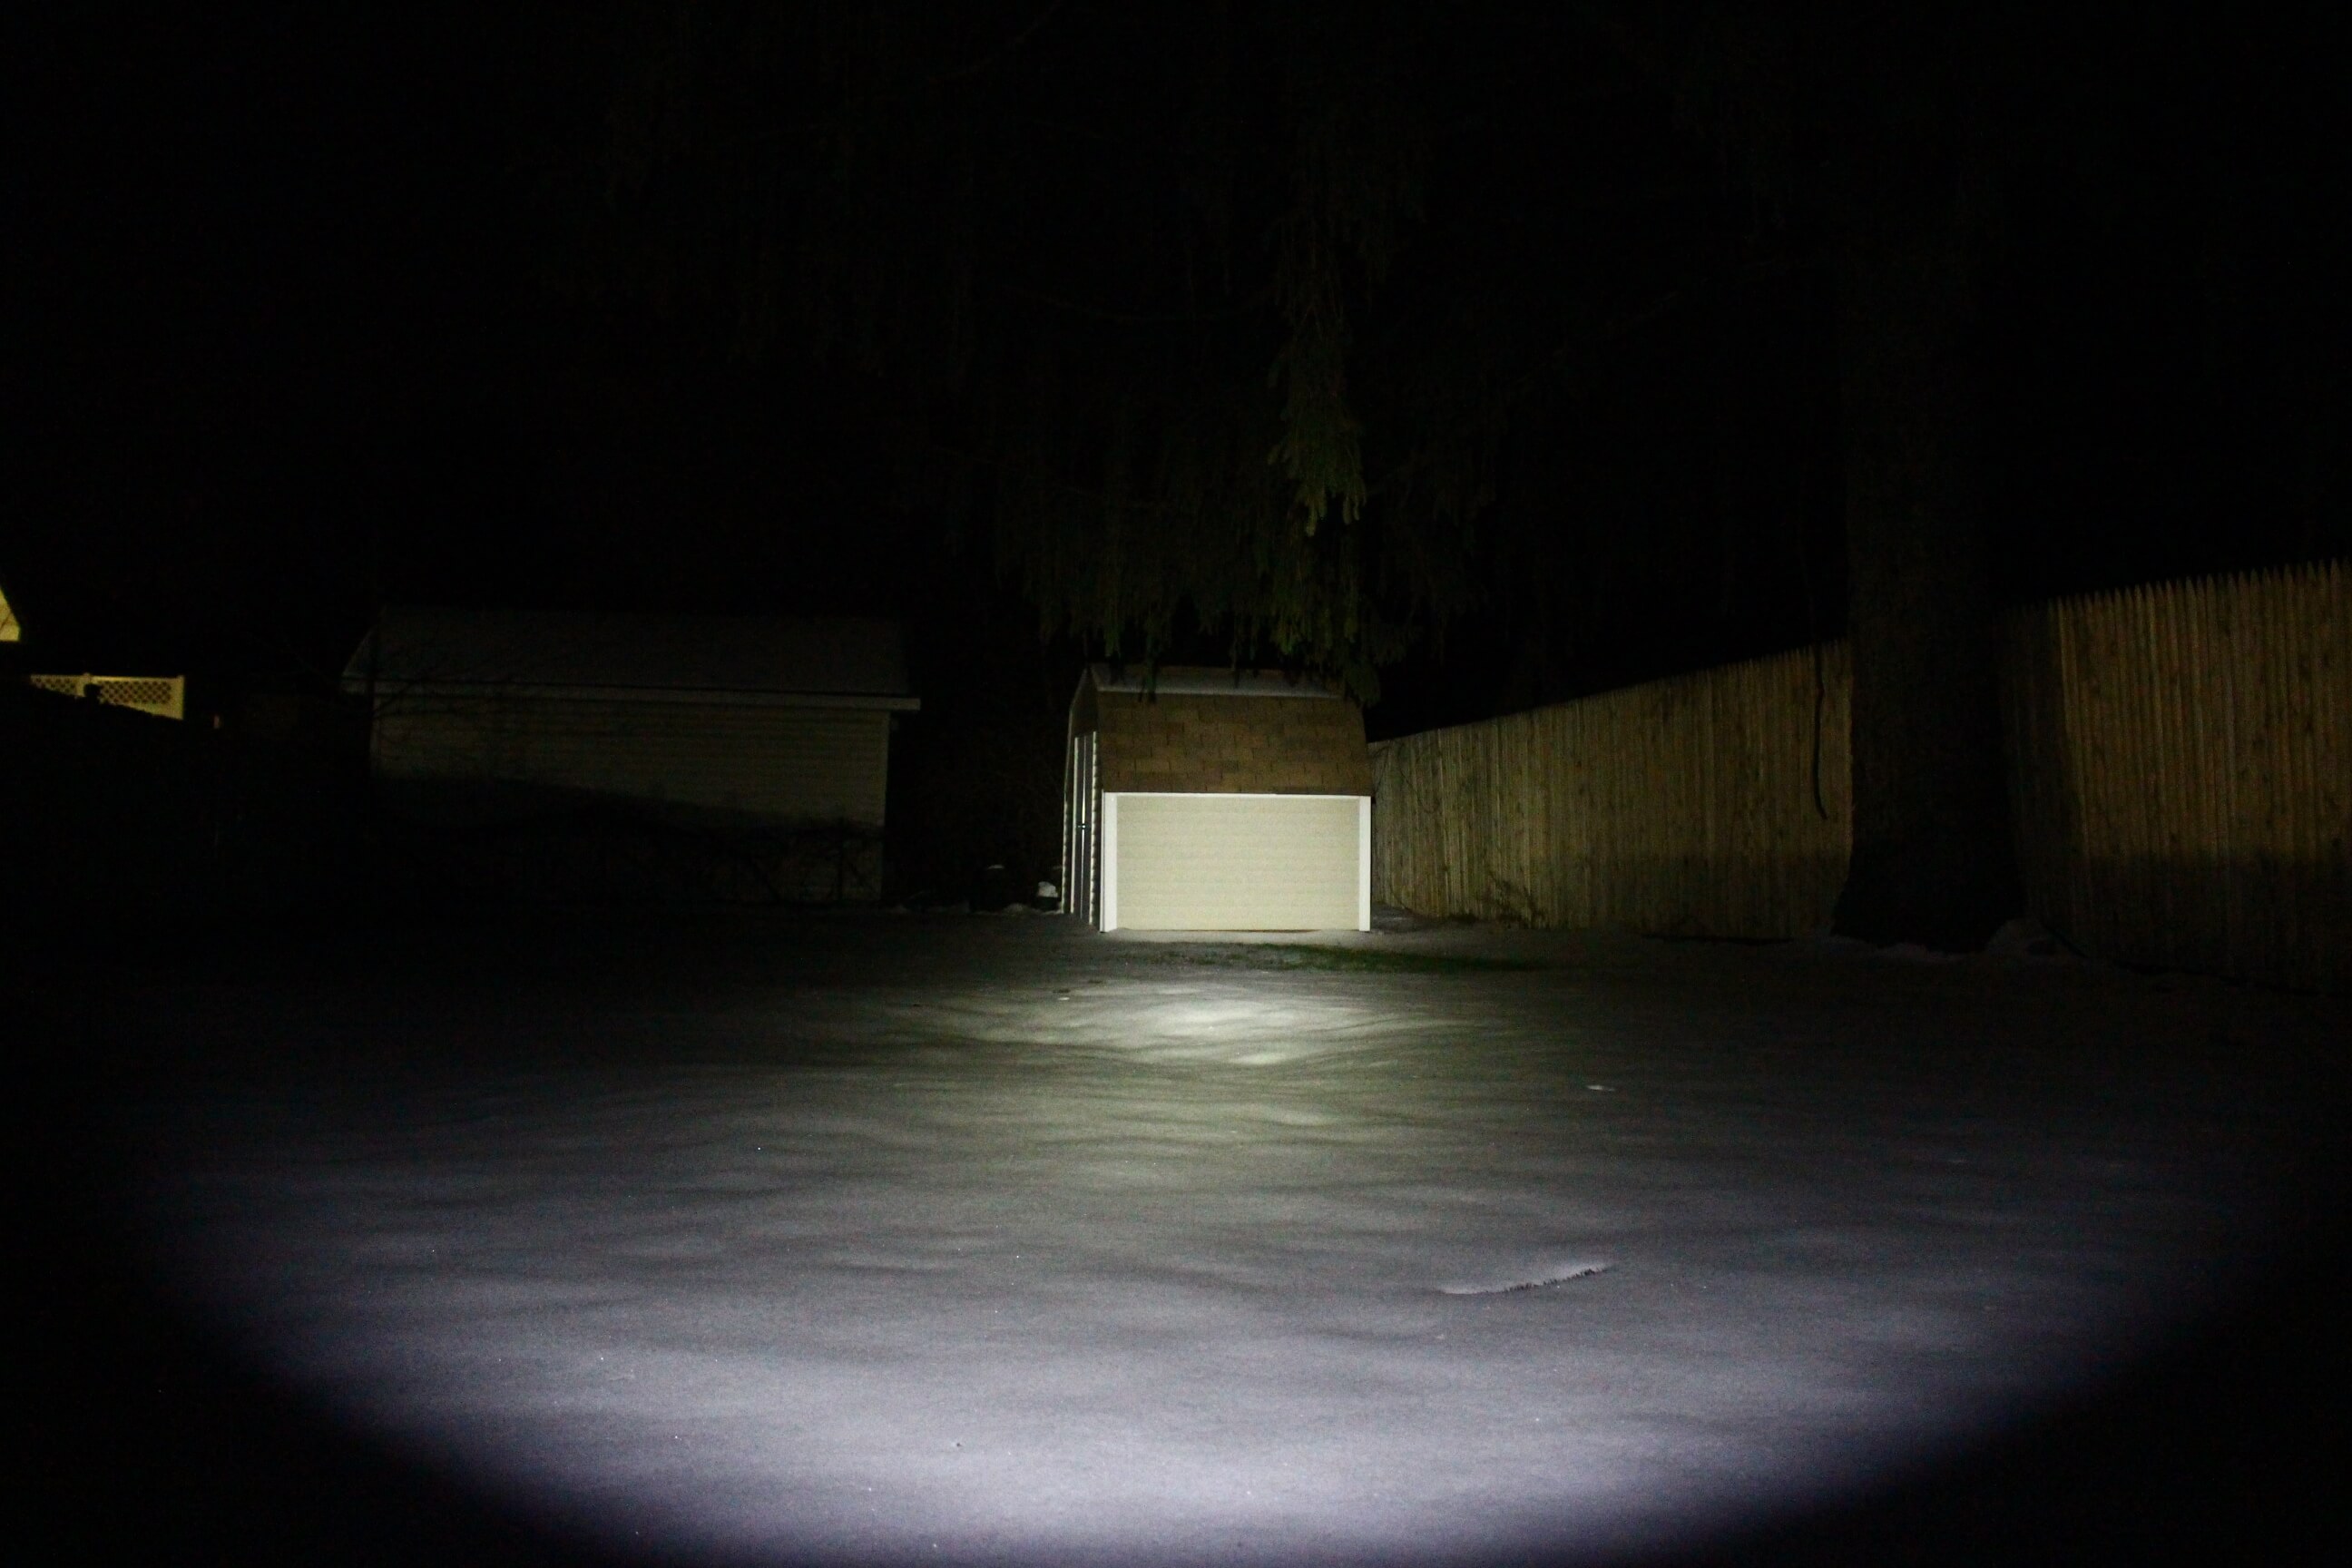
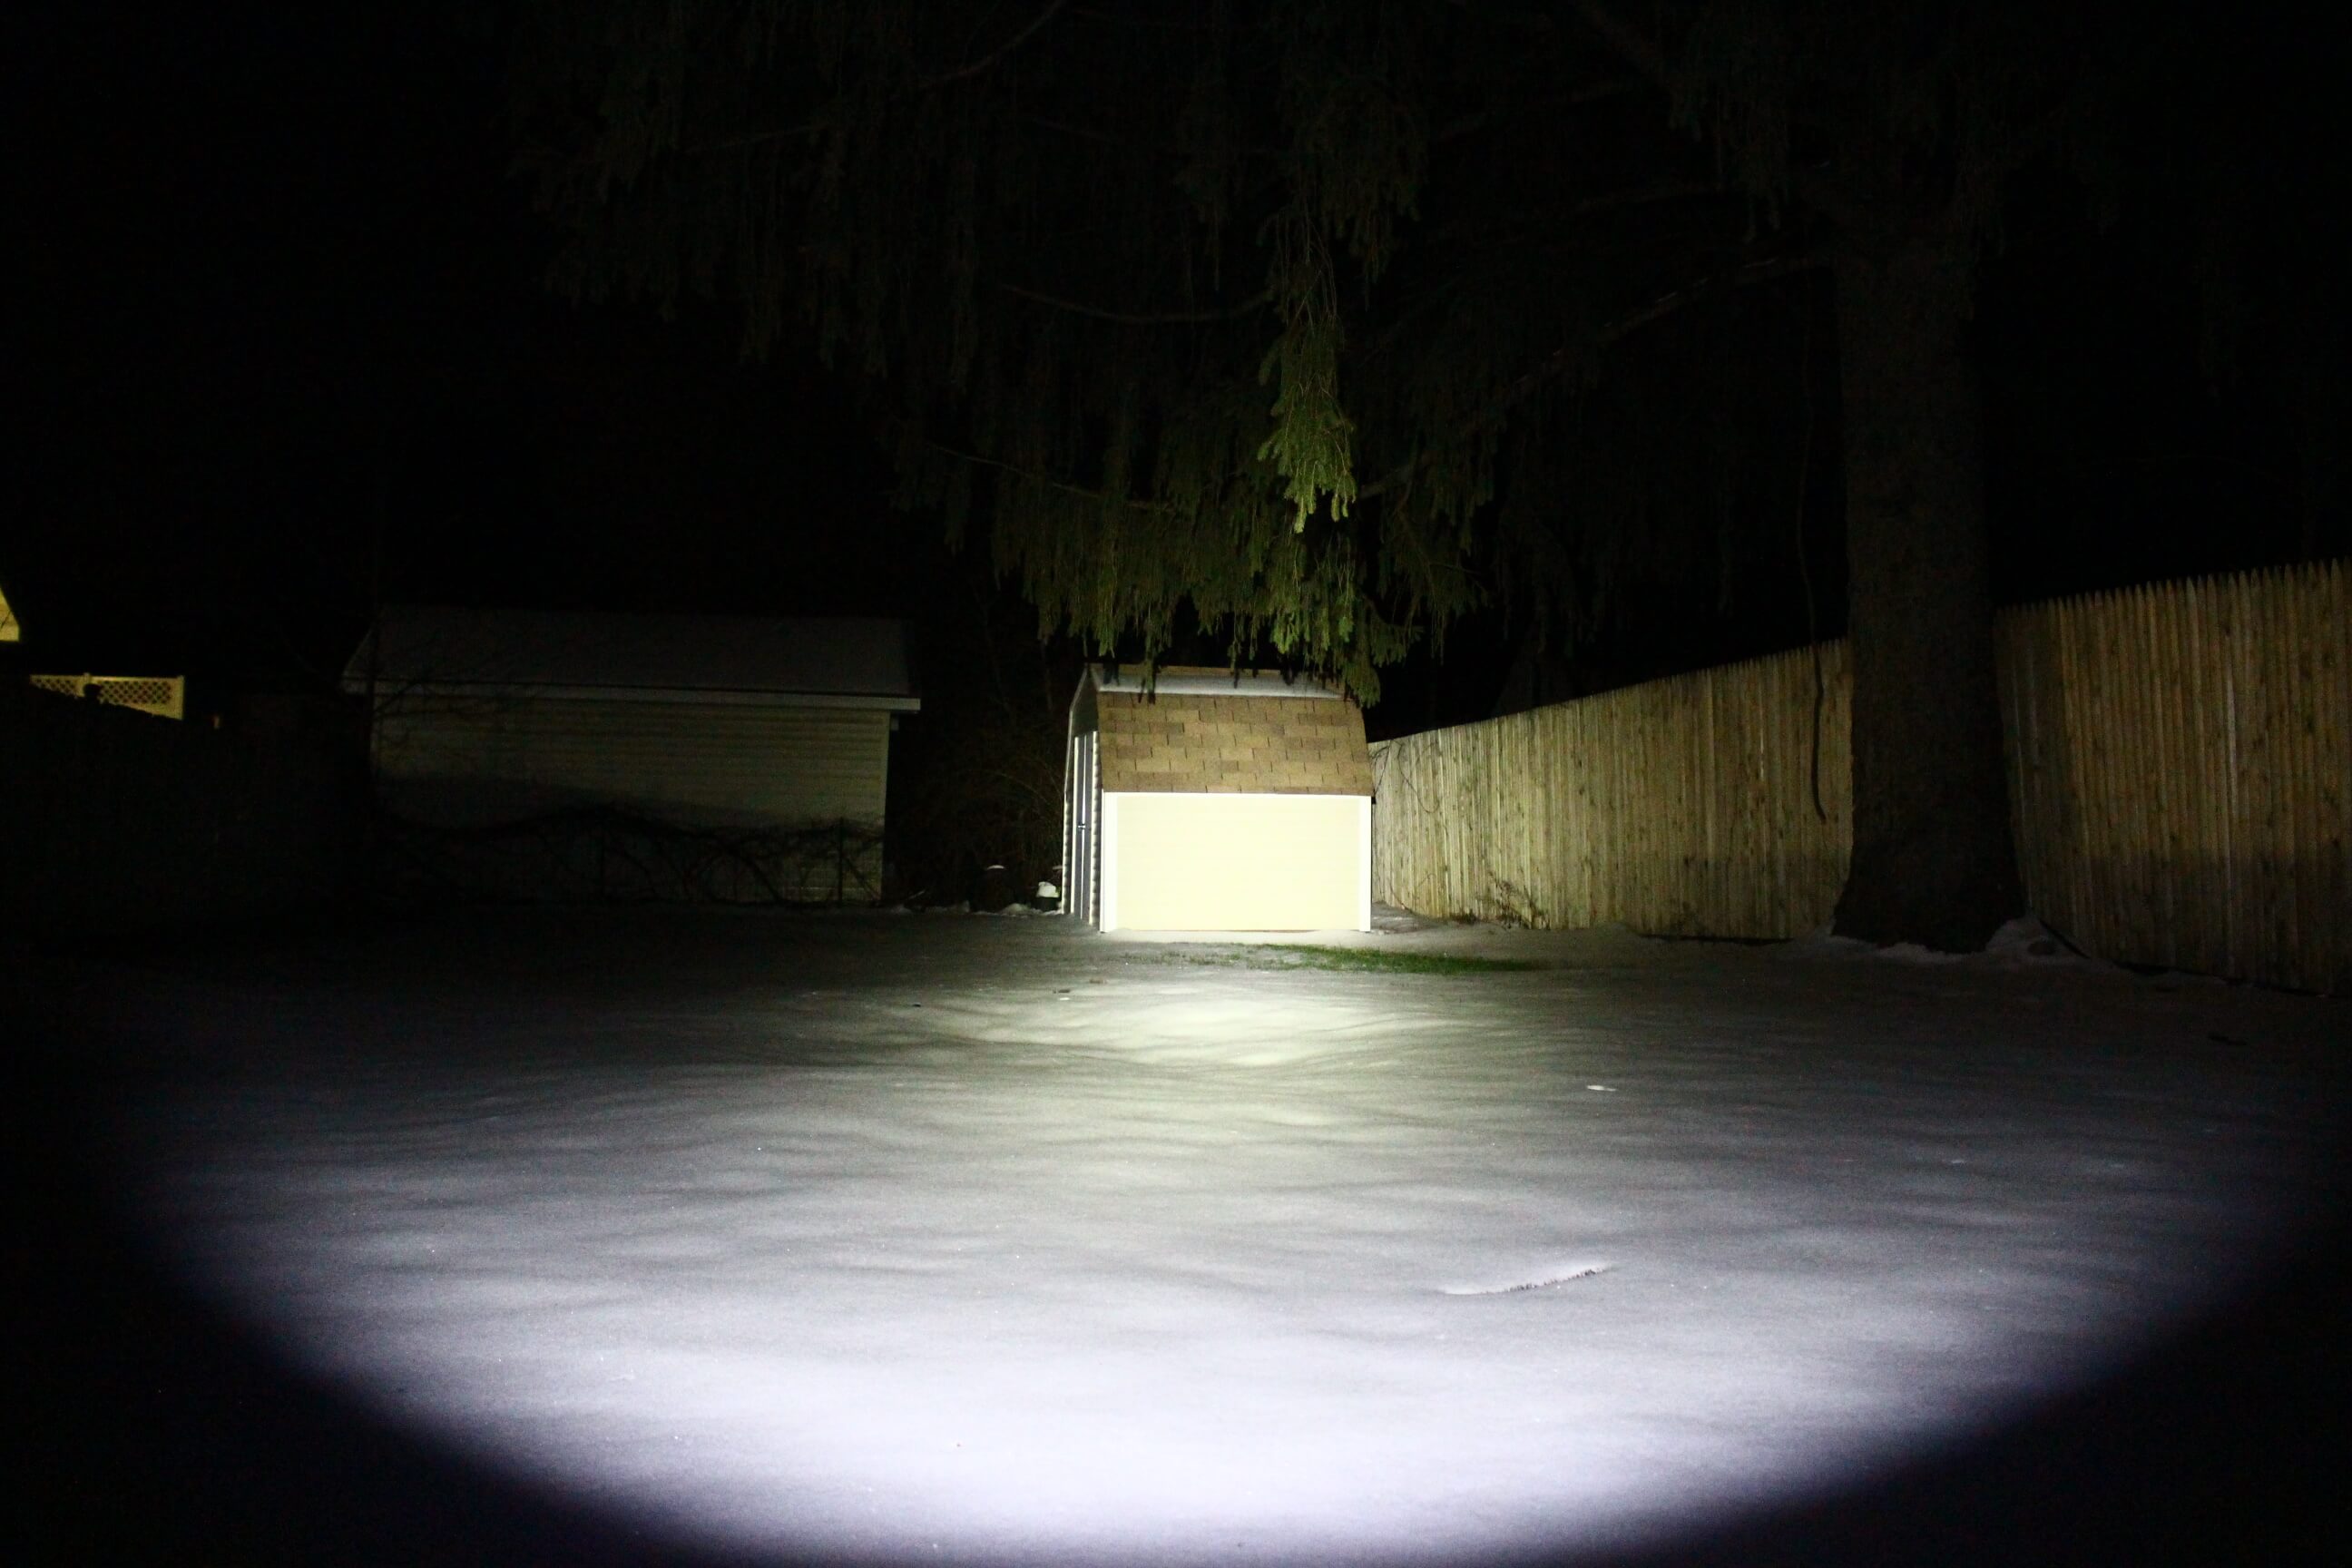
Turbo – across road
Standard Operating Procedure
Most one-switch LED flashlights these days, operate in the same manor. The Manker U11 is no exception.
To turn it on in any basic mode, press and HOLD the switch.
To advance to the next output level, give the switch a quick press. Each similar press to follow will continue cycling though all the regular modes from low to turbo.
The last mode you used is memorized. To activate it, press and hold the switch. Moonlight doesn’t need to be memorized, because it’s the default mode when you short-click the switch.
Moonlight Mode is accessible from the OFF position by pressing the switch in the same way you would advance the modes; one short press. Continuing from moonlight will cycle as I’ve already described.
Strobe, SOS, breath-flash, etc… are hidden and not accessible until you DOUBLE-CLICK the switch from any regular lighting mode.
Battery Voltage Indicator which causes the beam of the light to flash once for every 25% of overall voltage. For instance if the battery were at 50% power, it would flash twice. When the battery drops to 20% full (or less) the blue indicator under the power switch will flicker.
To enter Pro Mode from General Mode; press and HOLD the switch from the OFF position. Allow the light to come on, and wait 10 seconds until it “flashes” three times (and shuts off). You are now in Pro Mode. To switch back, turn the light OFF and repeat the procedure. General Mode will be activated after the light flashes TWICE (and shuts off).
Selection Mode is where you can customize the output of low, medium, high, and turbo. To reach the mode, double-click while the light is on, then cycle through strobe, breathe-flash, SOS, location beacon, turbo, and the voltage indicator. The mode is reached when through careful observation, you’ll notice it repeatedly ramping through three varying levels of low mode. Click the switch when you see the level you want. Once you choose, it’ll step to the next mode, where you repeat the process. This will continue until you’ve chosen the Turbo output.
Not to worry. As this may seem overly complicated…it’s not. After these procedures have been run through two or three times, you’ll be switching back and forth and changing modes like a pro!
As I mentioned in the T01 review, once you set the operating mode that you want, there’s really no need to adjust it again. And what’s great, is that the mode you set…is SET, even through battery changes.
Another function the “breathing” LED serves, is to warn of a low battery. As the voltage gets close to 3.0 the blue LED beneath the switch will pulse. With a protected battery in place, the light will eventually shut off.
The Rechargeable Part
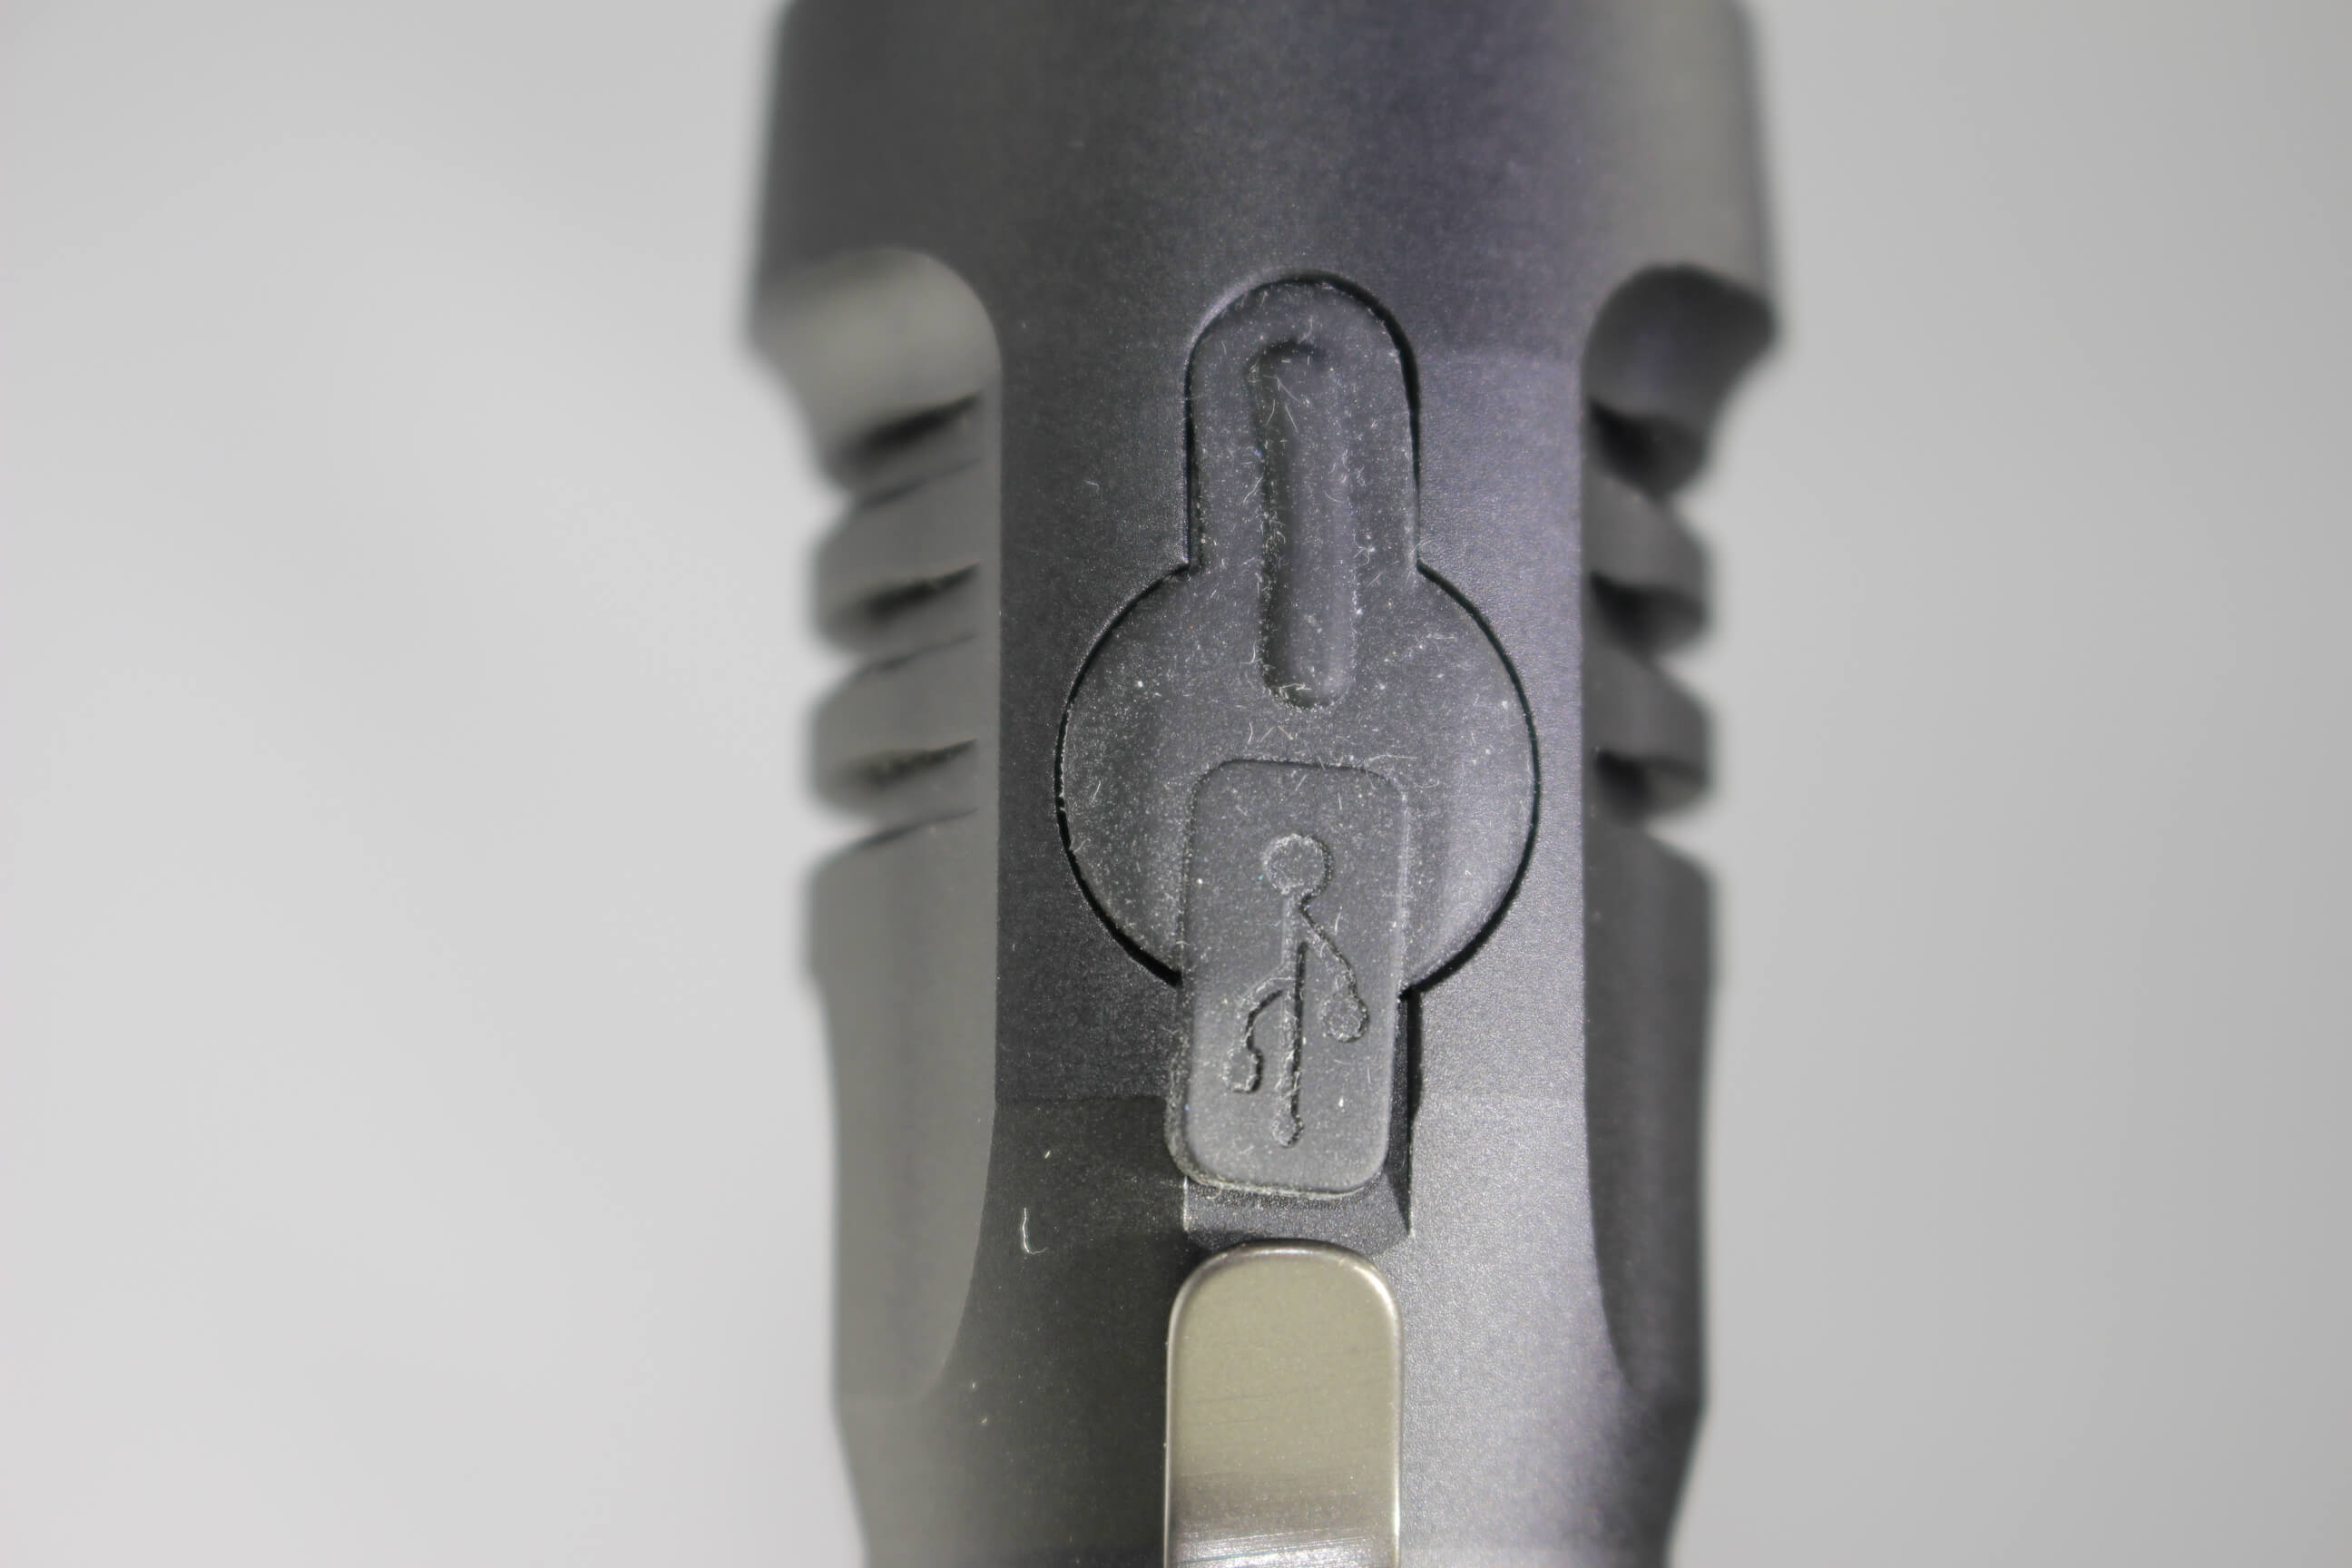
USB port cover

The port is OPEN
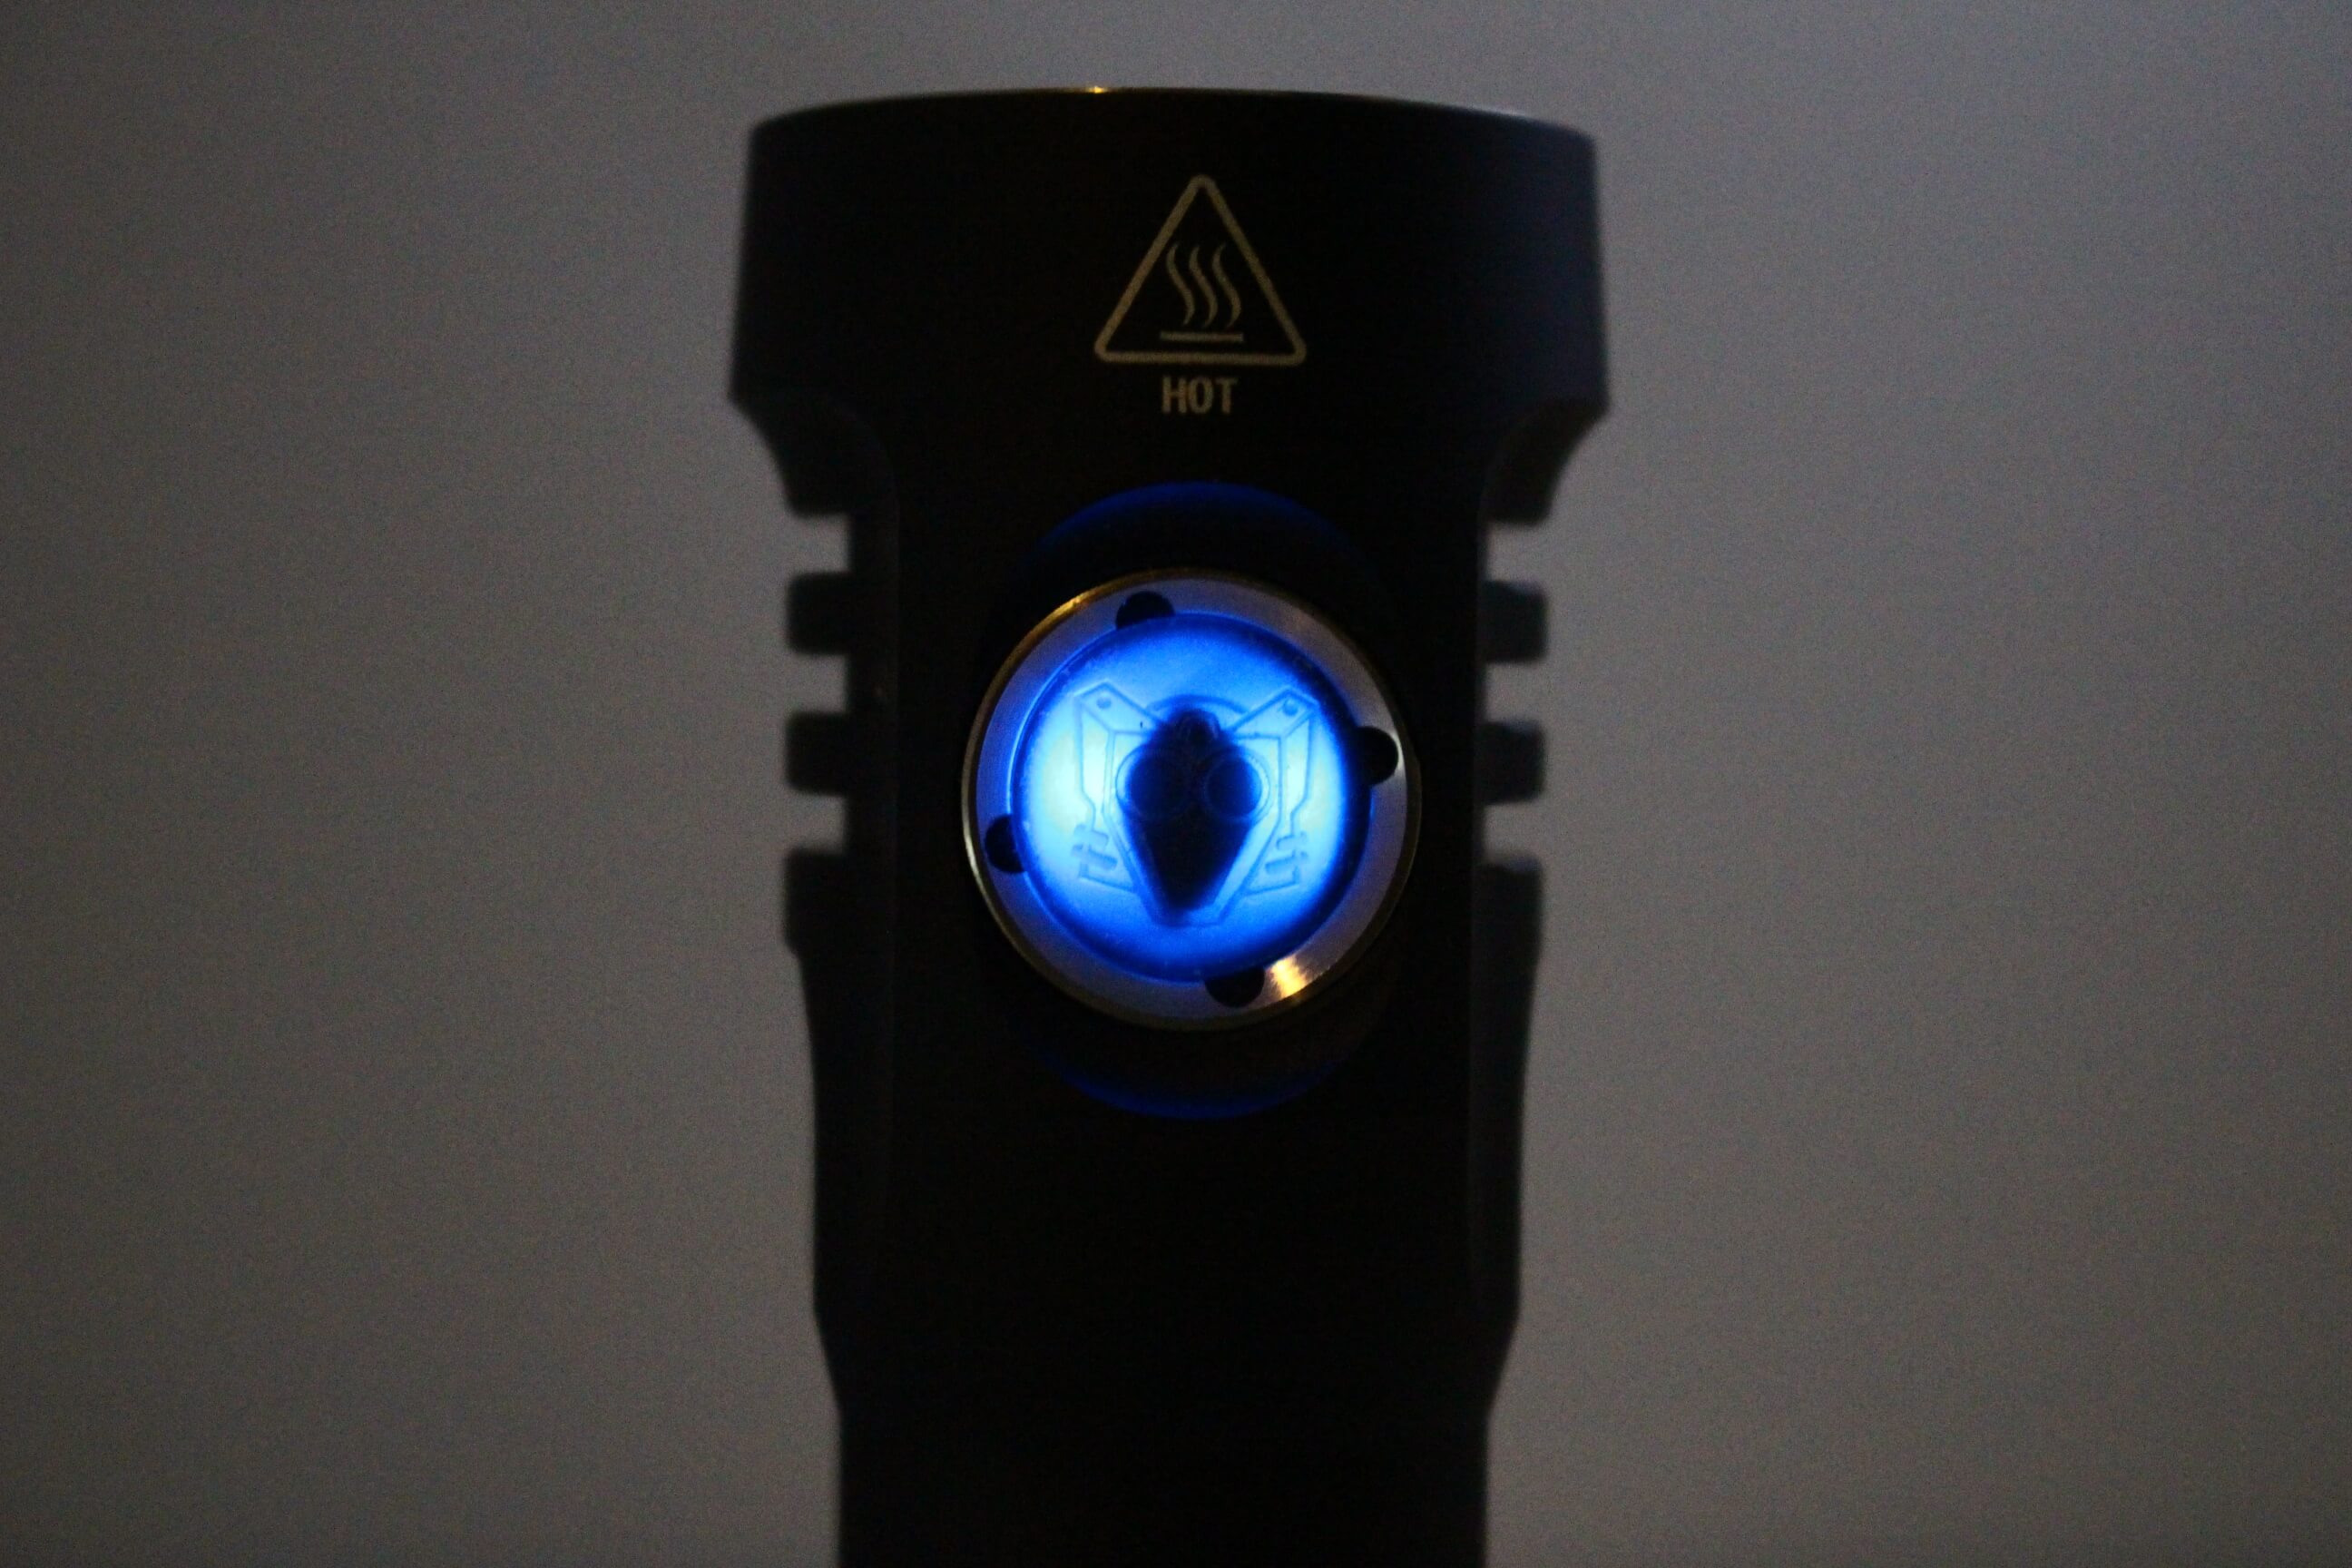
The “Charging Eye”
As eluded to earlier, and as the title of the post suggests, the U11 is 100% rechargeable. The included micro USB cable (although very short) plugs in to the port on the flashlight. Once connected, the blue indicator inside the switch lights up and pulsates. Charging time will vary depending on battery capacity and level of voltage. My testing indicates that the flashlight charges with roughly 430mA. This means if the battery had previously reached its voltage cut-off, you’re looking at a rather lengthy charge time. With USB capability, there’s really no reason to allow it to get that low and charging “on the go” is a convenient option.
Closing Observations
In my opinion the Manker U11 is an excellent entry into the LED flashlight universe.
Functionally, once you get the hang of the user-interface, it’s a snap to use. The pocket clip is sturdy and allows for “deep-pocket” carry.
The modes are spaced well and very useful, and having instant access to moonlight is a plus!
The extra blinky modes could be very useful in an emergency. I would certainly not hesitate to have the U11 accompany me on a camping, fishing or hiking expedition.
The Manker U11 was provided for test and review by my friends at GearBest. Please visit them for a great price!
I also welcome your comments and/or questions regarding this review.
