


A recent review of an Imalent flashlight introduced a new concept in USB charging. Today’s review of the Imalent DM21C, features the same method of charging the battery internally, but does so in a more familiar flashlight size.
The Imalent Presentation
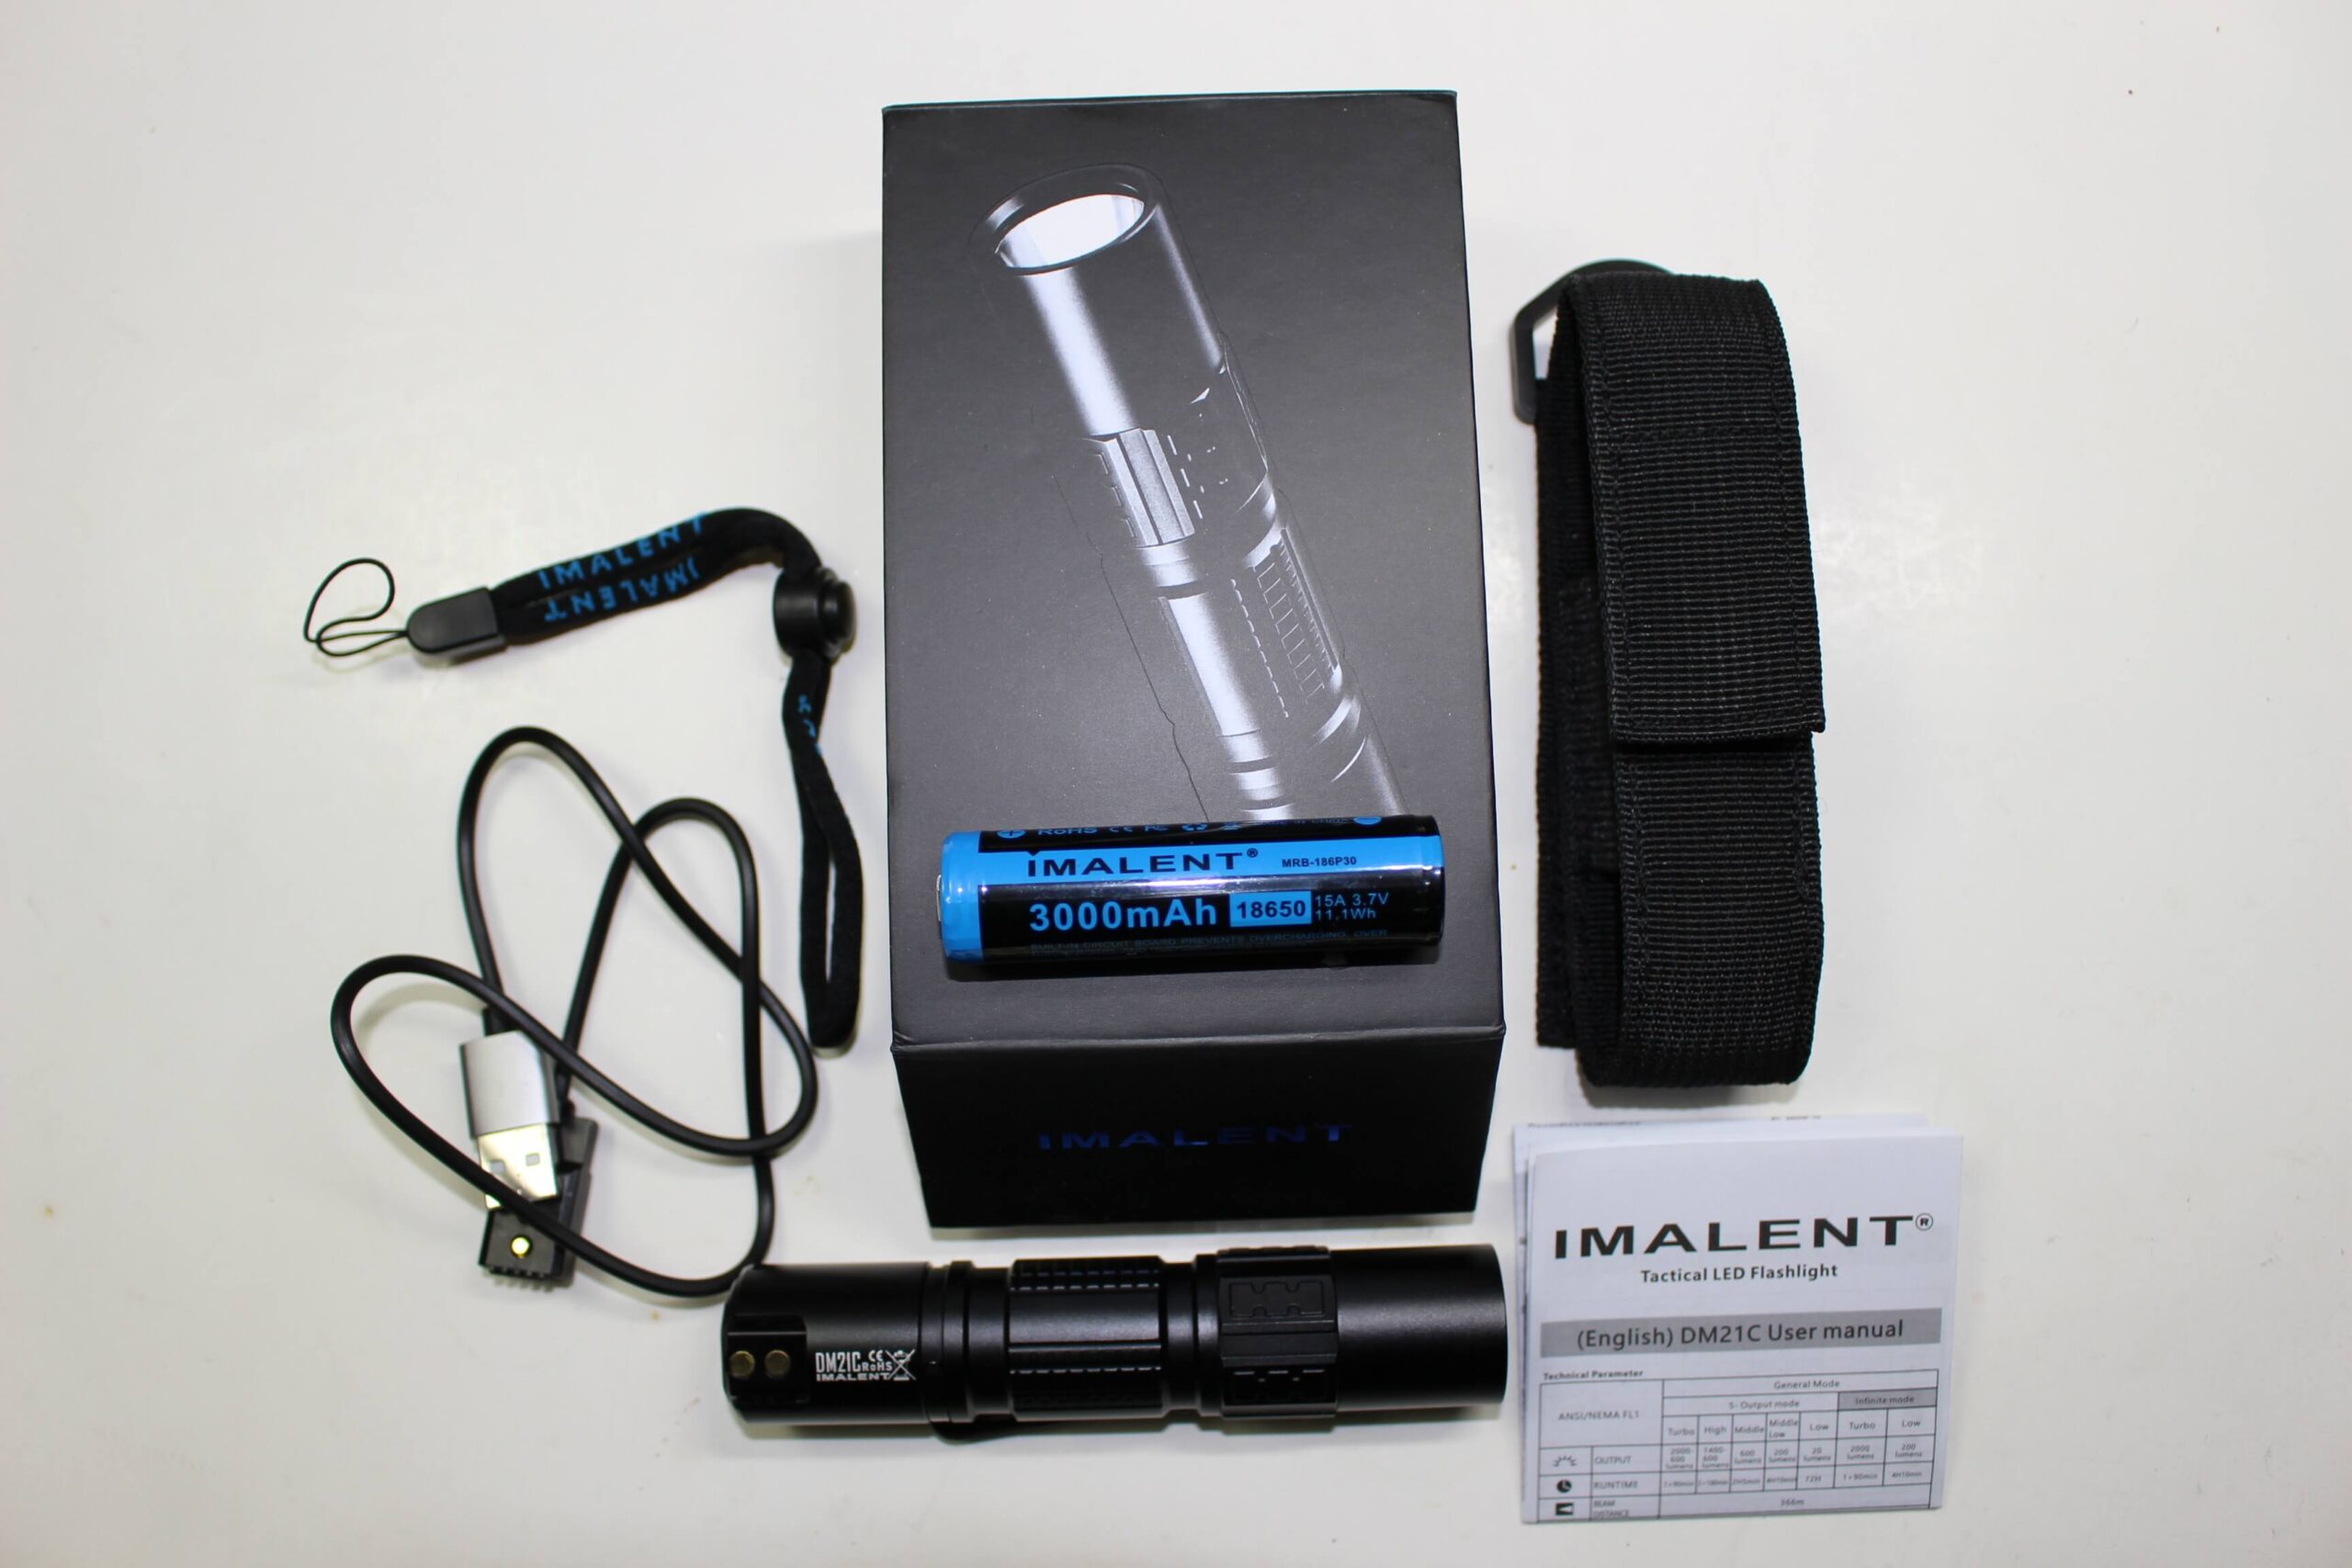
The boxed product reminds me of some that I’ve seen from Olight. In separate sections within the sturdy box, is the DM21C, and a belt holster. Inside the holster is a sealed packet with a lanyard, a pocket clip, a proprietary USB charging cable, and two extra o-rings. Tucked inside the flashlight body, is an Imalent 3000mAh 18650 rechargeable battery.
Specifications
- Length; 4.7″
- Weight; (w/battery) 4.38oz
- Battery; (1) 3.7v 18650 (included)
- LED; CREE XHP35 HI
- Maximum Output 2000 lumens
- Lens; AR coated toughened ultra-clear mineral glass
- Smooth reflector
- Aerospace-grade, TypeIII hard anodized, aluminum alloy body
- Beam Distance; 366 meters
- Impact Resistant; 1.5 meters
- Waterproof; IPX-8 (2 meters underwater)
Important Features
- Mode Memory
- USB rechargeable
- Lock Out Mode
- Multifunctional OLED Display (w/battery voltage read out)
- High efficiency constant current circuit
- Thermal Temperature Control
- Two operating interfaces
Modes and Output
There are five regular modes, plus Strobe.
- Low; 20 lumens*
- Middle-low; 200 lumens
- Medium; 600 lumens
- High; 1400 lumens
- Turbo; 2000 lumens*
- Strobe*
For runtimes, low is supposed to yield around 72 hrs. Meanwhile turbo goes for about 1 minute before kicking down to medium. High is timed for 2 minutes, before lowering to medium.
* these modes are hidden; see below.
Operating the Imalent DM21C
As noted near the tail, the battery is inserted positive end UP. I’ll discuss battery issues later in the review, but what should be known is that when the tailcap is tightened, it might be necessary to twist it back and forth at its tightest point until a connection is made. You’ll know it’s connected when “IMALENT” appears in the OLED display!
There are two textured (rubber) switches on the tail of the light. One is for ‘power’, the other changes the modes.
Press ‘power’ initially. The light will come on and the display will show “200LM”. At this point you can advance the modes in two ways. By pressing ‘power’ they will change incrementally; middle-low>medium>high. The other option is to press and HOLD ‘mode’ and the output will ramp from 200 to 1400, and back down again. You can alternate between ‘ramp & step’ at ANY time. Press ‘power’ to turn it off completely.
During this process, the display will visually track the output (lumens) increasing and decreasing. You can obviously stop at any time as well, but if you want to continue ramping it won’t reverse until it reaches the next limit. If it’s going up, it’ll continue in that direction…and vise versa.
Also be aware that if you turn it on, and ‘ramp’ to the output of your choice, then PRESS the mode switch again, it will automatically shoot to 1400 lumens. If you’d prefer to continue ramping, then press and HOLD.
It has mode memory, but it seems to be a bit of a crap-shoot. Most times if I switch it off (and on again) from whatever level it happens to be at, it’ll revert to ‘200’. At times it HAS turned on again, at the same level it was at when switched off. But regrettably, there seems to be no particular pattern.
Hidden Modes
- Low (20 lumens) can only be activated by triple-clicking the ‘power’ switch from OFF
- Turbo is reached by double-clicking, from either ON or OFF
- To activate strobe, it must be in turbo first…followed by double-clicking the ‘power’ switch
Lock Out Mode
To lock it from activating accidentally, click the ‘power’ button FOUR times while OFF. The icon of a lock will appear in the display. To un-lock, click four times again.
Beam Views
Charging the Battery
The proprietary charging attachment is included. It works the same way as it does on the Imalent LD10, which I complained about in that review. HOWEVER, on THIS light, for whatever reason, it seems a little more stable.
See the photo for an example of the best way to attach it. The two “stubs” on the business-side of the cable, need to attach to the connectors on the body of the flashlight. Several attempts at connecting it might be necessary before it starts charging….because it’s pretty finicky. Once it does, the white bars will begin “climbing” to illustrate the state of charge. When it’s finished the icon will display full bars, then “black out” within a few seconds. If you see no activity on the display, you can press and HOLD the ‘power’ switch for a visual voltage reading. If it reads over 4 volts, it’s done.
Usually, even right after a charge, activating the light on ‘middle-low’ will display the voltage close to 3.95. This is of course “under load” which is why it may seem a bit low considering it’s fully charged.
Checking Battery Voltage
As I mentioned in the previous paragraph, battery voltage can be checked anytime (whether the DM21C is on or off) by giving the power switch a holding press.
A battery icon in the display will blink eight times every thirty seconds, when voltage dips below 3.1
Imalent DM21C; The Pros and Cons
The pros on the DM21C outnumber the cons. So let me try to separate them out.
- I like the OLED display, it’s convenient and east to read
- LOVE the ability to either ‘step’ or ‘ramp’ — to change output
- The flashlight is a good size
- Very easy to take along as an EDC light
- Even on low levels, it’s quite bright, due to the “high intensity” LED
- Excellent build quality
- It tail-stands if the surface is level, and you’re not impatient about it
So, what’s NOT so great?
- Tightening the cap
Once the battery is in, and you go to tighten the cap, it gets to the point where it can’t tighten any further, BUT, it’s not making contact so the display can activate. Best practice is to have the display facing you, so you can see when contact is made…since the display turns off after three seconds. So, it may be necessary to loosen and RE-tighten (to the point of highest resistance) two or three times!
- Battery acceptance
The best battery to use is the one that comes with the light. And as long as you plan to do that, the light is happy. If you plan to use a rotating set of cells, you’re likely to find that it may not eagerly accept other brands. It’s battery LENGTH that’s the issue. It WILL NOT accept flat-top (or even those with a slightly raised positive tip). Unprotected “IMR’s” will rattle enough to entertain a toddler! But, batteries that are even a millimeter longer than the included one, won’t make contact with the cap.
- No voltage limit given
The manual fails to give the “working voltage”, so we can only assume that it can’t accept any voltage above 4.2 This means NO alternative battery sizes…such as CR123’s or 16340. I’d be willing to try them, if I wasn’t afraid of blowing up the LED or driver! Besides, given the fussiness of the light, with regards to battery length, it probably wouldn’t work with two small size cells anyway. So don’t even try it!!
- Limited use of Turbo
It’s not unusual that turbo generates a lot of heat. So therefore it’s not unusual that there’s a timed drop in output after roughly ‘one minute’ before turbo becomes ‘medium’. But what might seem unfair, is that depending on the battery, you won’t get much use from turbo once the voltage drops below 3.9! This will vary, and might go as low as 3.8 But suffice to say, voltage will drop quickly, and you need it to be HIGH in order to support the high output.
One thing to note. The difference in output between ‘high’ and ‘turbo’ (especially outside) is not terribly noticeable, so if you want really bright light, ‘high’ will get you slightly longer runtime, and a lower voltage reading.
- Switching in the dark
Here’s the issue. When you’re in complete darkness, the switches are very hard to distinguish. Even though they’re different in shape and size, it’s hard to know which is which, and the display doesn’t work unless it’s on.
Recommendation
Taking everything into account, the DM21C is still a good light, if, that is, you can work around a few minor inconveniences.
While it’s possible that the DM21C might not be currently available, I invite you to check out a few of their other models at Banggood.com!
They lost me at proprietary charging cable. 🙁
Striving to be unique by doing things a little different. To each his own.