


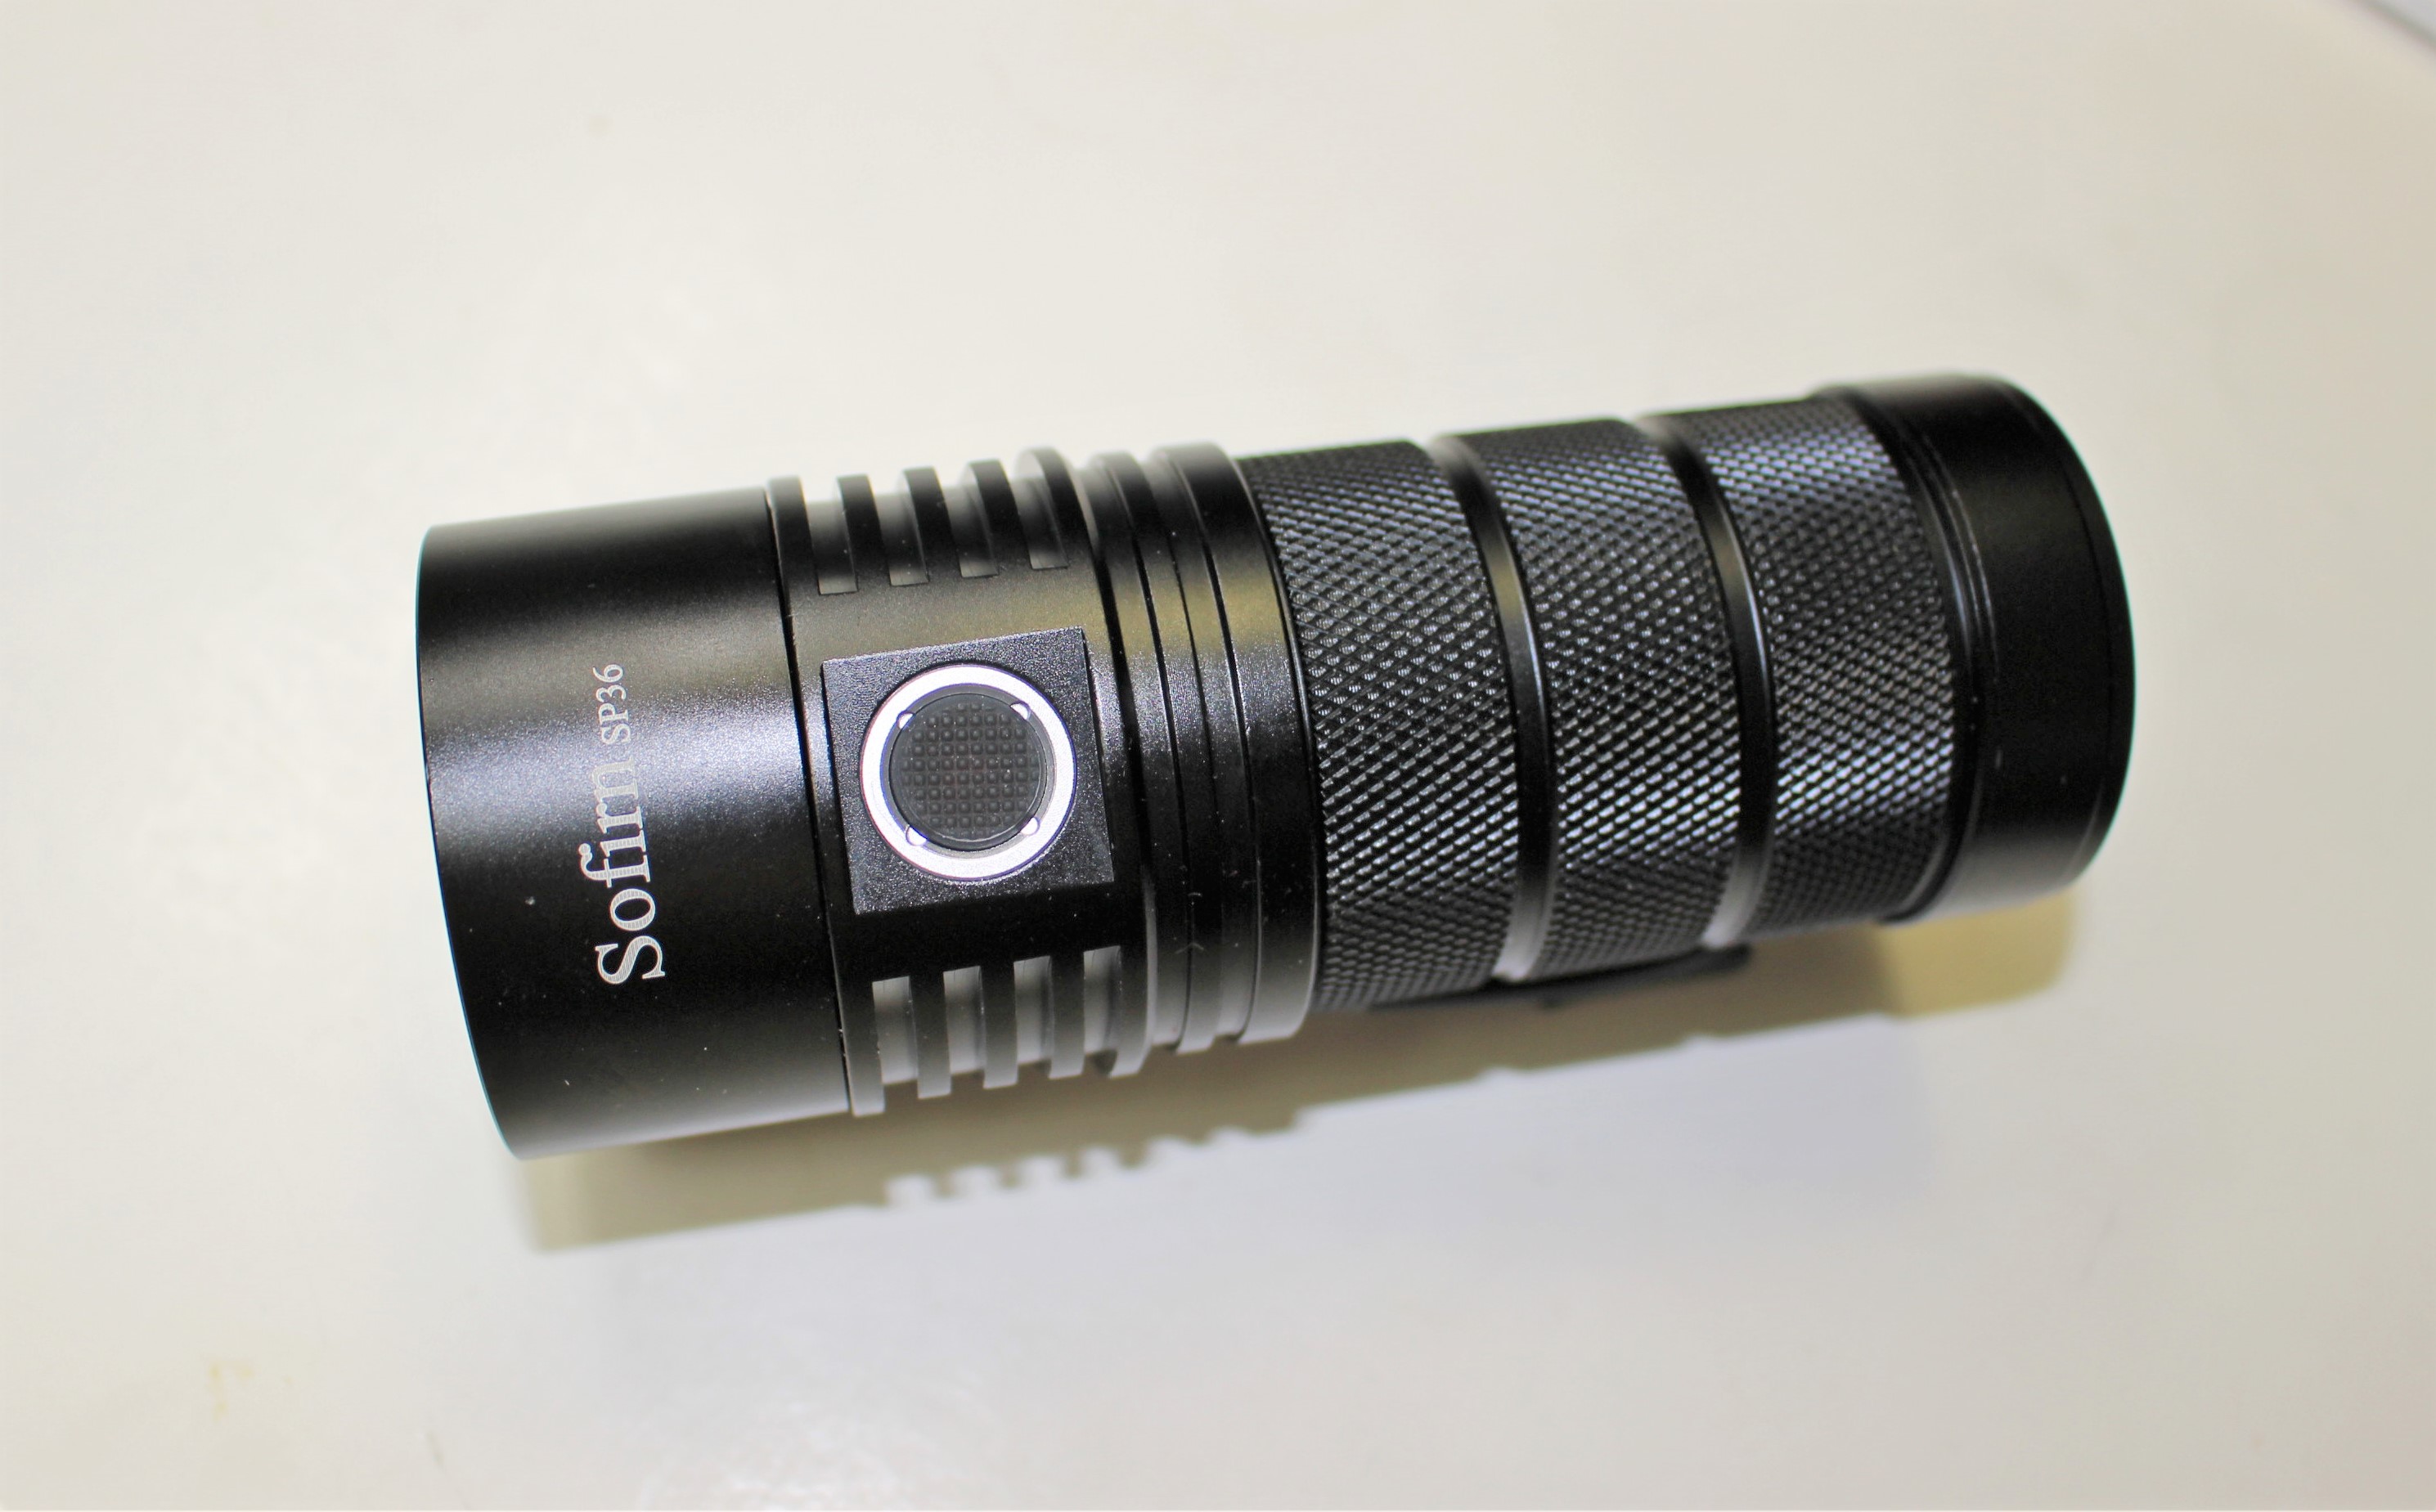
Working in conjunction with Budget Light Forum, the Sofirn SP36, is an incredibly bright, user-defined flashlight which features NarsilM, V1.2 firmware, which can be configured to the user’s personal preferences. How does that work you might ask? Read on!
Flashlight and Accessories
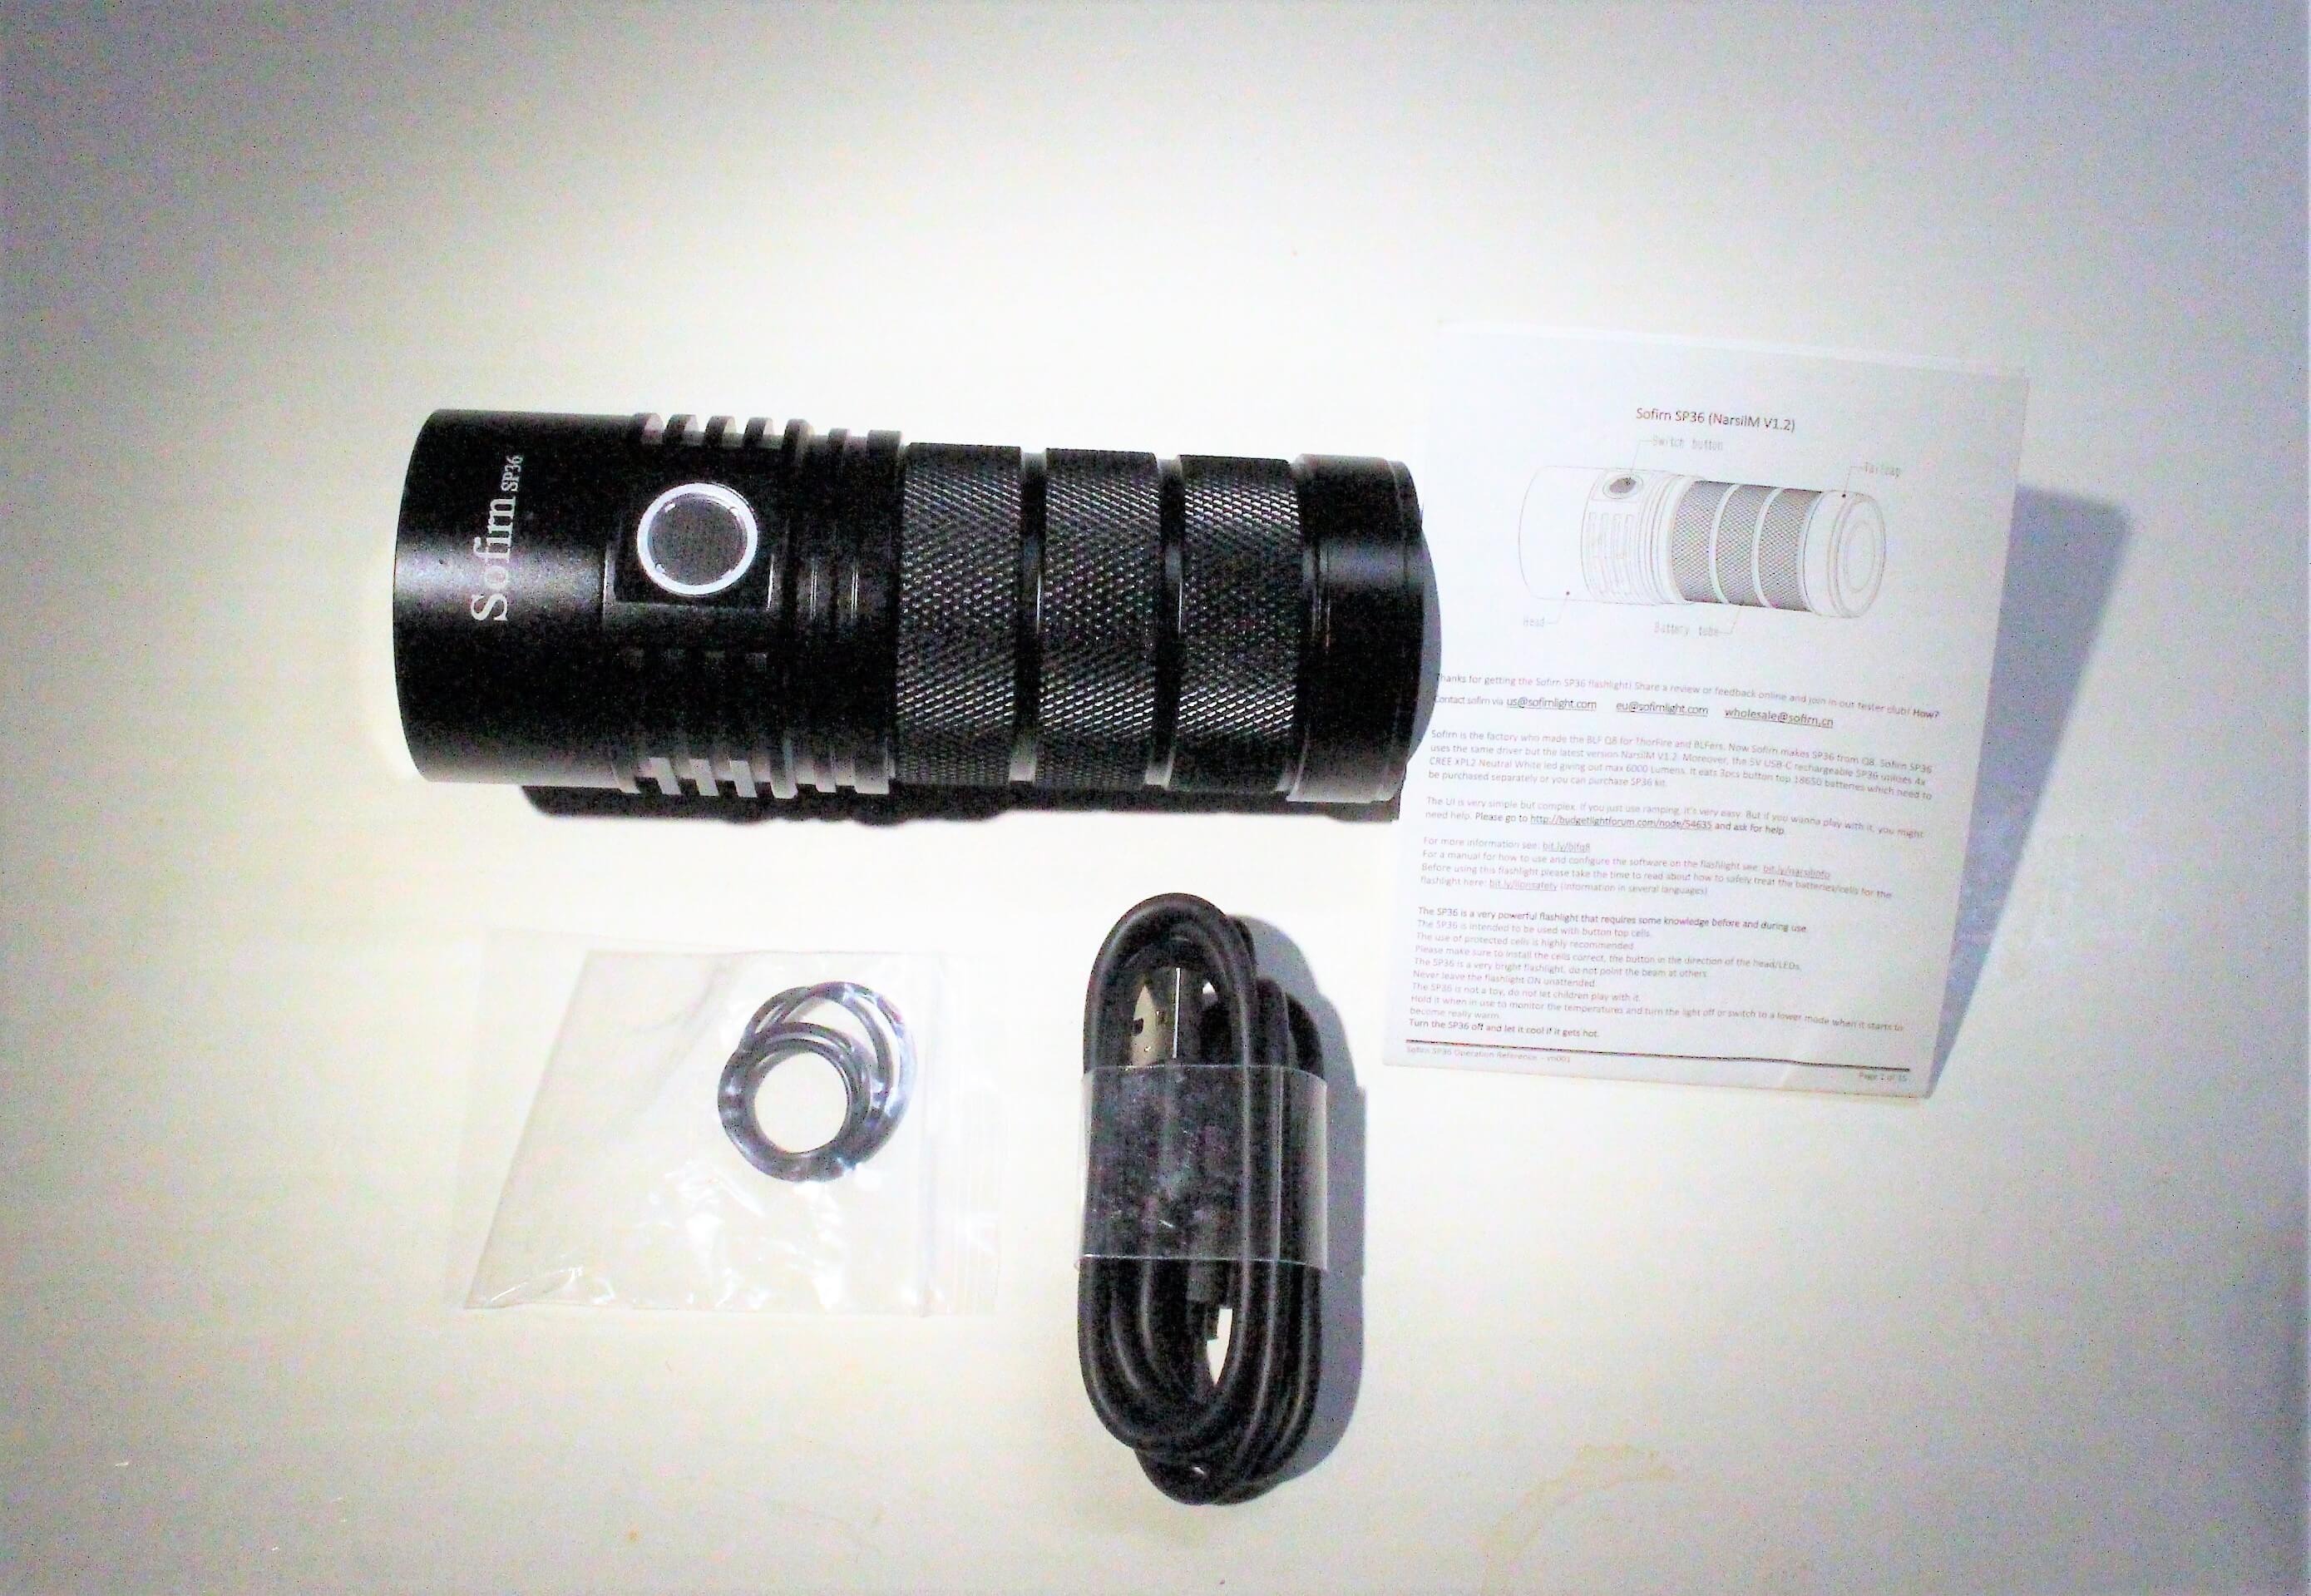
I didn’t include the box in the photo, since it’s just plain, brown, and has no printed markings. But as you can see, the accessories include the manual, some o-rings, and a USB charging cable.
Specifications
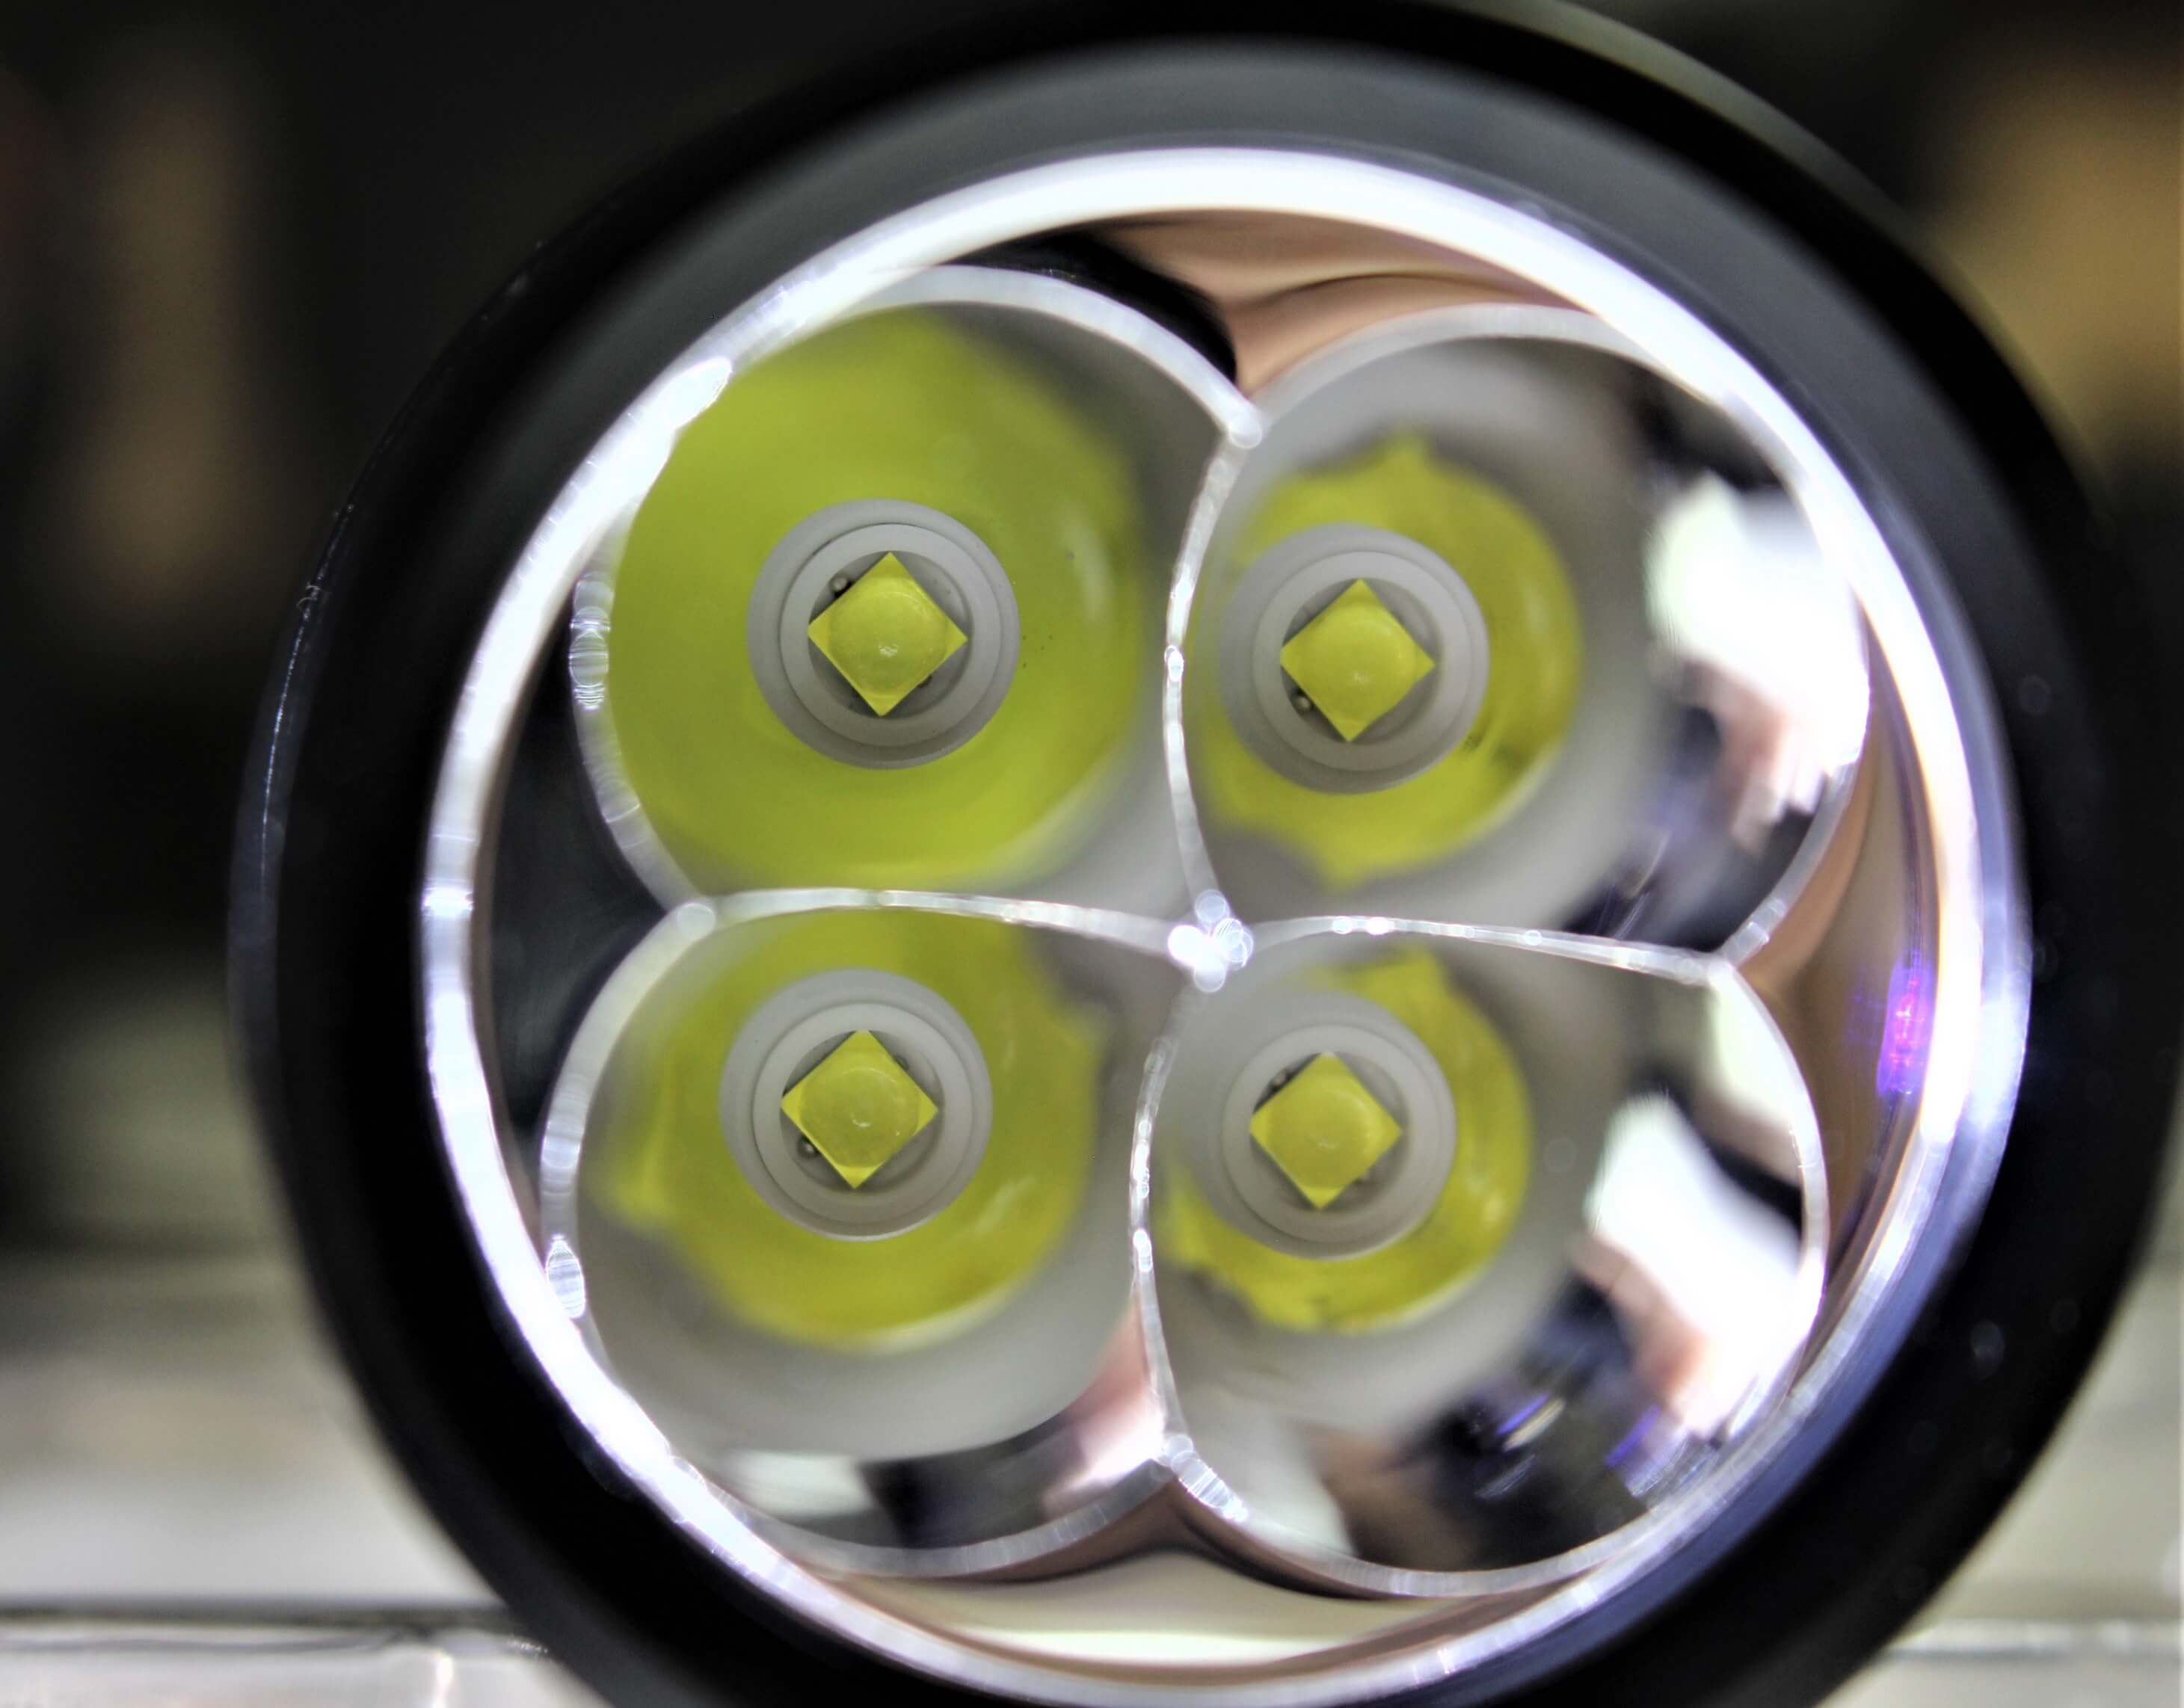
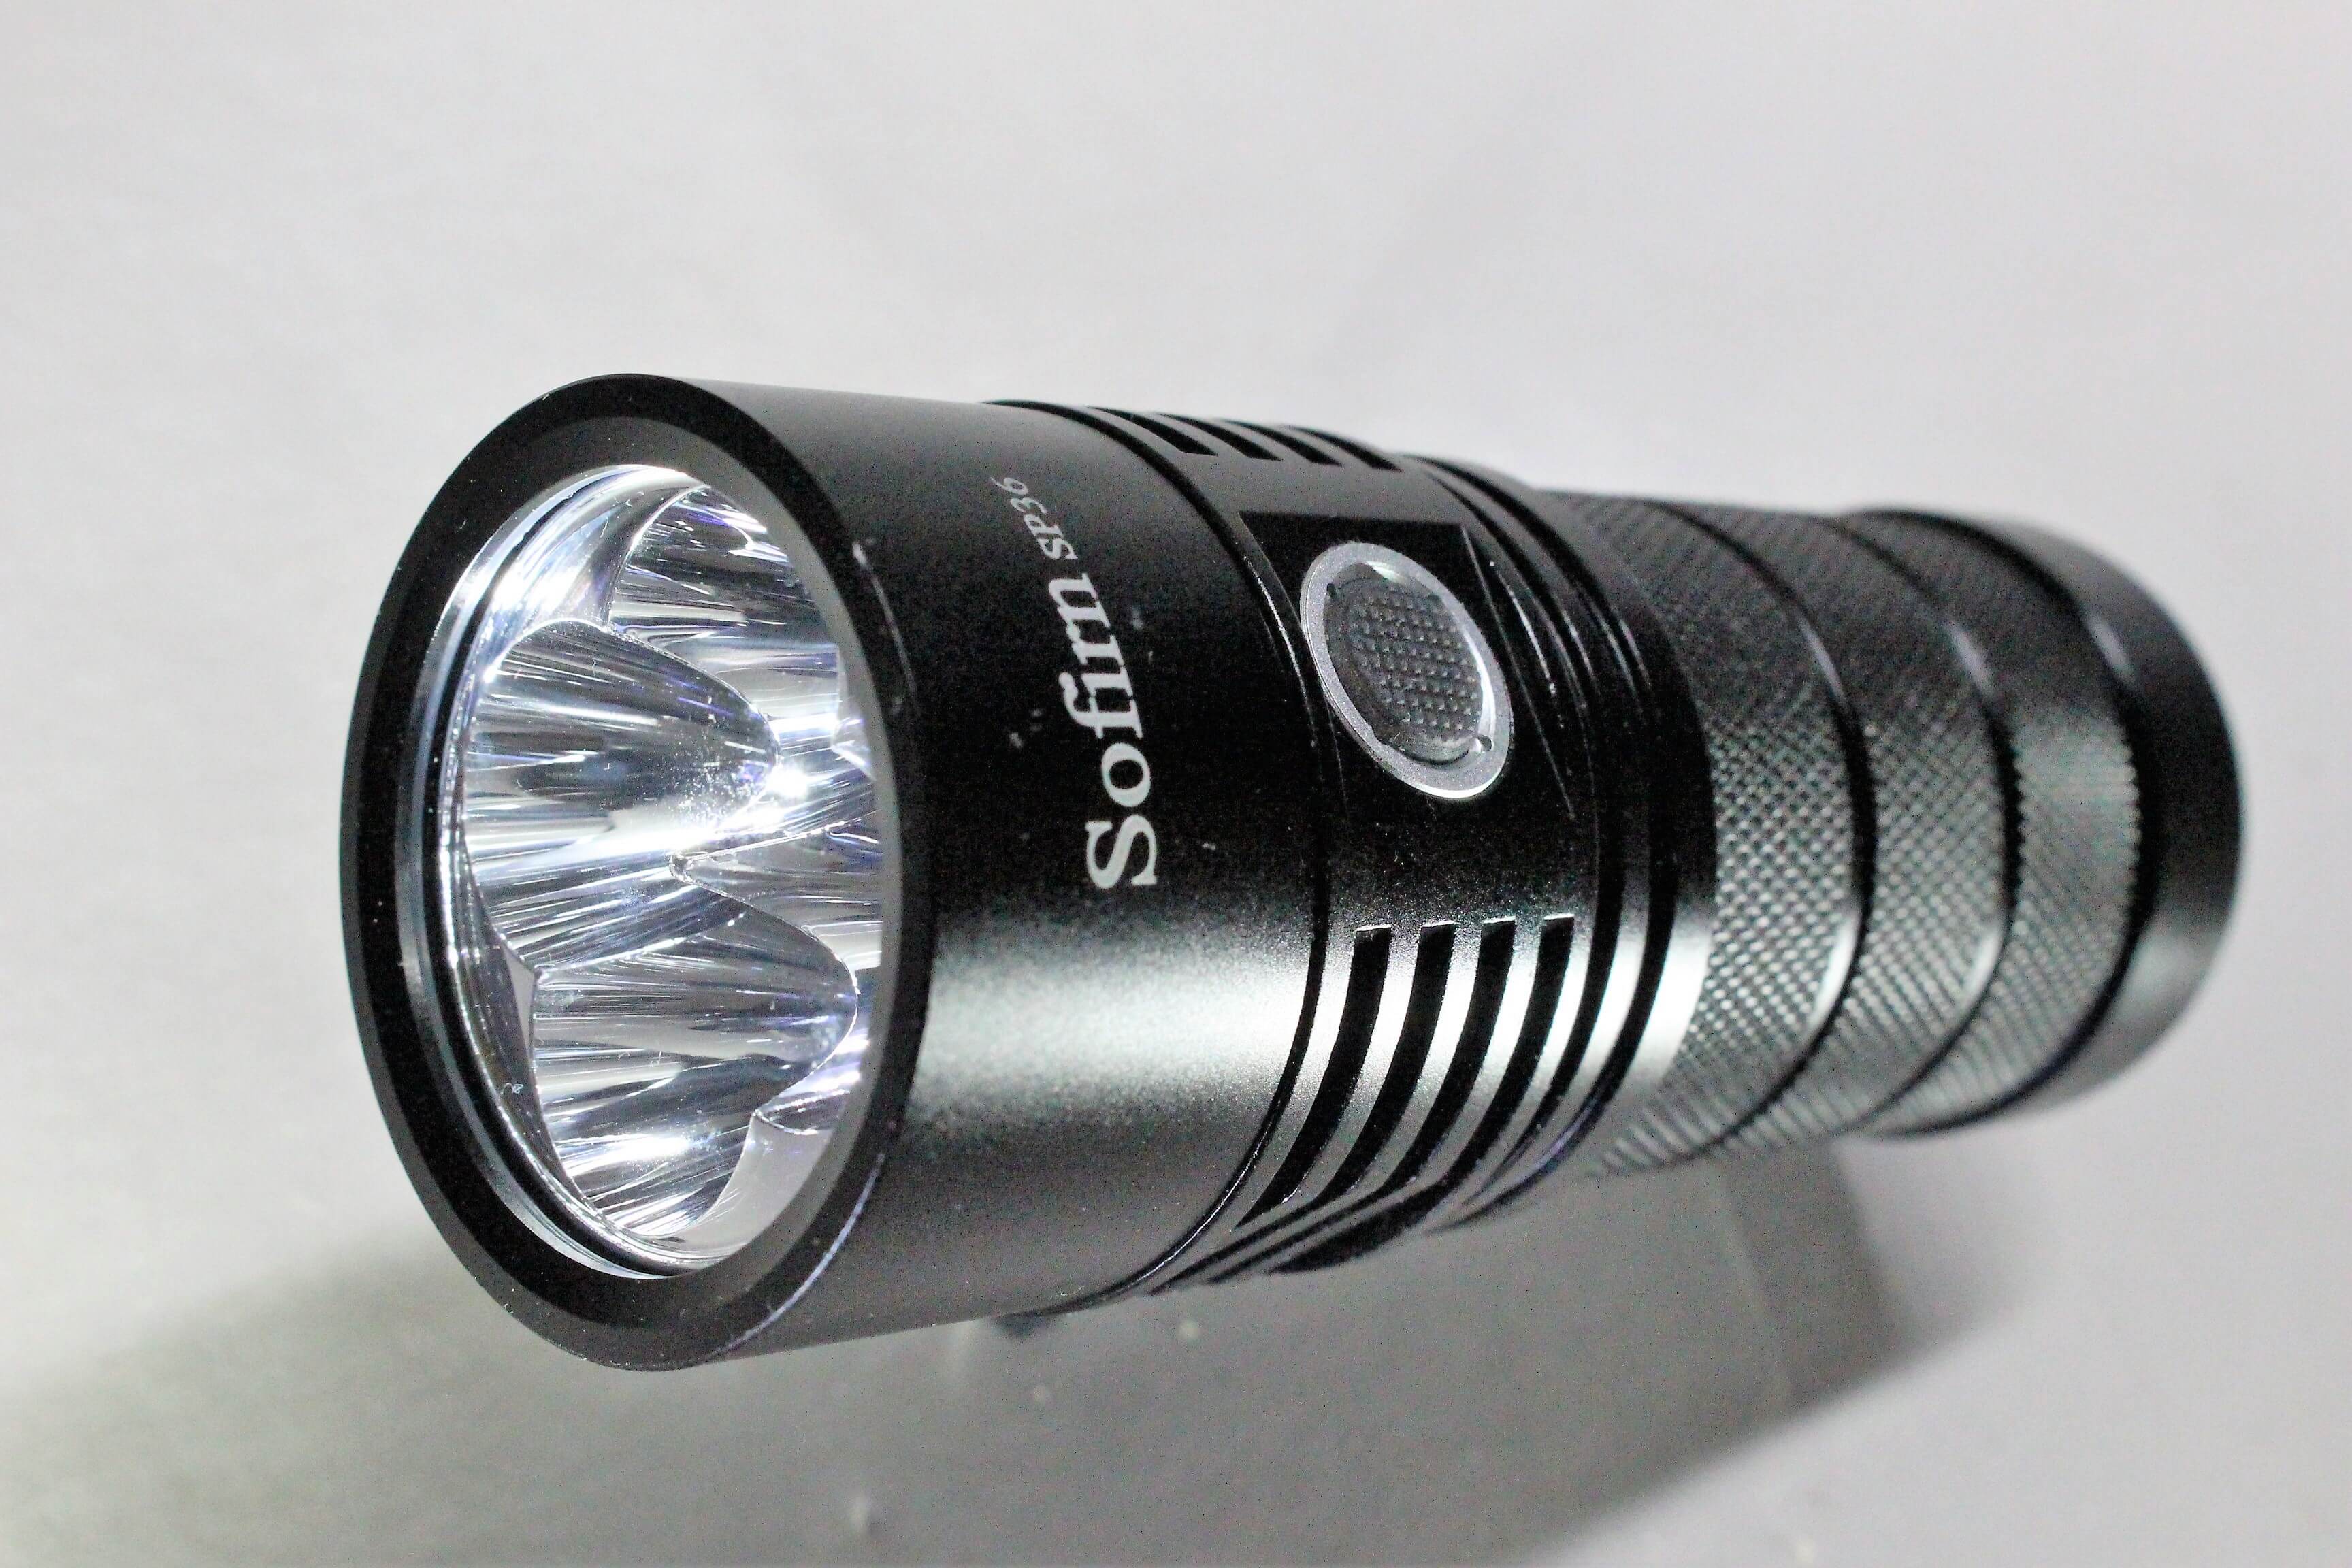
The XP-L2 LED’s
- Length; 4.9″
- Width; 1.9″ (head) 1.7″ (tube)
- Weight; 15.49 ounces (including batteries)
- LED’s; 4 XP-L2
- Waterproof; IPX-7 (underwater to 1 meter)
- Impact Resistant; 1 meter
- Output; 1 lumen to 6000
- NarsilM V1.2 firmware
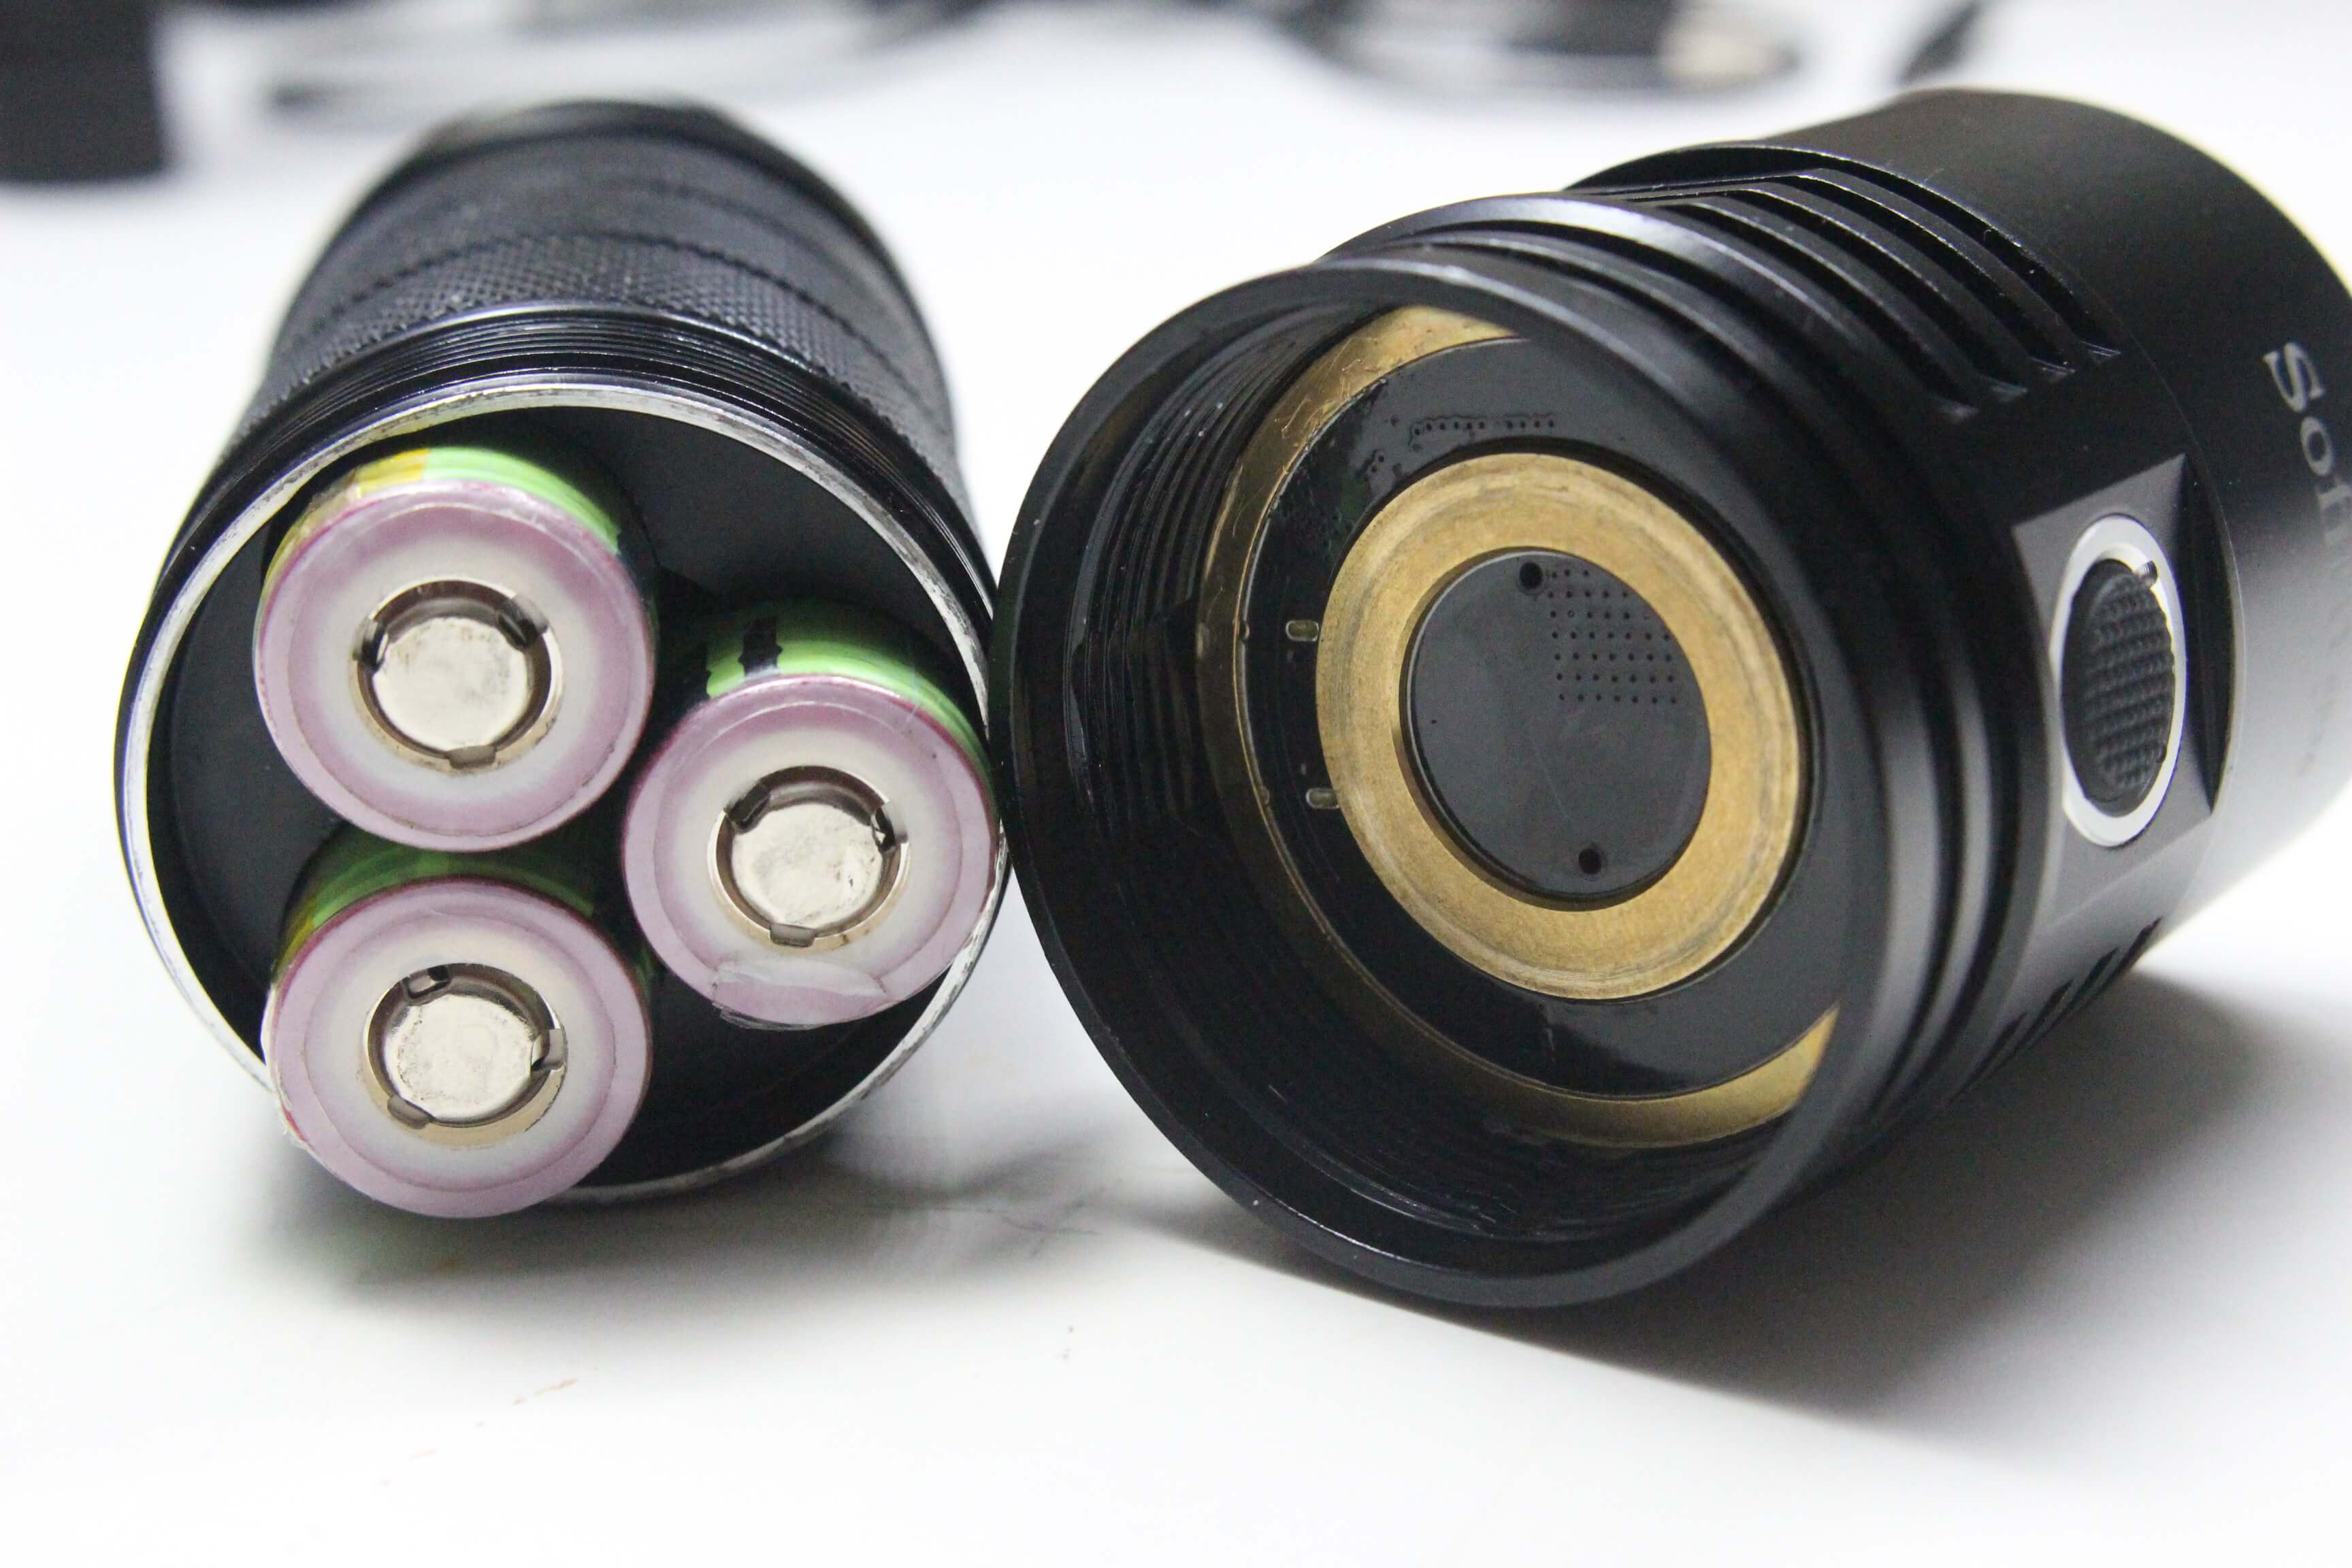
- Operates on FOUR 18650 batteries (button-top suggested)
Sofirn Sp36 Features
- USB Rechargeable (type C connector included)
- Tempered Glass Lens
- Hard anodized aluminum alloy body
- Two separate user-interfaces
- Mode memory
- Battery voltage counter
- Lock-out mode
Operating Choices 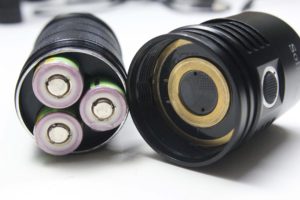
When you first turn the Sofirn SP36 on, the default ramping UI is what you get. But depending on either how curious, or adventurous you are, you might want to switch over to “mode set” and check out the offerings.
Ramping mode couldn’t be easier to navigate. Just press and hold the switch, and watch the output get brighter and/or dimmer. It’ll do a slight blink when it reaches turbo, and if you leave it on that level for more than a minute, you’ll notice it starting to get very warm. By default, a timed step-down is set at three minutes. But… you can change that, or disable it completely!!
Ramping allows you to change the direction of the ramp at will….unless you pause (after release the button) for more than 1.2 seconds. Pausing will cause the ramp to continue in the same direction.
Special Modes
Within each operating interface, are the emergency modes, and a couple of other neat little tricks. Here’s a rundown of what’s available.
When Set to “Ramping”
- From OFF, press and hold for instant “moonlight” (release after 1 second, or it will continue ramping)
- DOUBLE-click from OFF, to get instant “turbo” mode
- TRIPLE-click from OFF, to engage “battery check” mode… where it “blinks” the voltage
- QUADRUPLE-click from OFF (or on) to engage “lock-out” mode
- *DOUBLE-click (from “turbo”) to activate Strobe
*From Strobe, the other three flashing modes (bike flash, SOS and beacon) can be reached, but in order to get them, you need to double-click (without pausing) from Strobe. Once you’re locked-in to one of them, a short HOLDING press, will go in REVERSE to the previous one. Strobe can be enabled or disabled at any time. Strobe can also be enabled separately, WITHOUT the other “blinking” modes.
- Whether ON or OFF; Engage TACTICAL strobe by clicking FIVE times. To cancel, loosen and re-tighten the head.
- From Battery Check mode, a DOUBLE-click “blinks” the air temperature! (in Celsius) It’s not factory calibrated, but is surprisingly accurate 🙂
When On “Mode Set”
- From OFF, or any mode, activate Strobe with a holding press.
- To activate Battery Check, (from OFF) perform a single click, then quickly press and HOLD.
- To engage “lock-out”, (from OFF) click TWICE quickly, then perform a HOLDING press. Repeat to unlock.
- Air temperature reading is available from Battery Check mode, the same way as it is in “Ramping”.
Click here for the complete user manual
Please make note the above link is for the BLF Q8, which uses the same software/firmware. So…if you already own the Q8, (and have mastered it) you’re way ahead of the game!
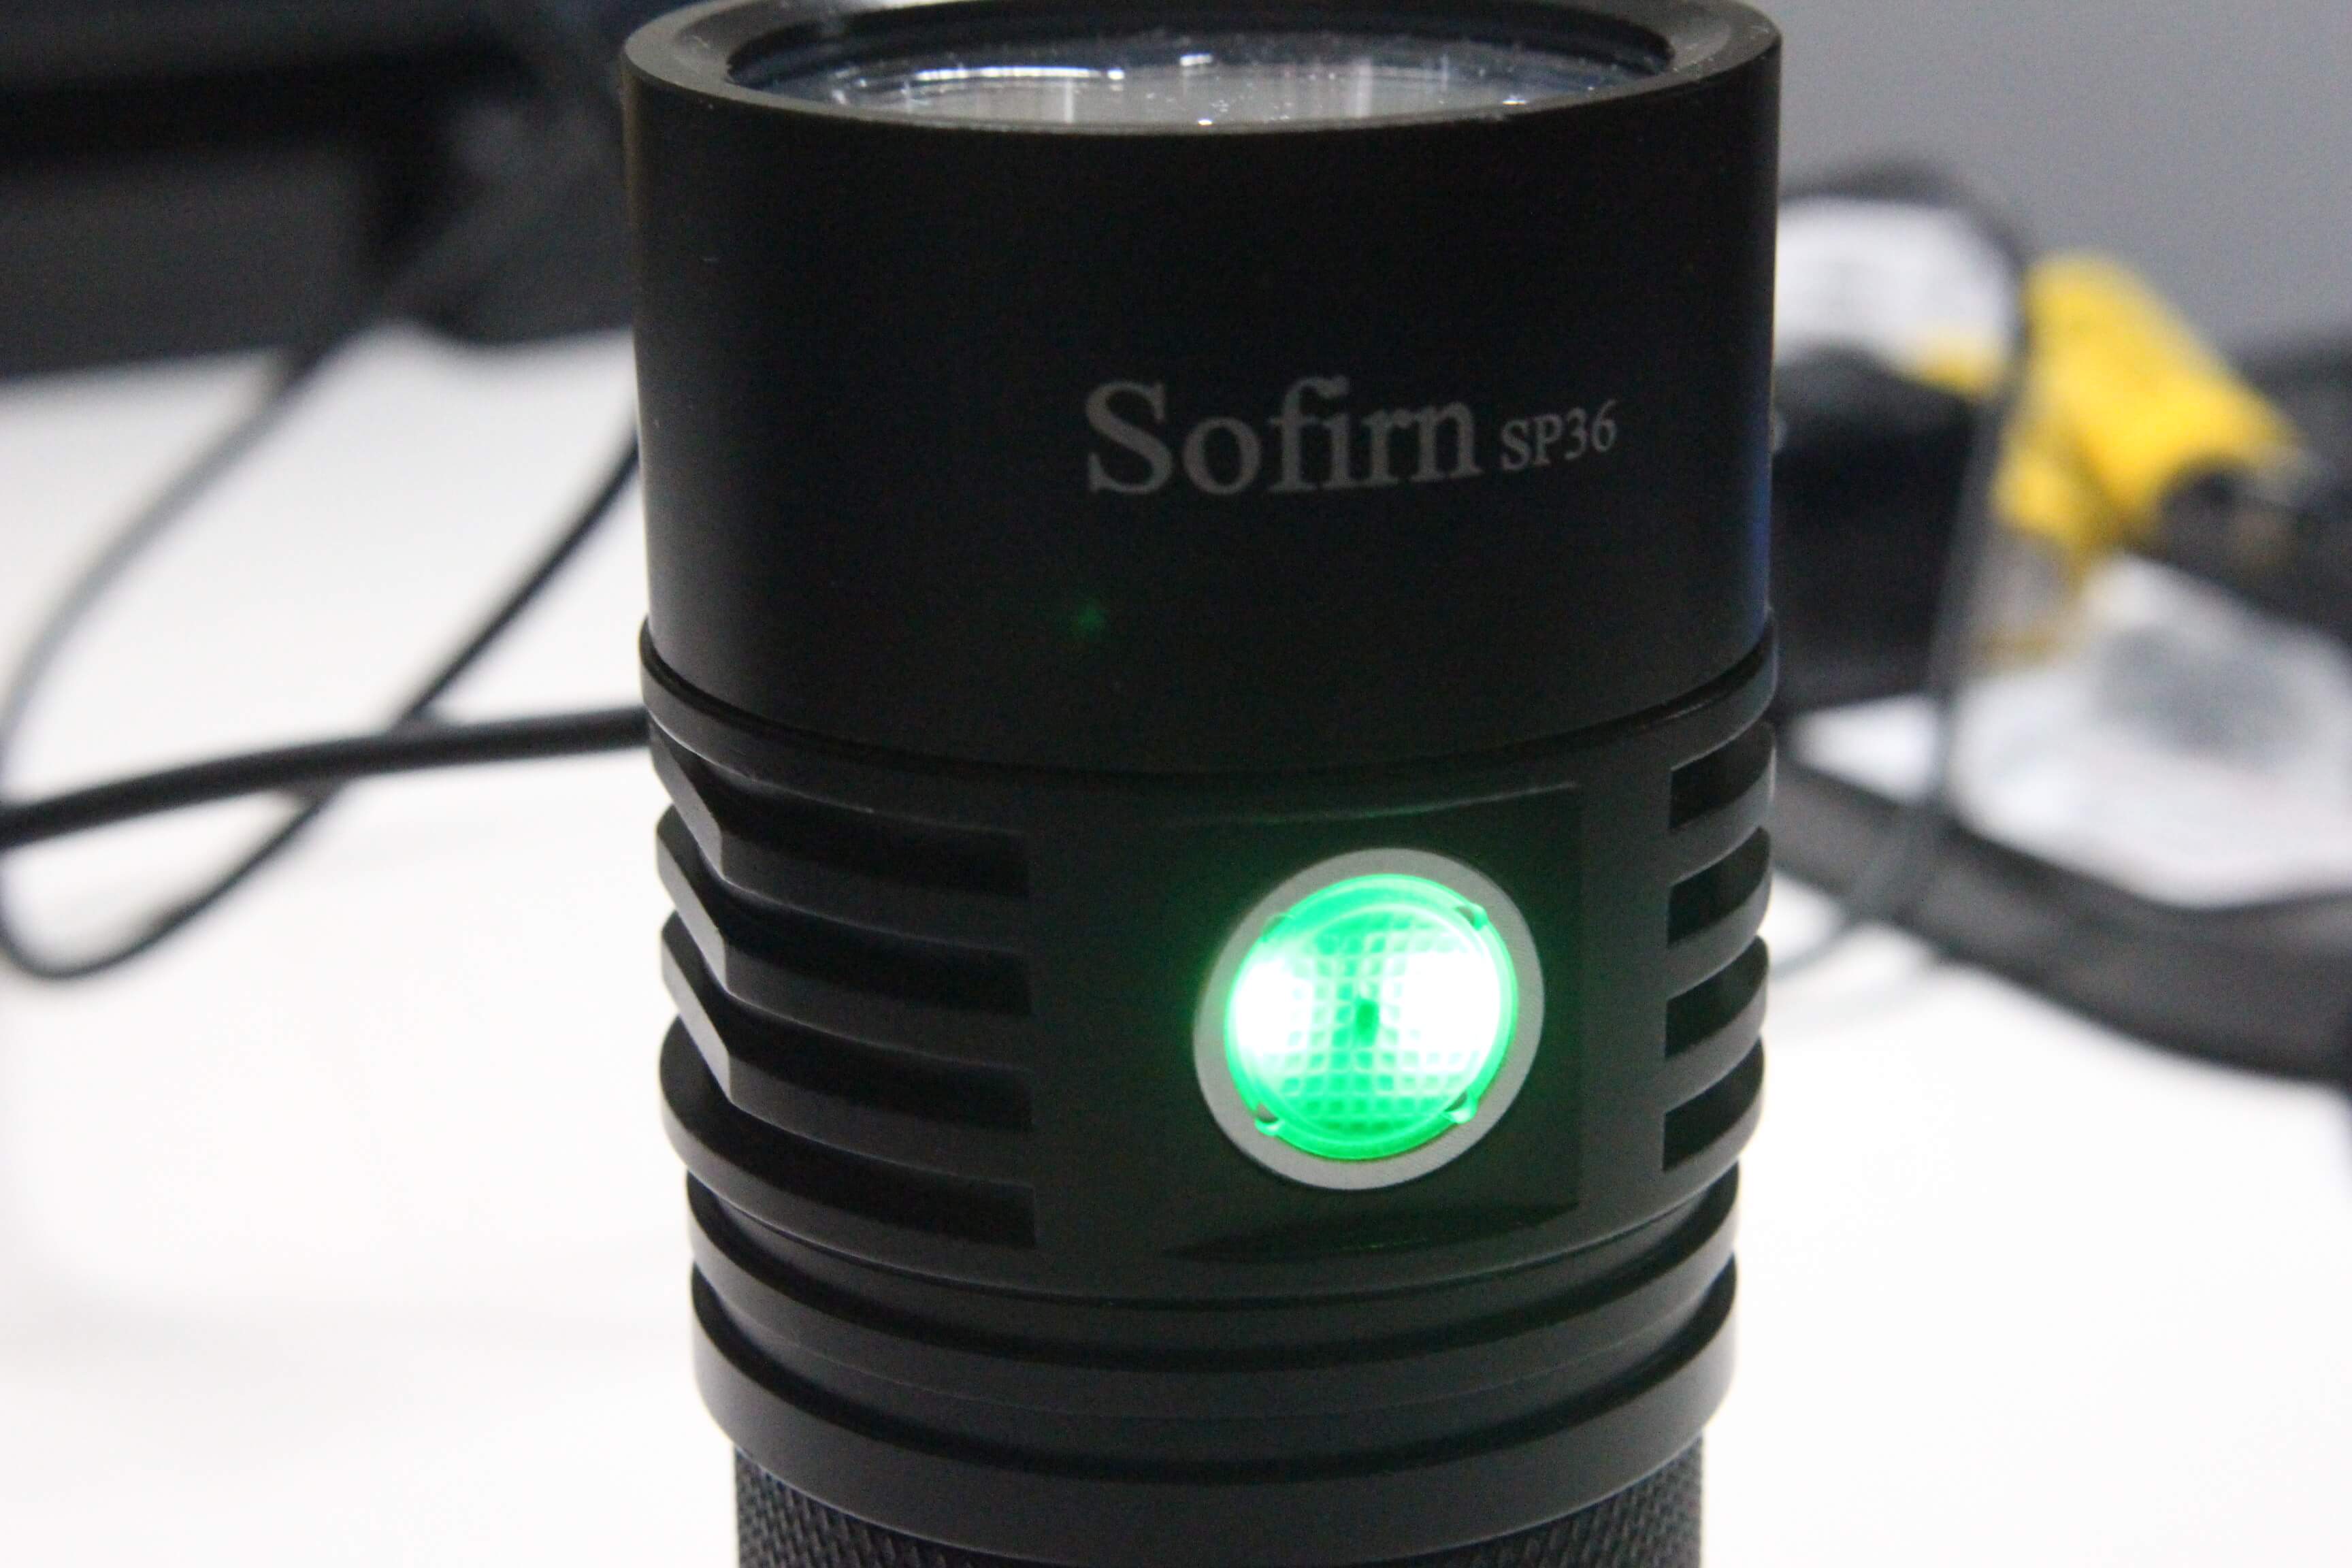
The Main Switch (Indicator)
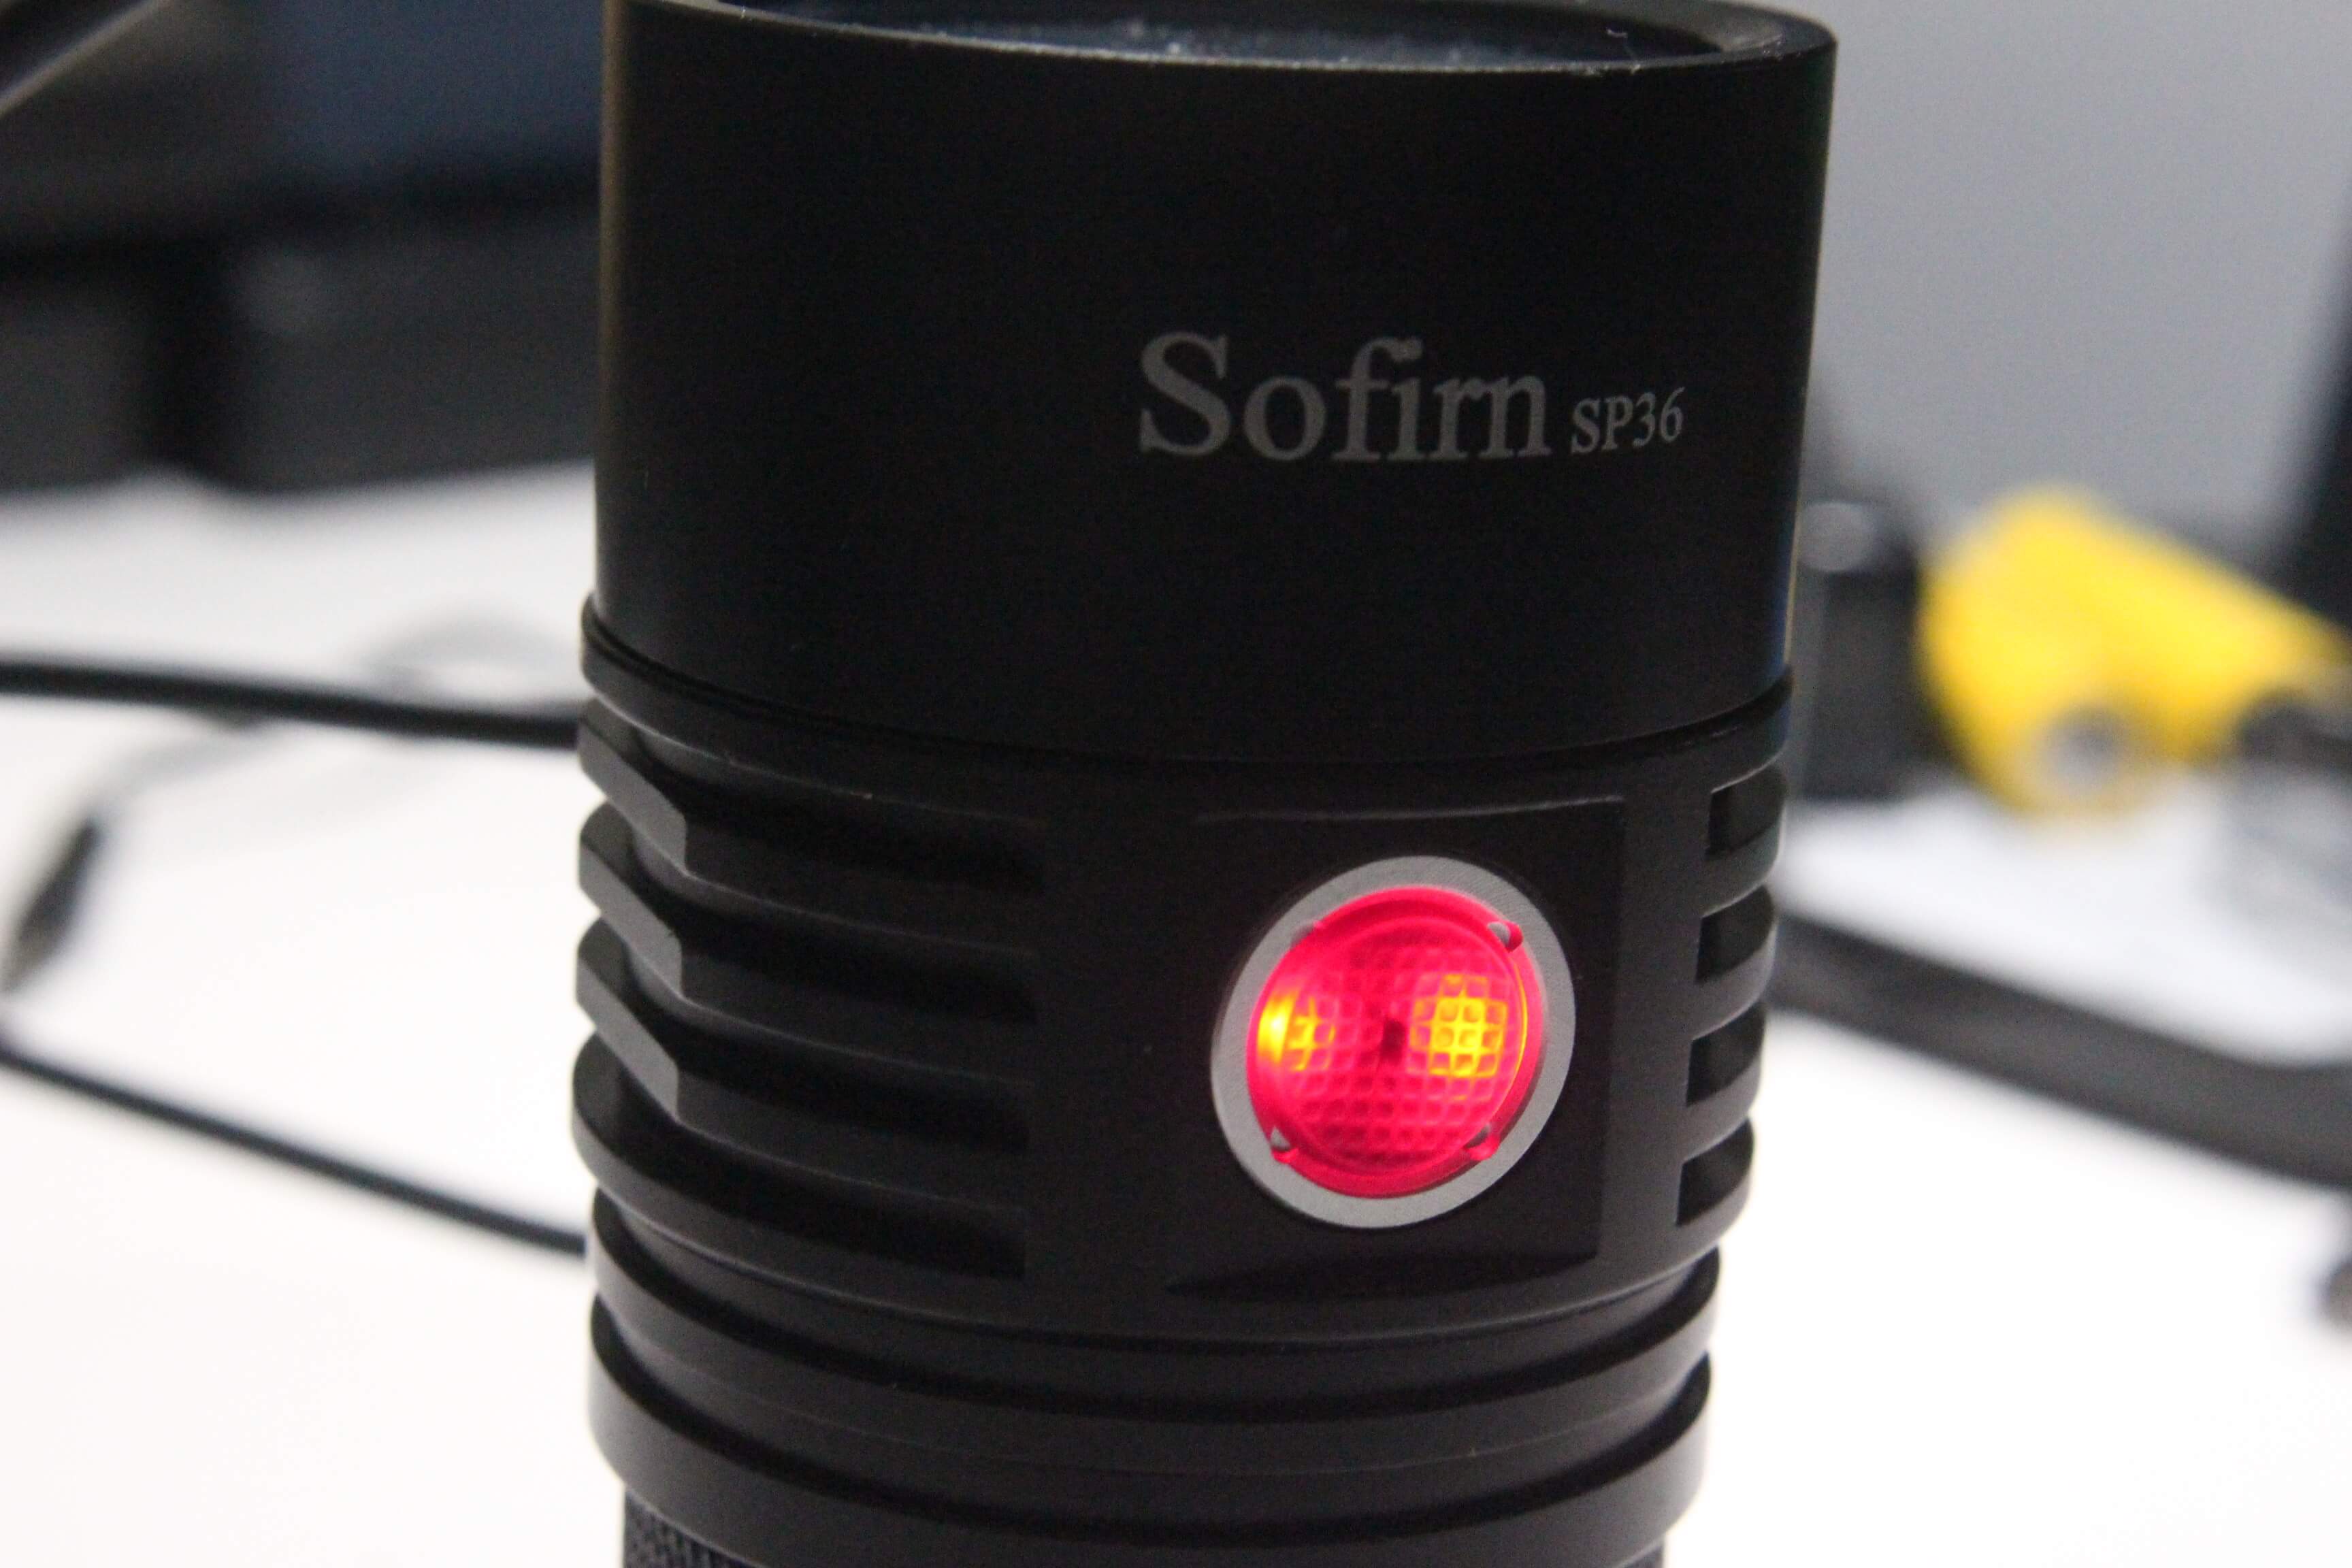
Charging
Charge Complete

USB port
It’s used for everything, and illuminates in RED when the USB cable is connected. It turns GREEN when the charge is complete.
The illuminating switch is used together with the LED’s to blink out battery voltage etc. It also remains ON each time the light is turned off. It can be switched off (until the next time it’s turned on) the same way it can on other lights, by performing a quick HOLDING press, followed a quick click. OR — it can be completely disabled (which is what I did on mine). To see how, follow the “manual” link (noted above) and look for “indicator LED enable” for instructions on how to disable it.
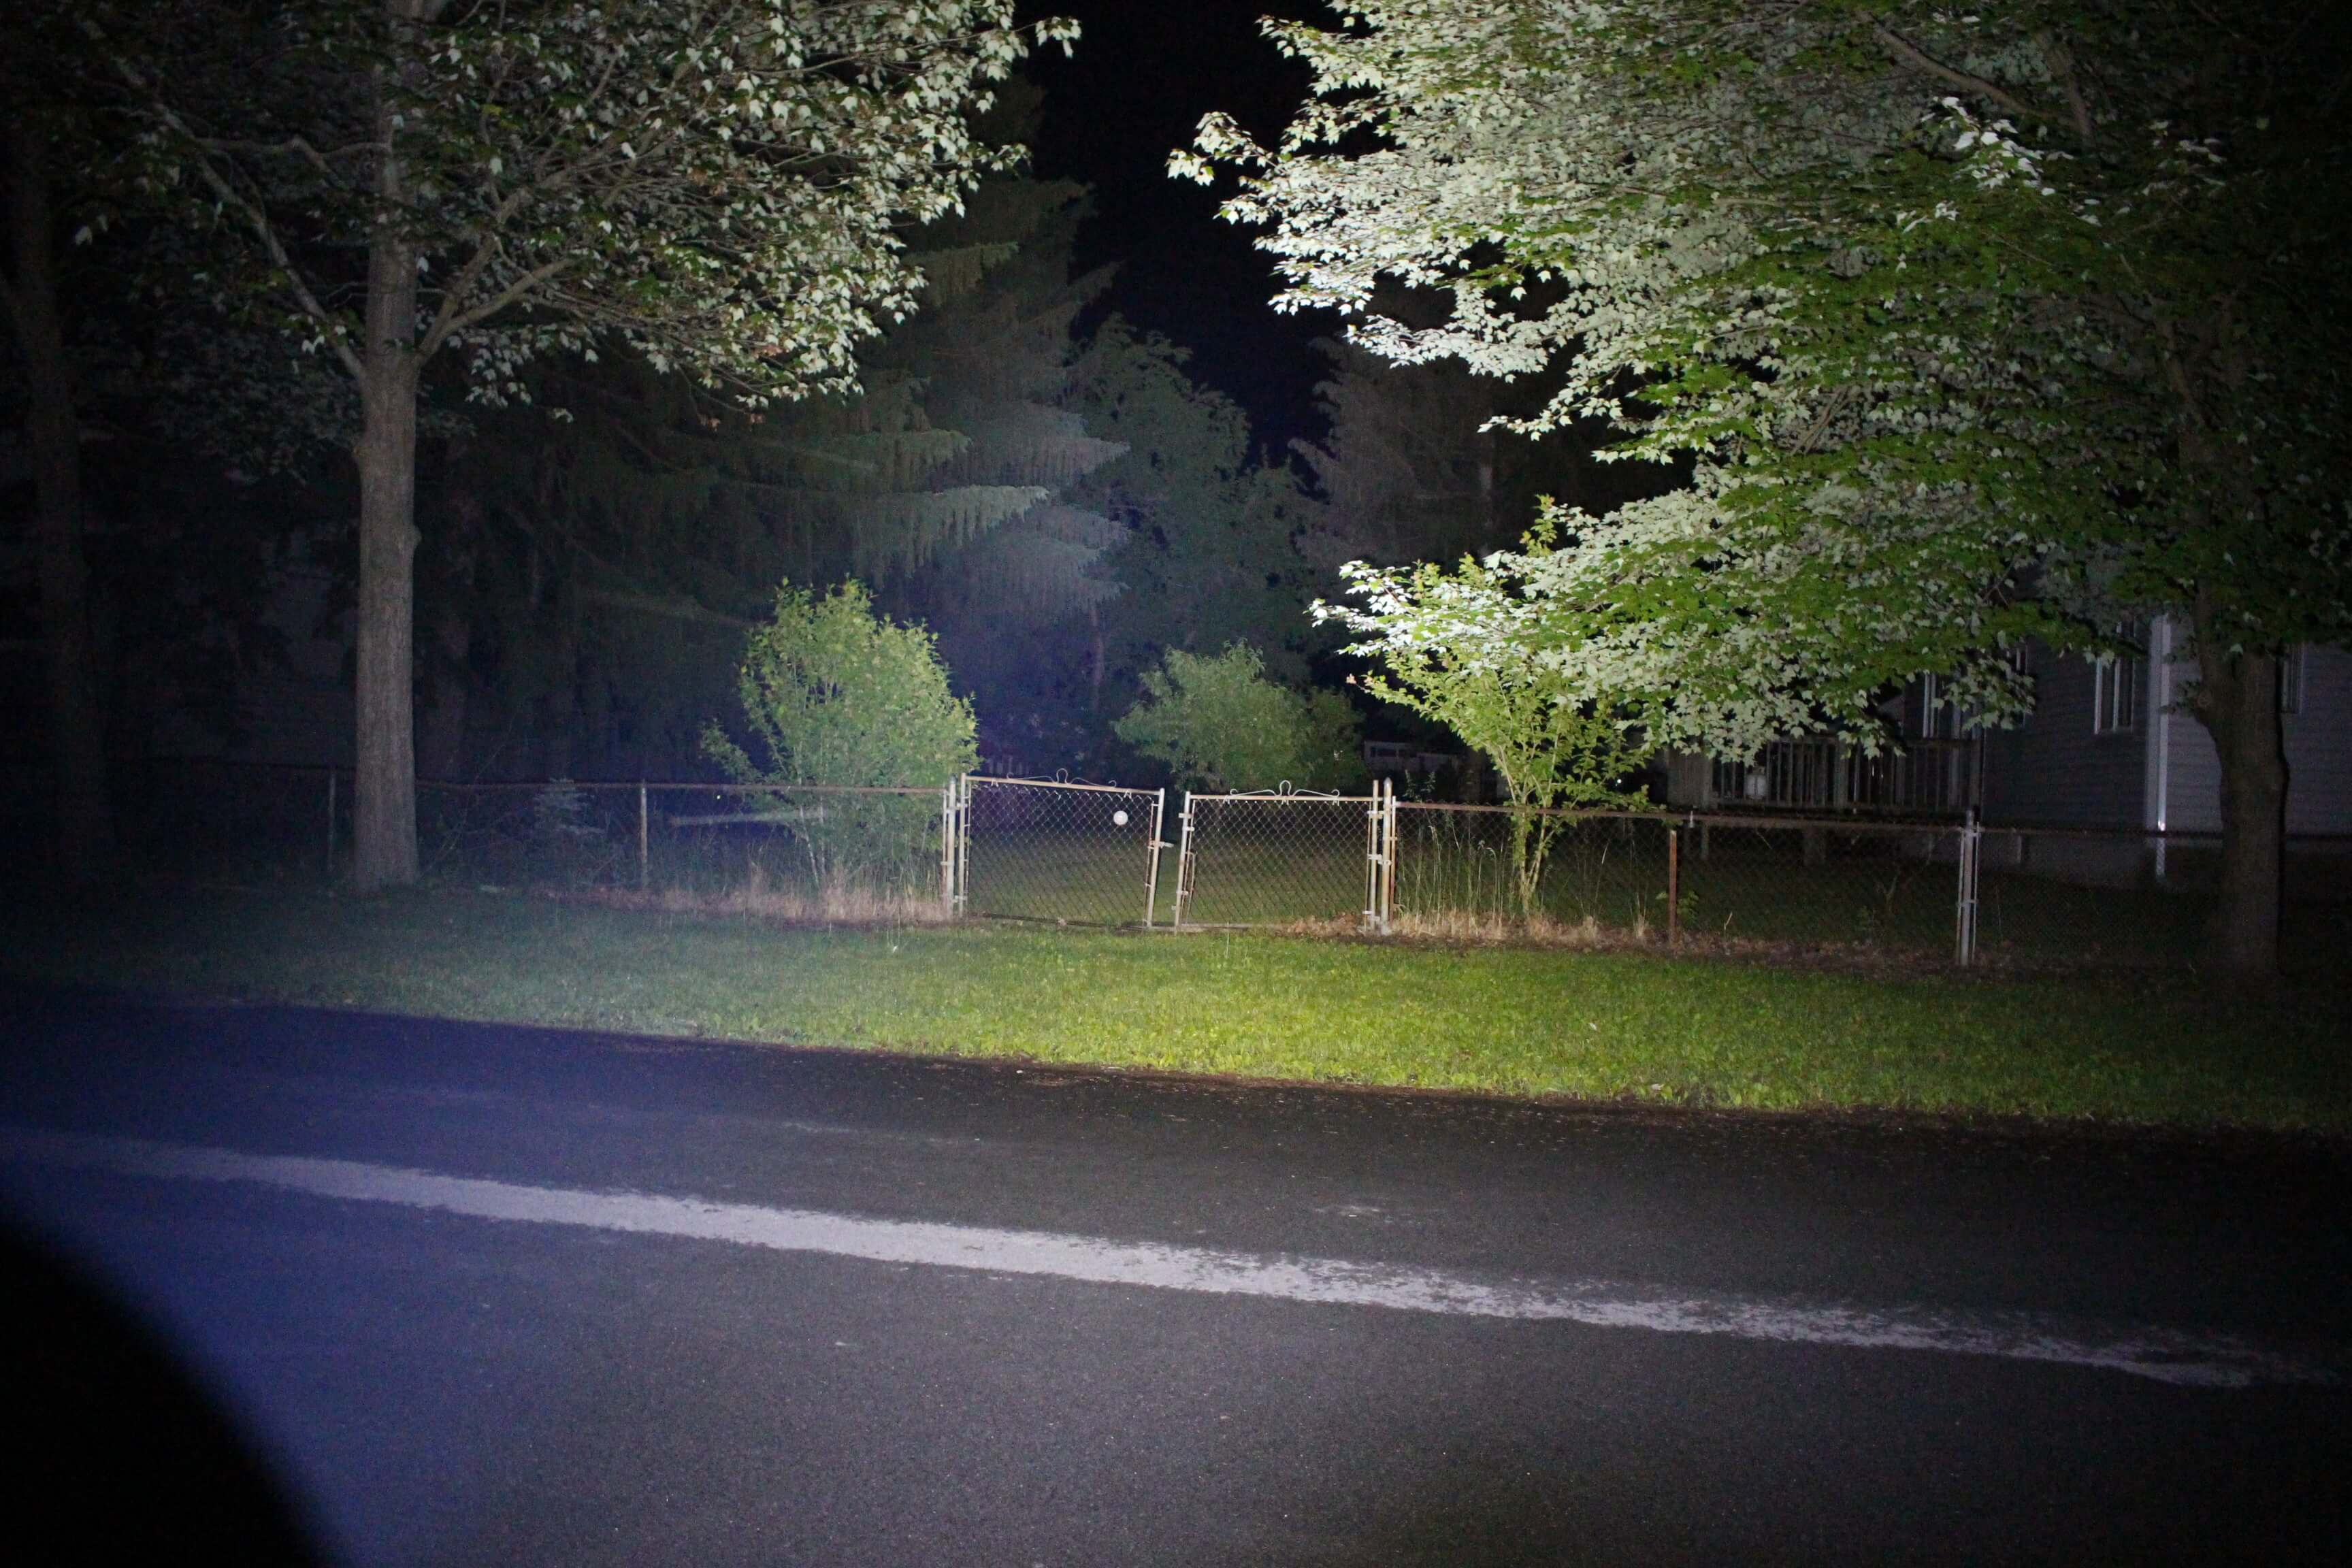
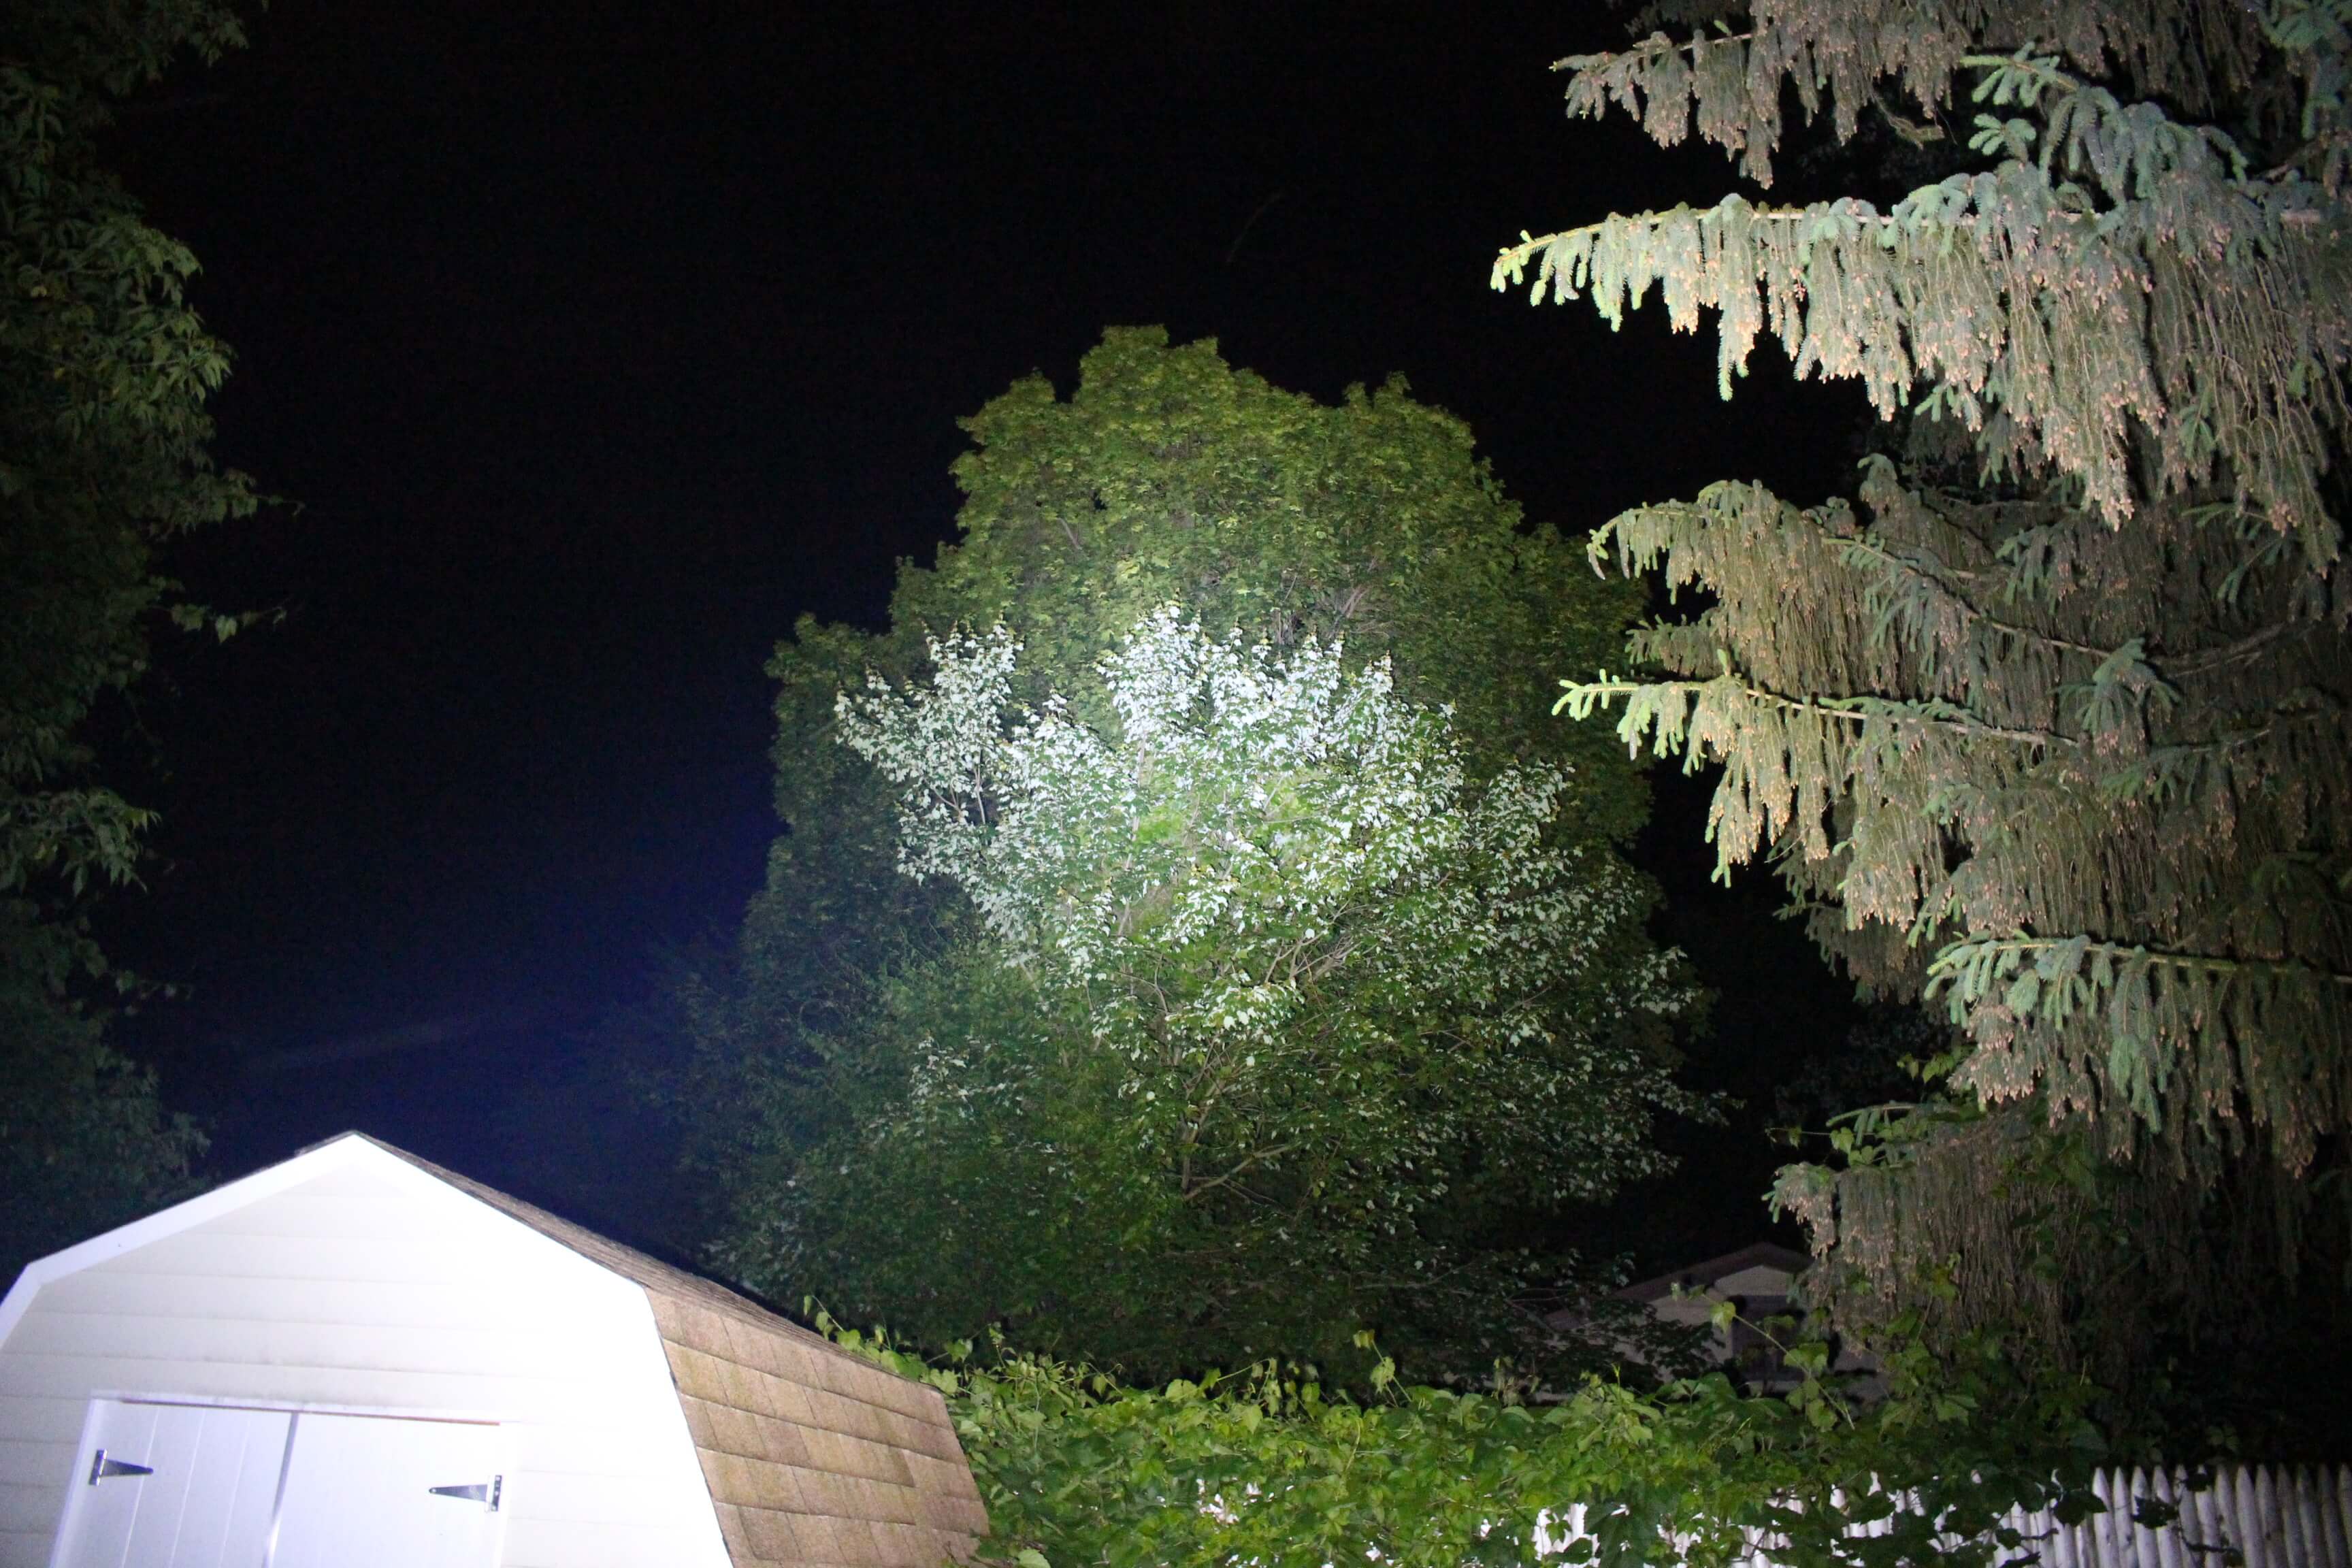
The Big Beam Images
Please note that it was set to “ramping” and the captured images are an approximation of what “low” and “medium” would represent. Obviously “turbo” needs no estimate.
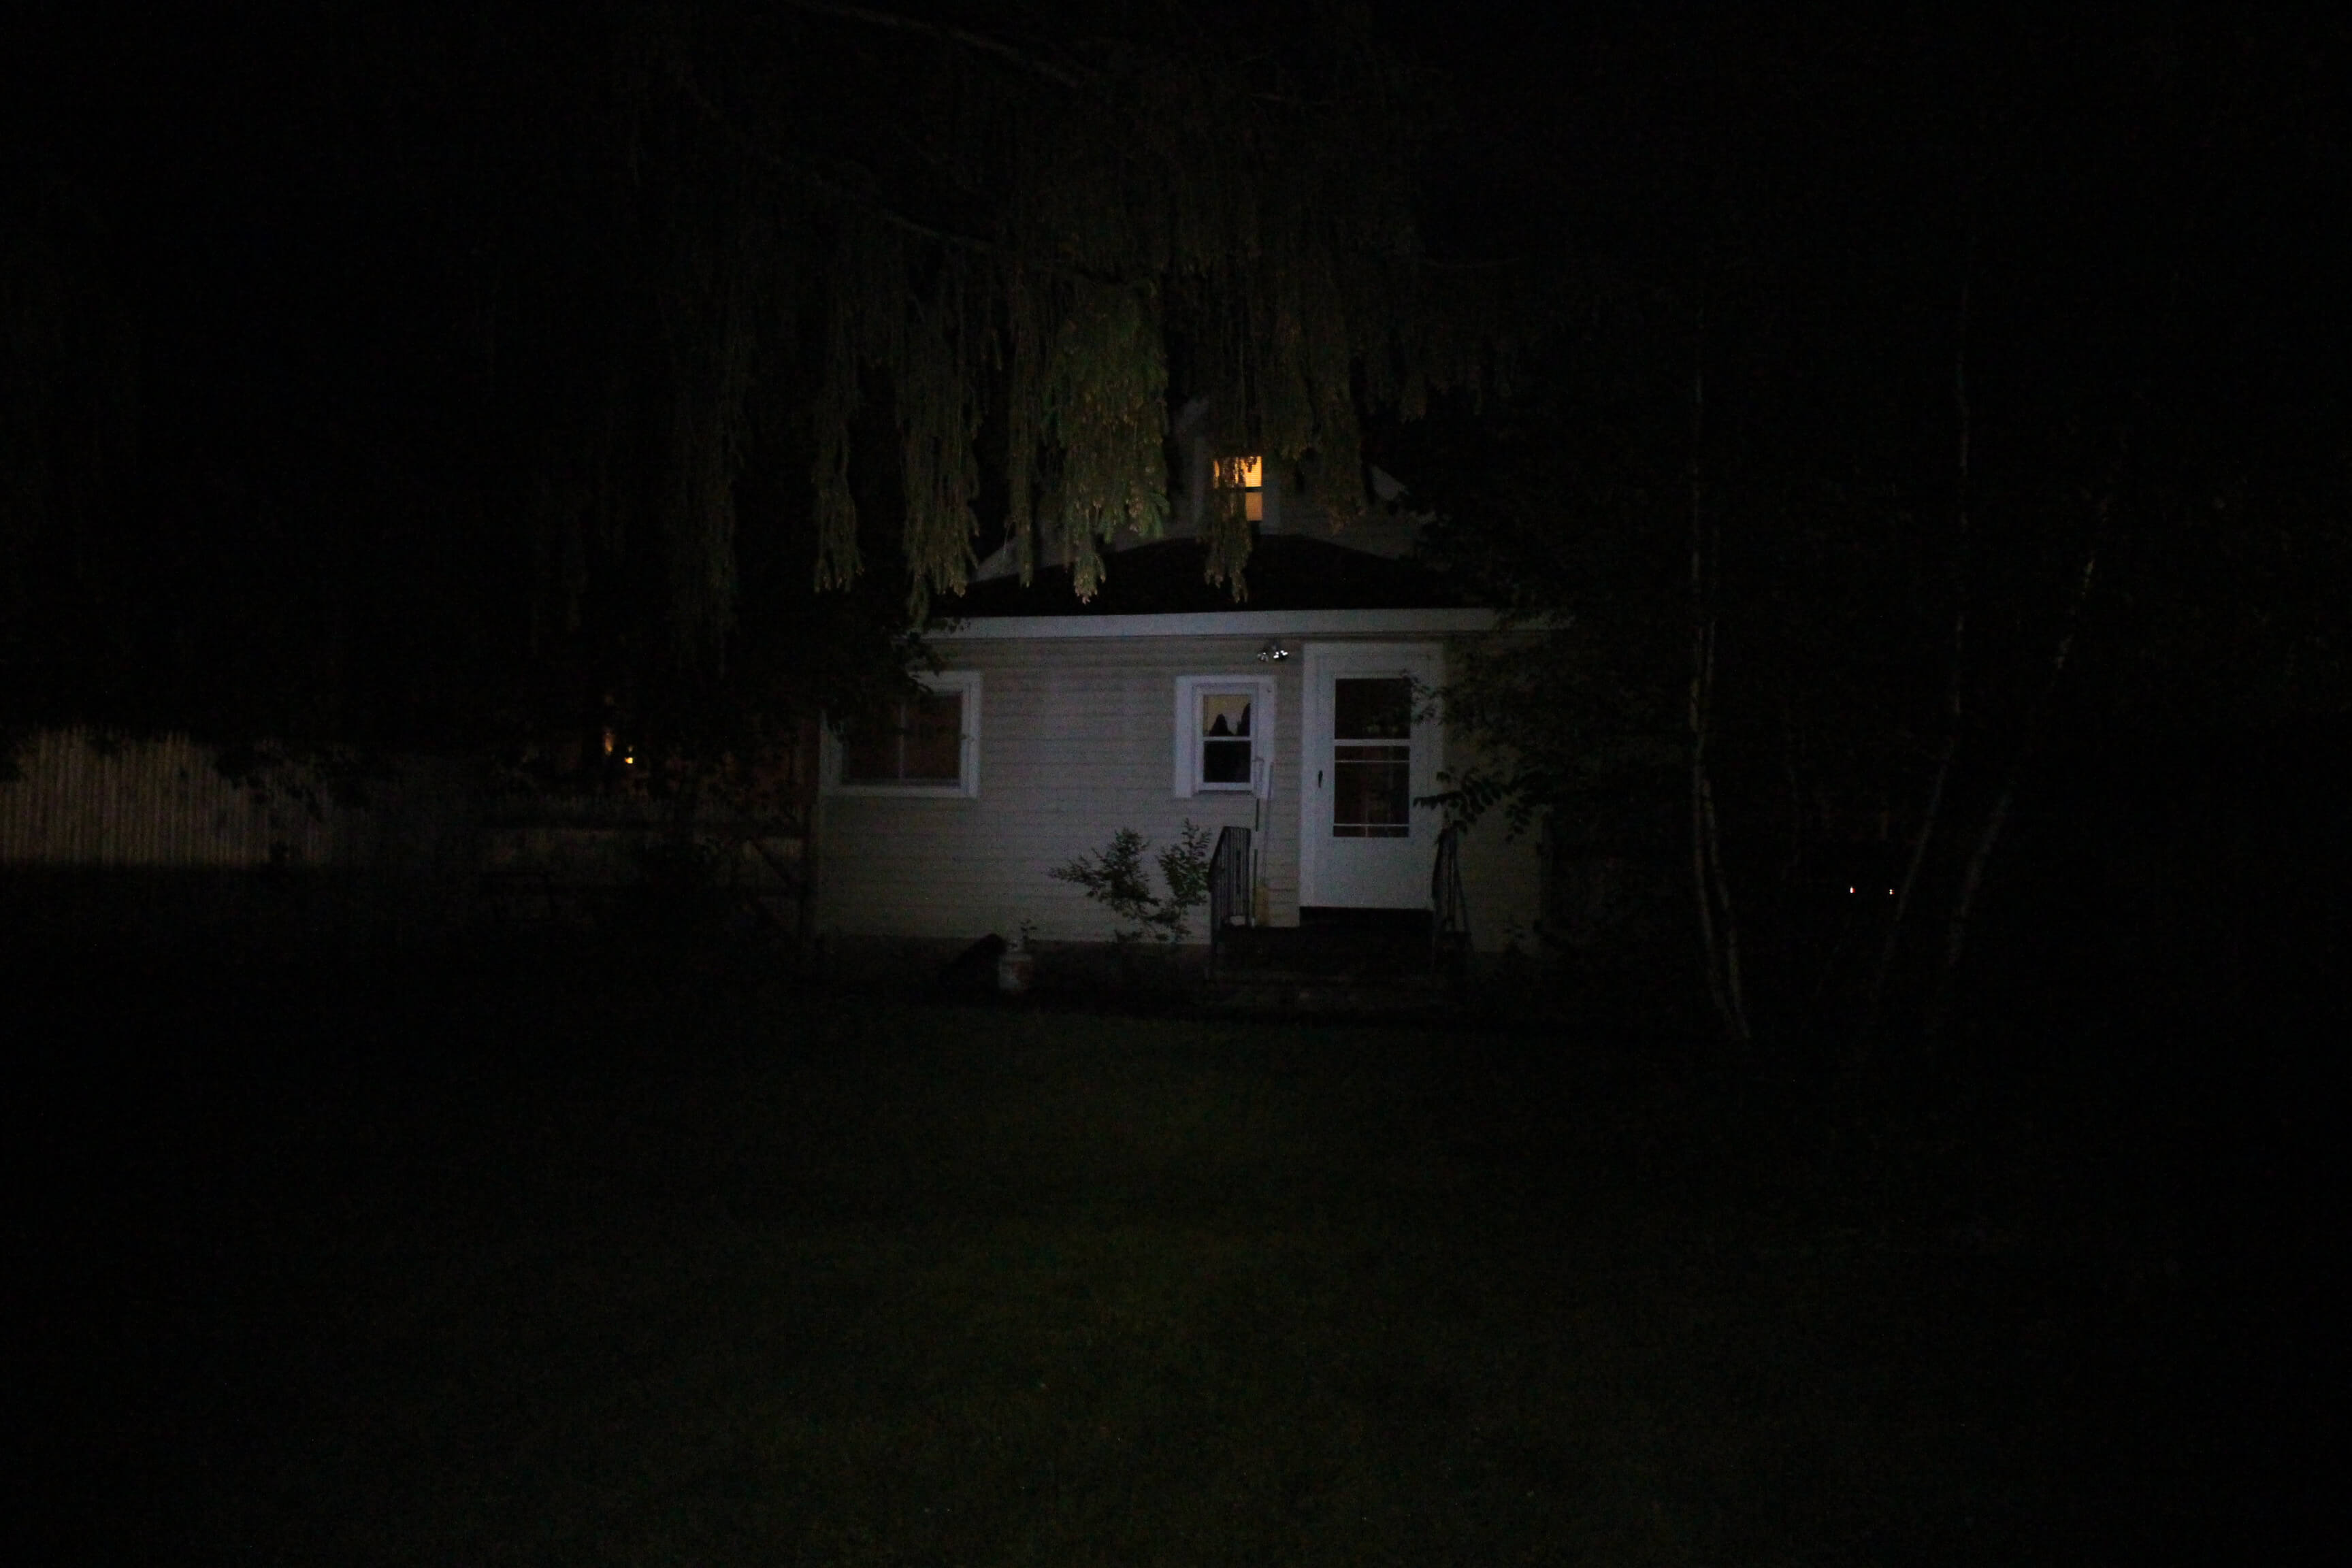
Low

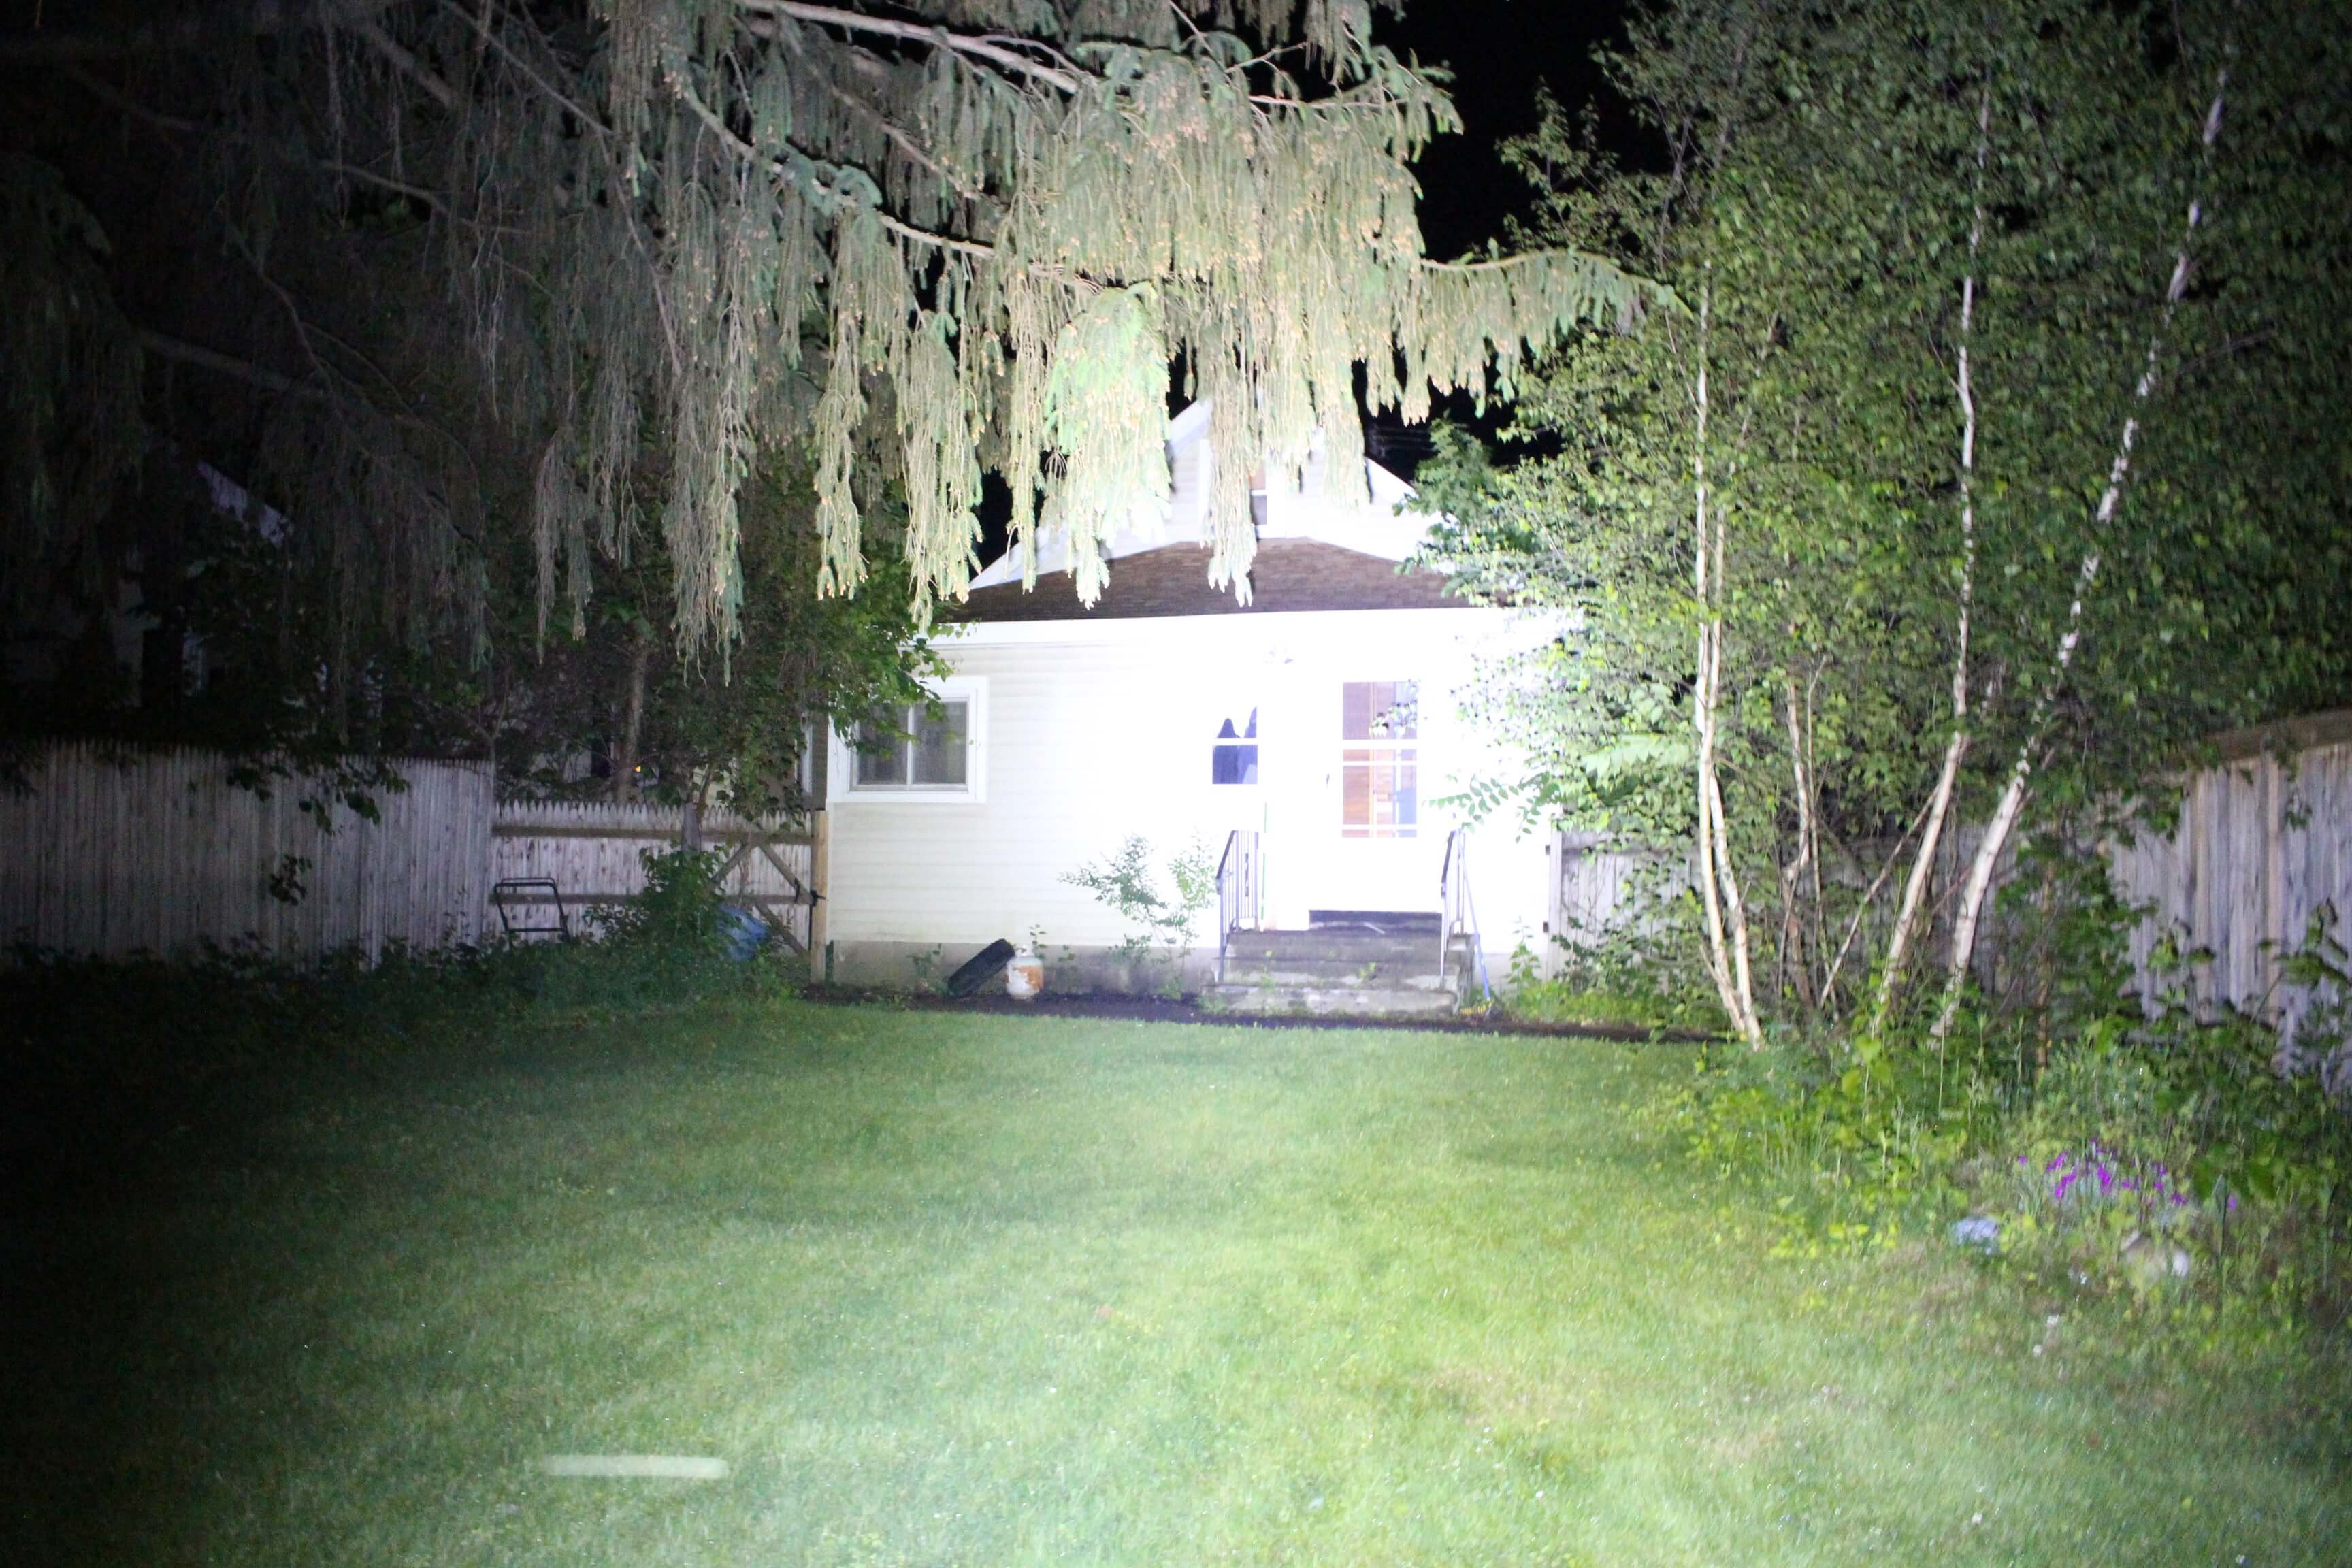
Medium-high
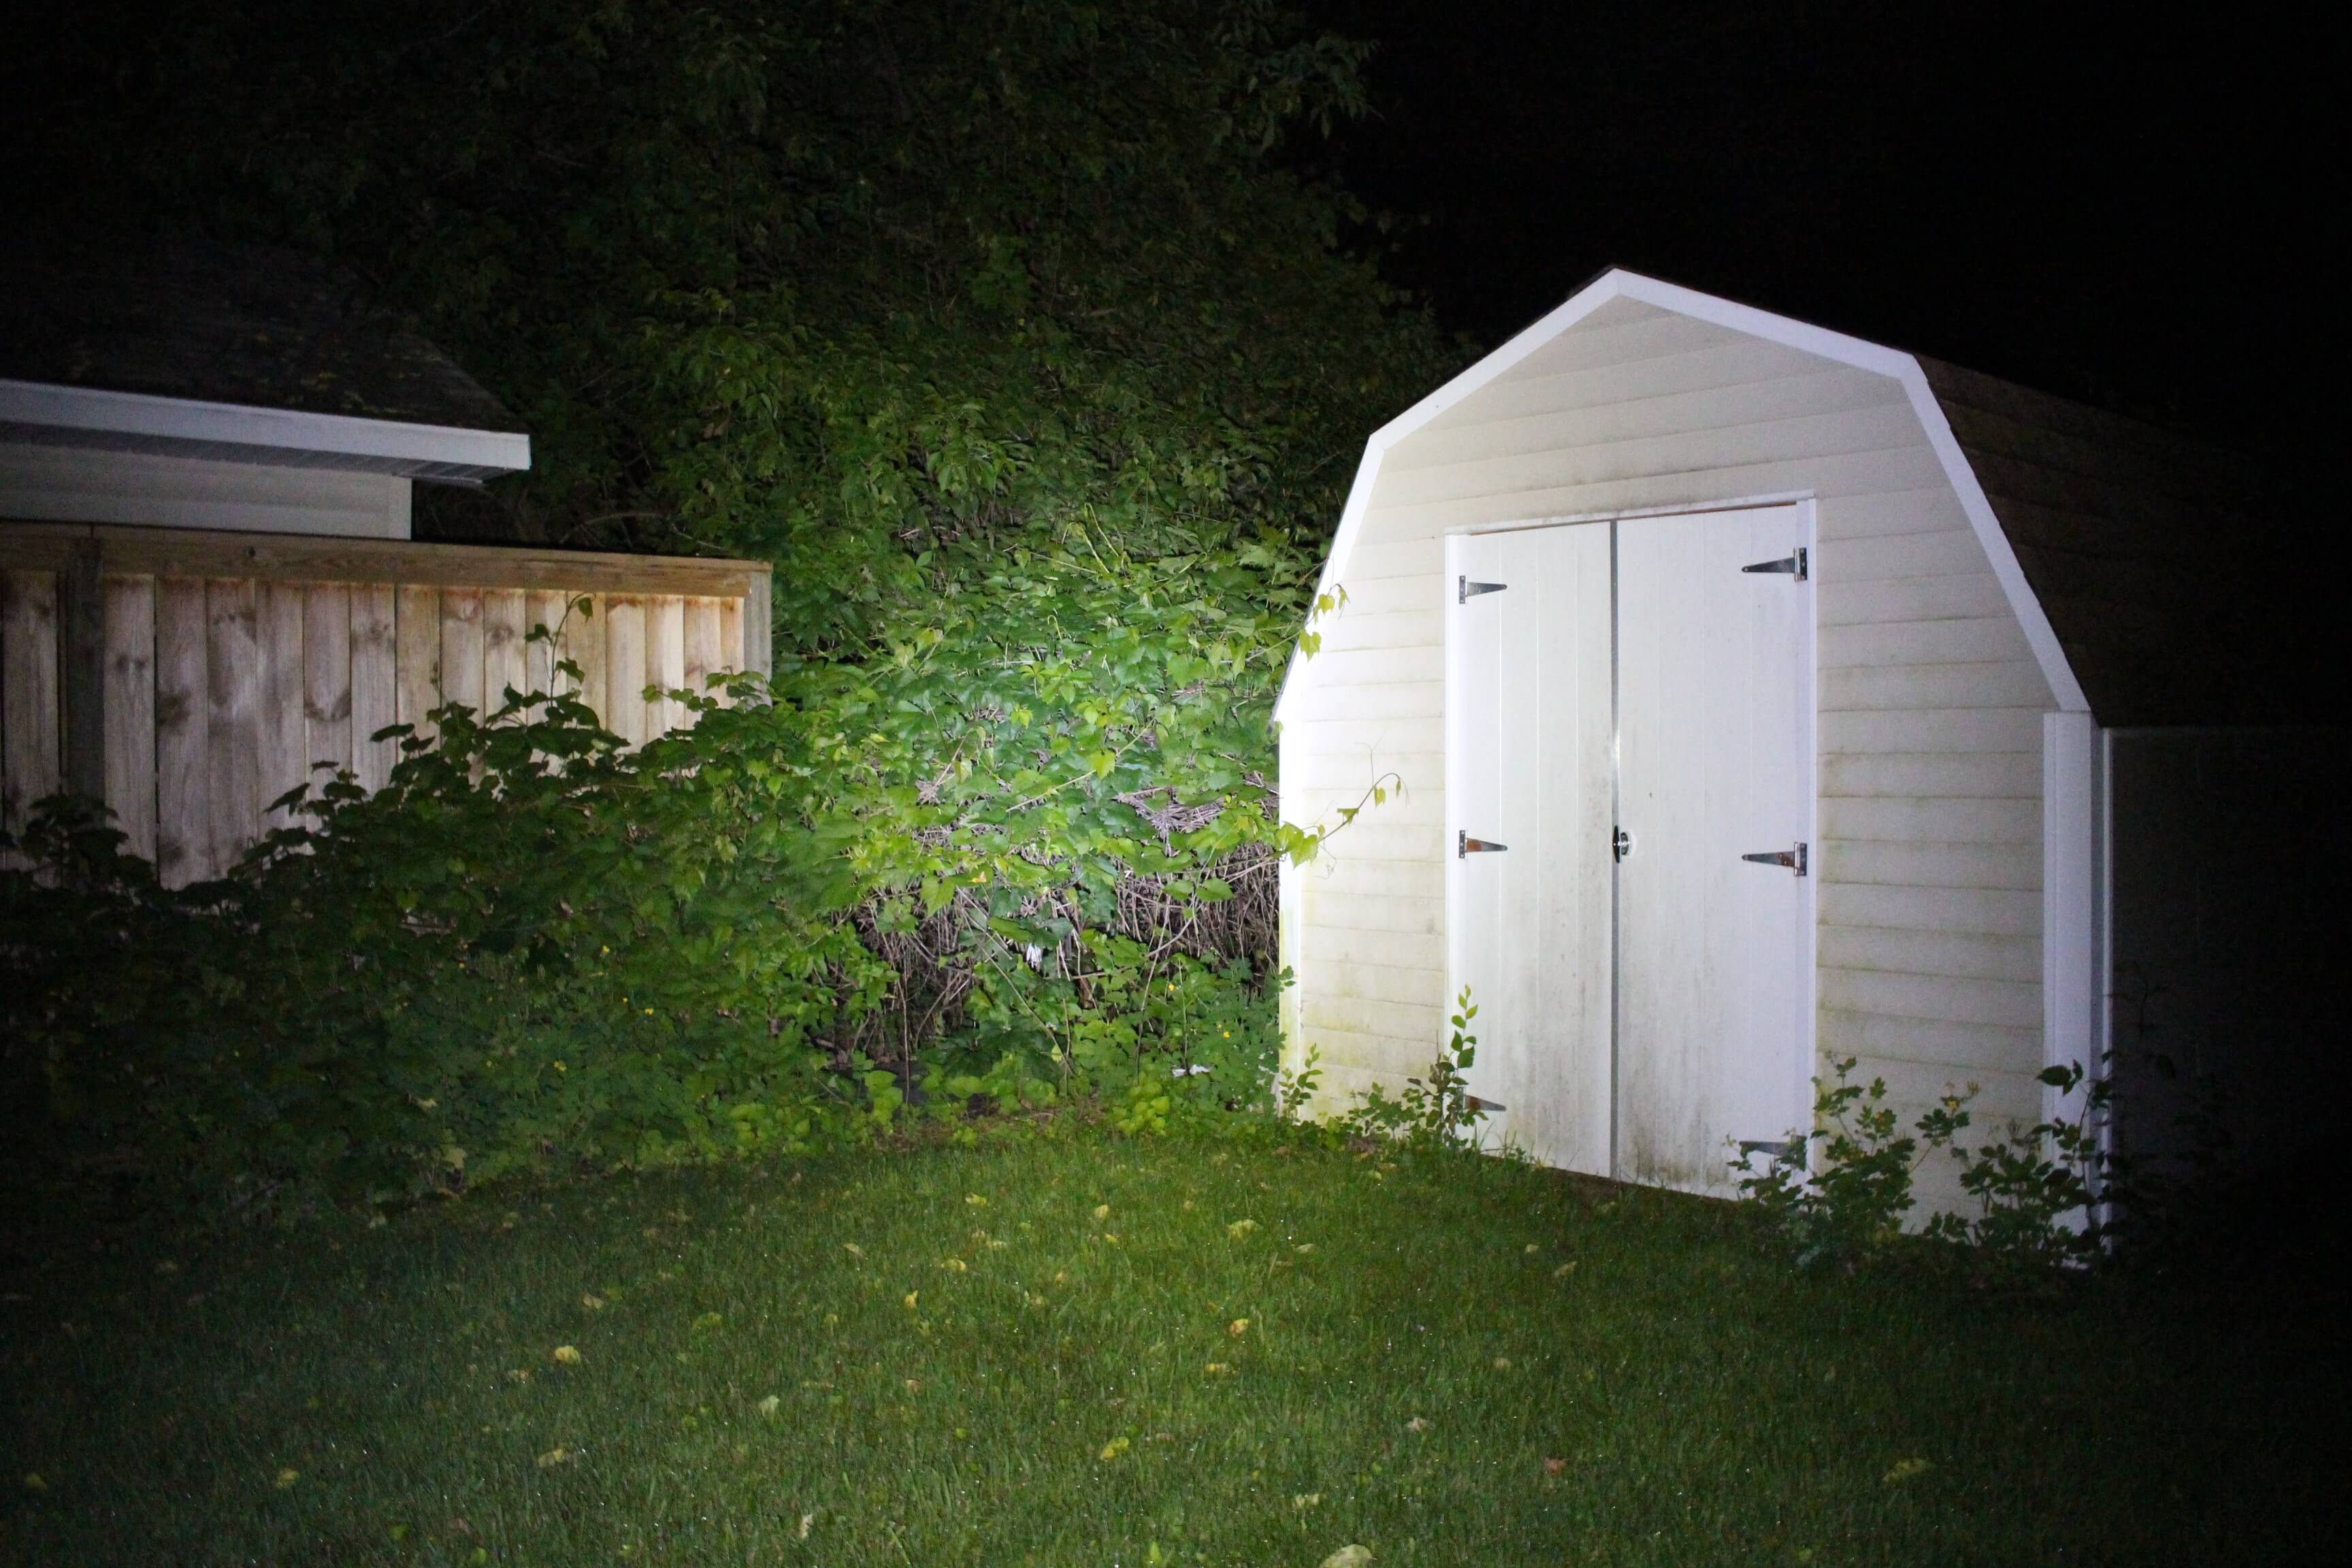
Turbo

Low
Medium

Turbo
Medium
Turbo
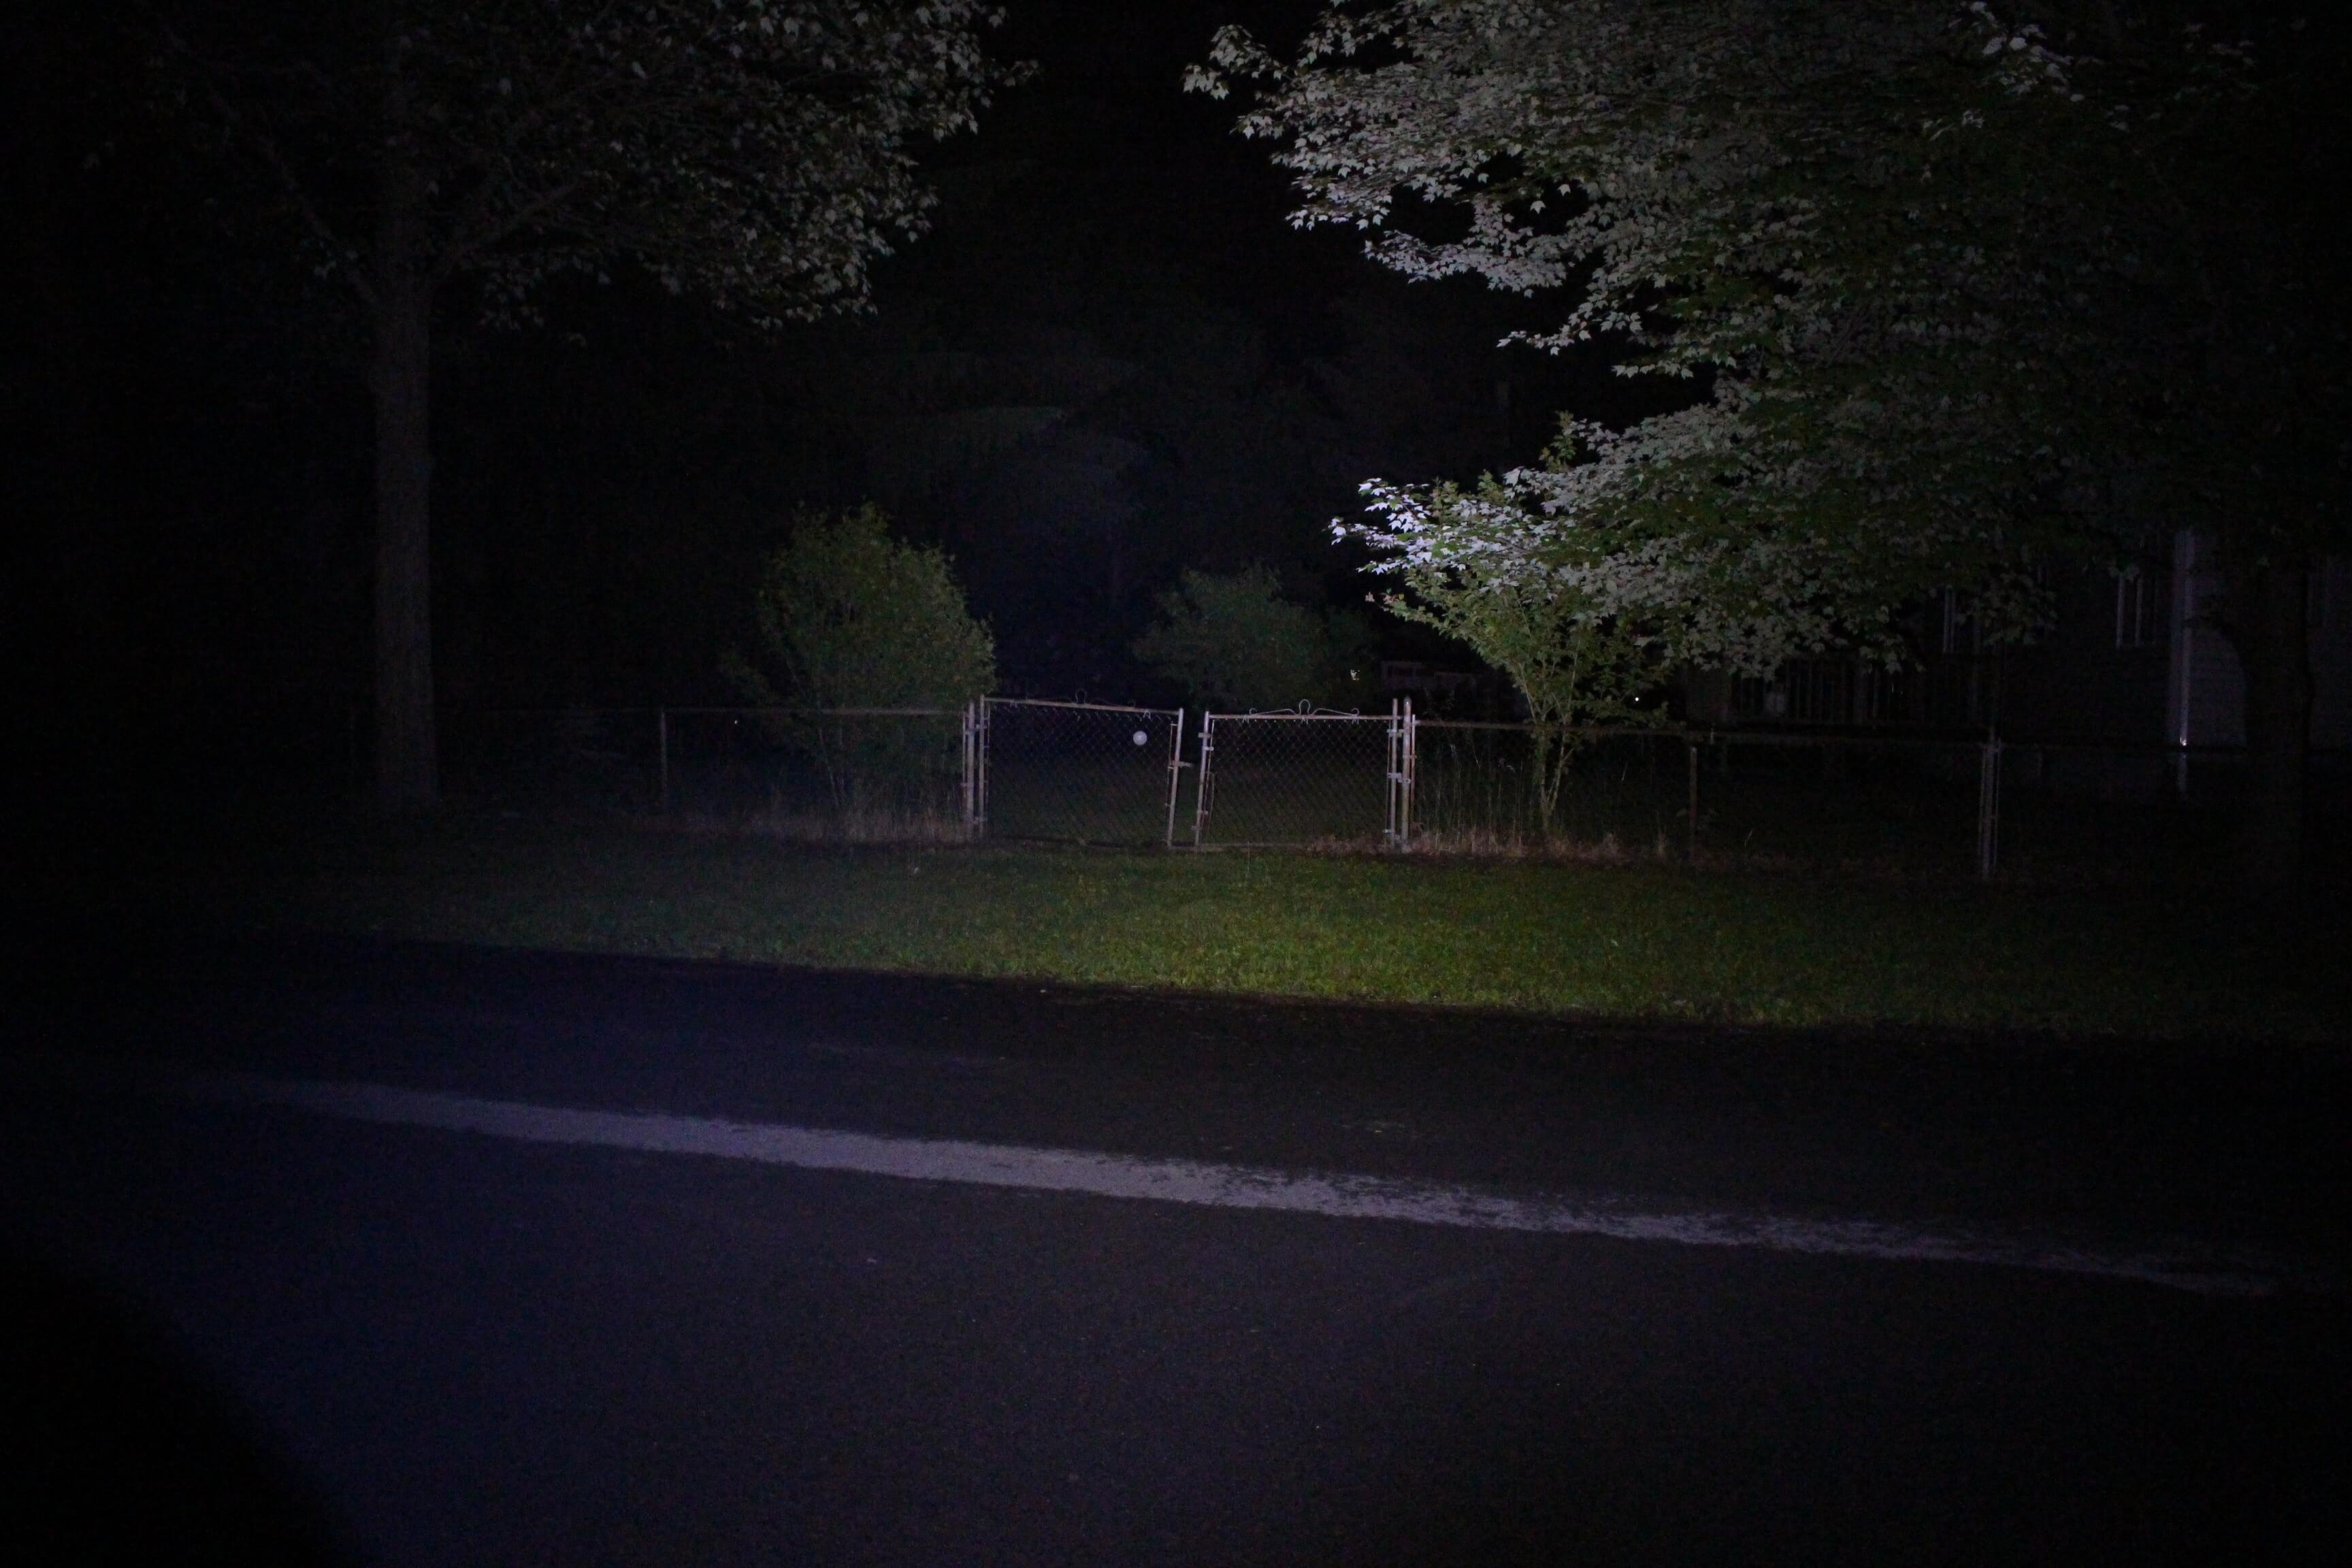
Turbo
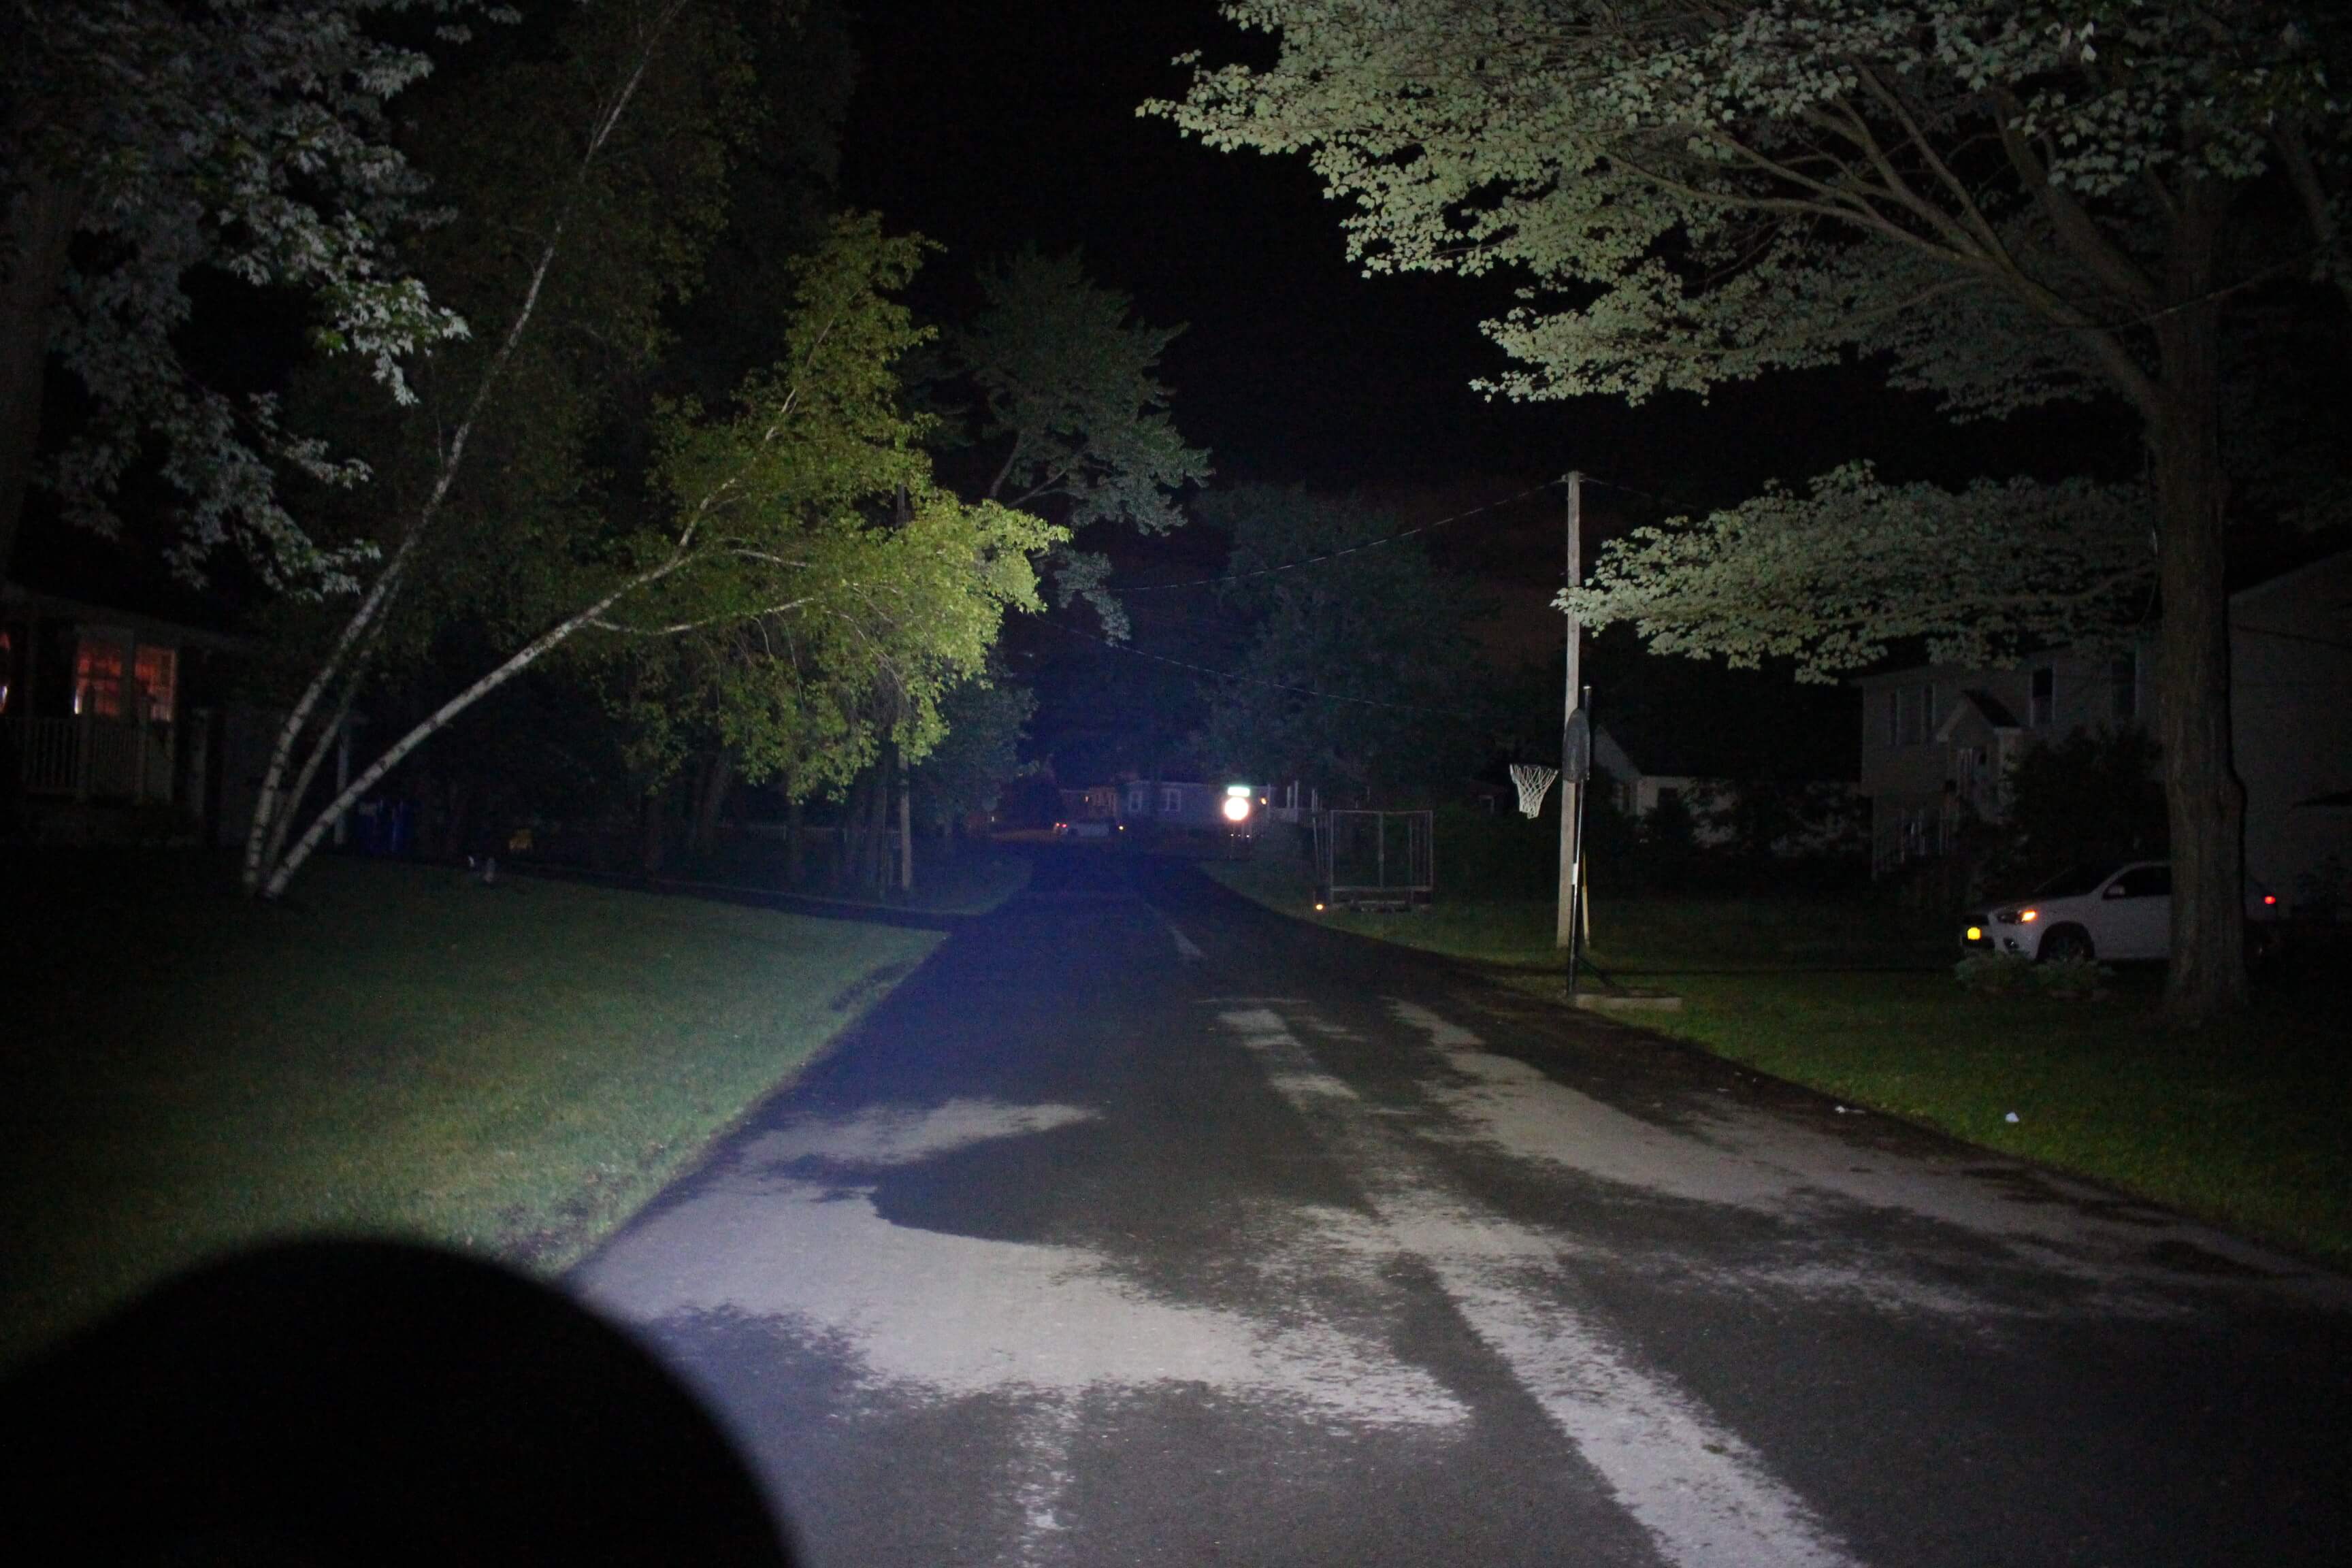
More turbo
Let’s Summarize the Sofirn SP36
With the NarsilM firmware, the SP36 can do just about anything desired by the user.
Ramping is the simplest way to use the light. And even on THAT setting, you have instant access to moonlight, turbo, and strobe.
For those who like a more “precise” output, and want up to SEVEN pre-defined increments of light, then “mode-set” is for them. Here are just a few of the attributes that the SP36 allows the user to customize;
- Select the mode switching order; moonlight – turbo or turbo – moonlight
- Choose from up to seven output levels of MOONLIGHT!
- Disable moonlight
- Enable or disable mode memory
- Choose whether the switch lights up in green, or stays off all together
- Select from up to six different timed intervals that the light will remain on for … or disable the feature completely
The SP36 is a solid, hefty flashlight. It’s not terribly big, but it’s reasonably heavy. It’s too bad it doesn’t come with a holster, since there aren’t any obviously easy ways of carrying it.
There are enough settings, and enough ways to personalize this flashlight, to please even the most discriminating flashaholic.
Recommendation
Your opportunity to own a Sofirn SP36, is just a click away. This link will take you to the SP36 page at Gearbest! If you’d prefer to shop Amazon Prime, click here!

The switch button is on a lockout. Cannot turn it on for the green light indicator after clicking 4x, hence the flashlight is not usable. The button turns green if the power cord is connected to the power source, the flashlight is then usable for the different modes.
Please advise a solution to the above-stated problem.
Thank you for your prompt attention.
–
Hi Fernando,
Sorry you’re having a problem!
Please confirm, do you have it set to RAMPING when you’re clicking 4 times to unlock it?? Is there a chance it might’ve been changed to the MODE interface? If so, unlocking it is a different procedure; To engage “lock-out”, (from OFF) click TWICE quickly, then perform a HOLDING press. Repeat to unlock.
Let me know if that works.